• Registered users are encouraged to enable MFA/2FA to add an aditional layer of security to their account. More information can be found here: https://www.ncsc.gov.uk/collection/top-tips-for-staying-secure-online/activate-2-step-verification-on-your-email

Jimbothemagnificent's Zenki

Messages
2,683
Well, it's finally happened chaps, I've fallen in love. Her name is Silvia, she's 24, fresh off the boat from Japan, and her interests include going sideways and scaring my mother.

Sil1.jpg


IMG_20180504_095344_Fotor.jpg


This is going to be a cut and paste from my thread on SX owners forum, so give me half an hour before you all freak out.....
 
I bought a fresh import '94 S14 a couple of months ago. There's no rust and mechanically it's spot on, but the wiring is truly horrendous.

The long drive home was eventful. The headlights turned off, on the motorway, in the dark.... So a quick ride on a flatbed to the nearest halfords, a night in the passenger seat wrapped in a space blanket, a couple of hours of ripping out the HIDs and finally got her home.

home3.jpg
 
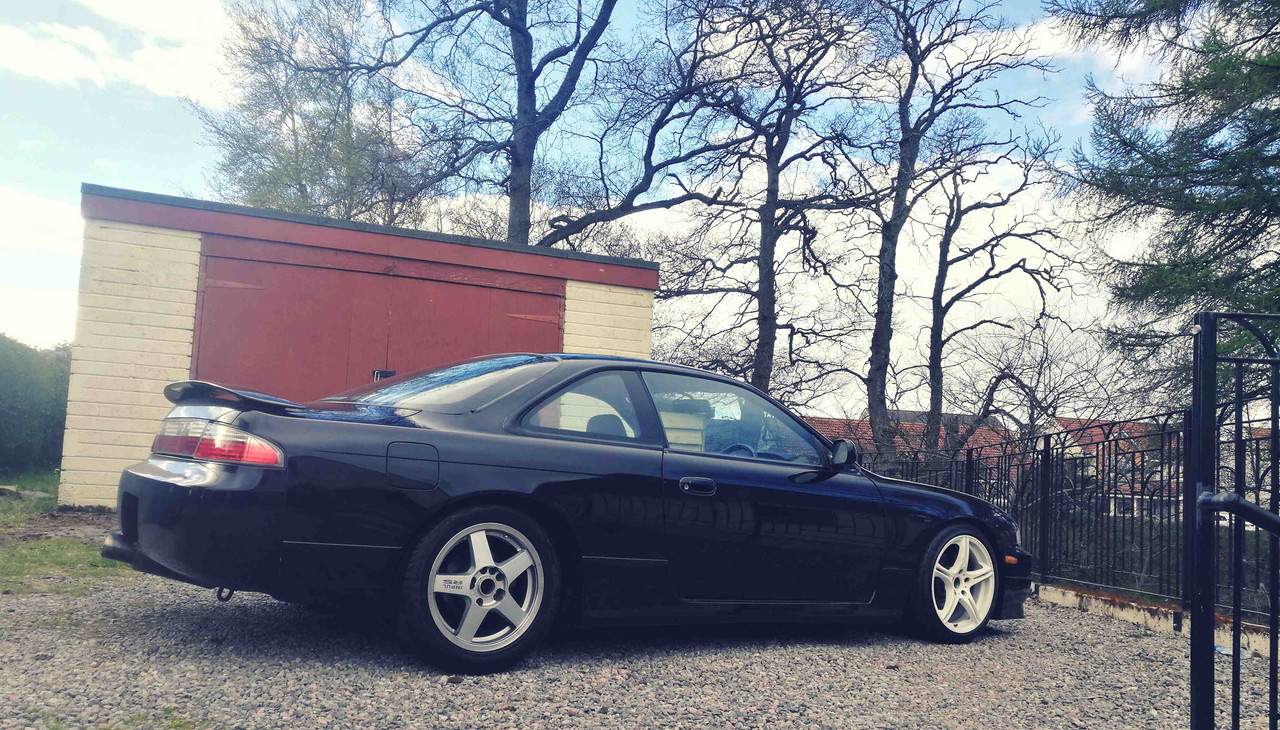
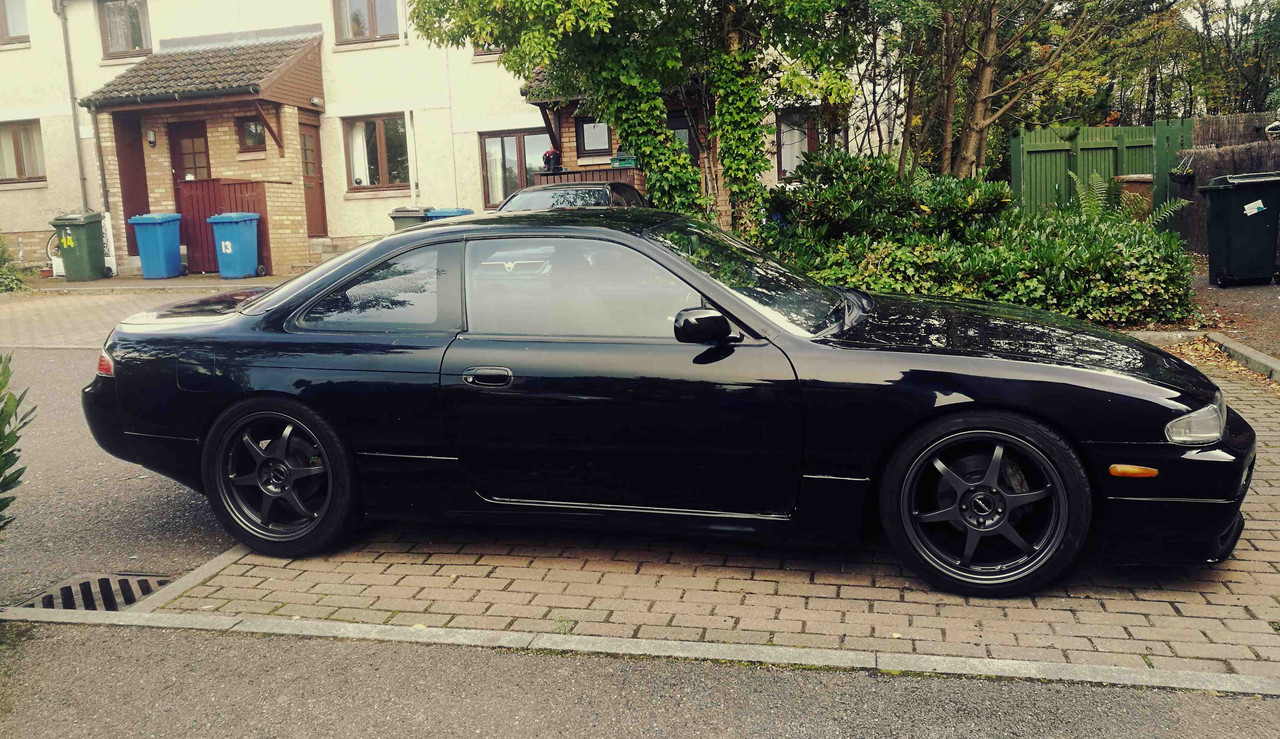
Since I got it I've mostly been fixing all the annoying problems. The boost has been turned right down and I'm taking it really easy on the old girl until I get a few more things done. I had moved into a new house with an epic garage in February, pretty much as soon as I got the car my landlord decided he wanted to live there and gave me 28 days notice. Gutted. So now I'm in a tiny flat with no garage, it's going to slow things down massively, and I don't think my new neighbours are super impressed with me pulling this thing apart every couple of days....

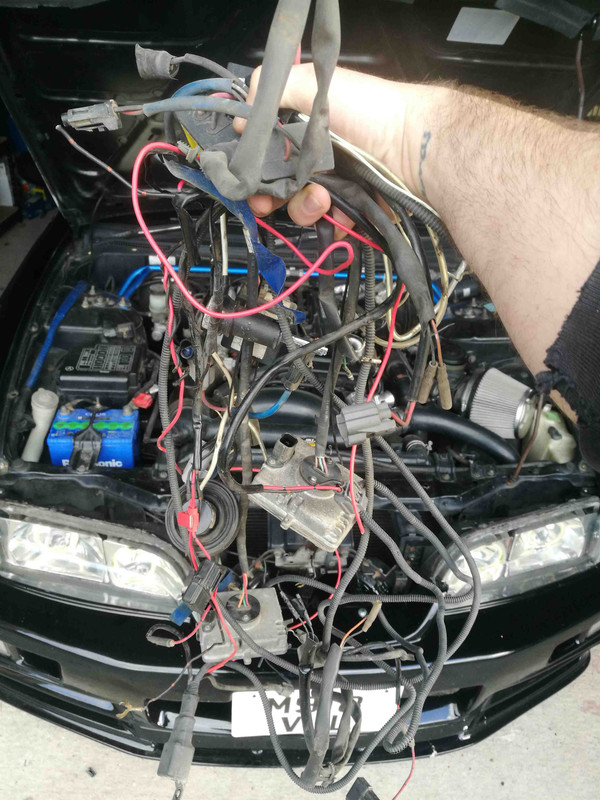
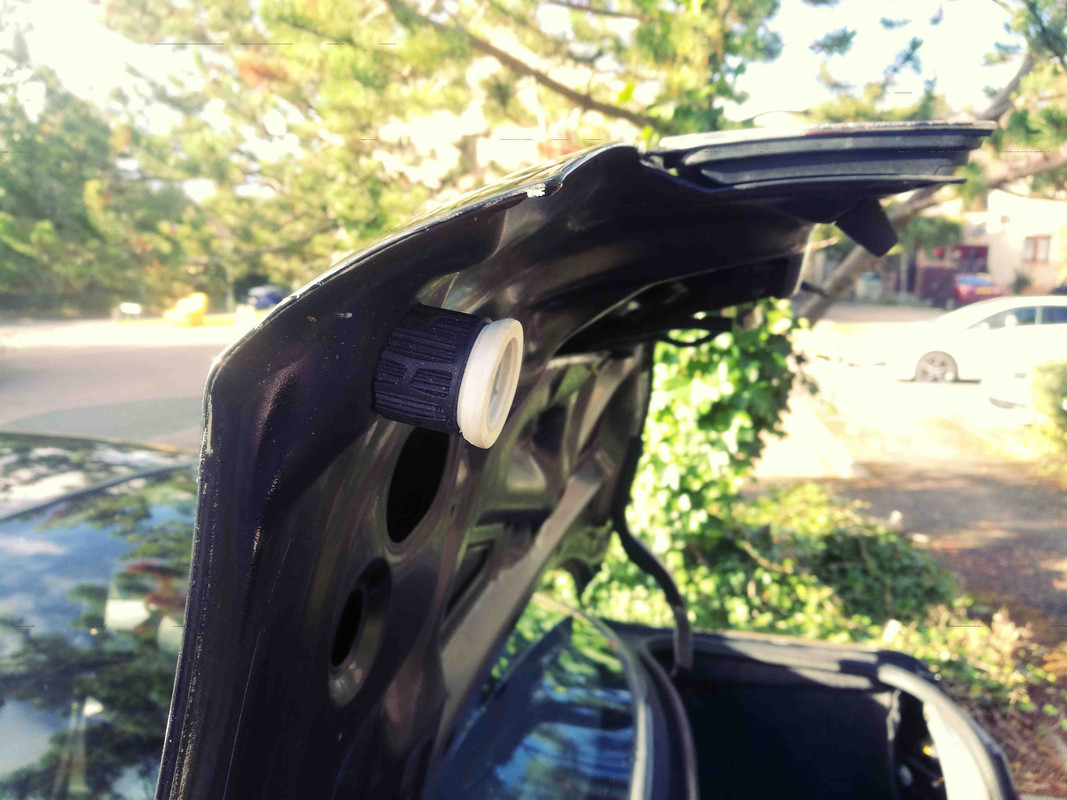
I pulled this out of the headlights, now they work.
IMG_20180513_190910_Fotor.jpg


The fuel gauge was stuck on full, turned out to be the sender unit floating around in the tank. That was an unpleasant job, mostly because my guesses at fuel usage were WILDLY conservative and the tank was mostly full. Facepalm.

The belts were all humped, they've been changed but I discovered the source of my squealing on start. The locking bolt for the tensioner on the alternator is snapped. The local Nissan dealership found one, but managed to send it to Dunfermline, then it disappeared.... so still waiting.


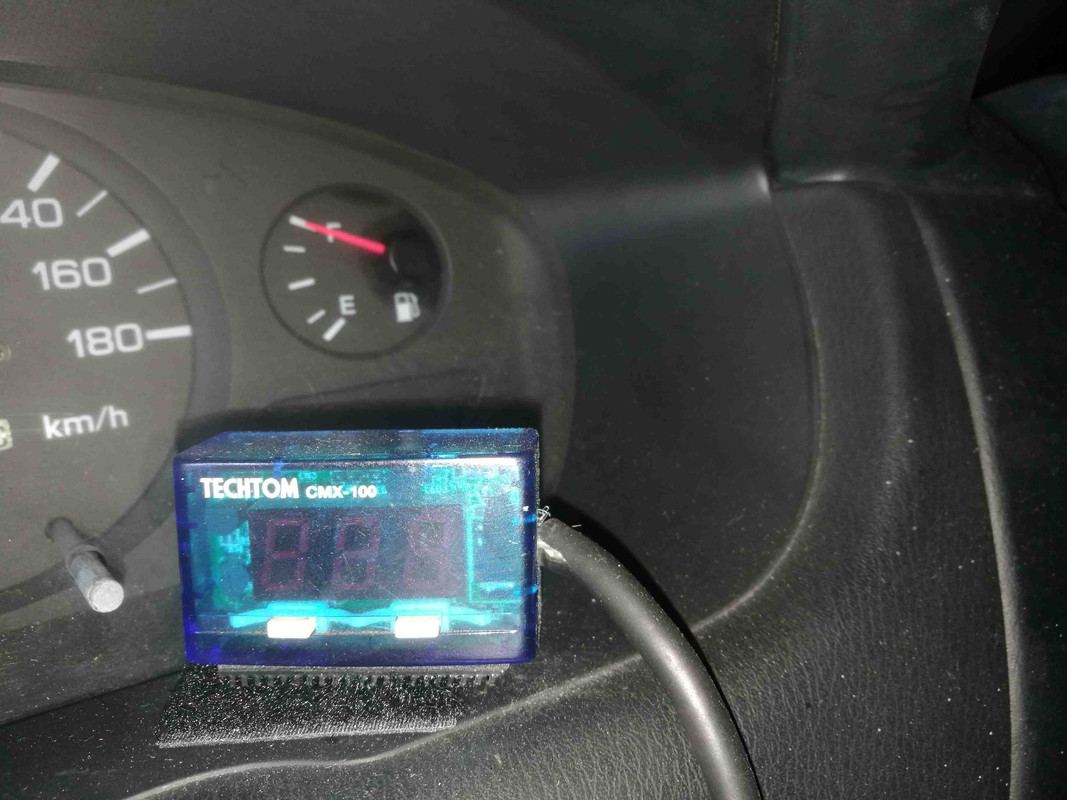
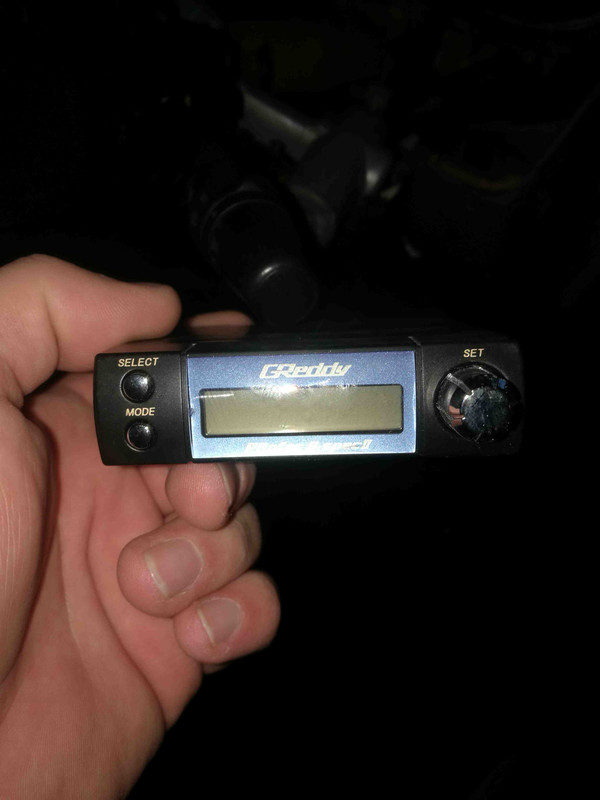
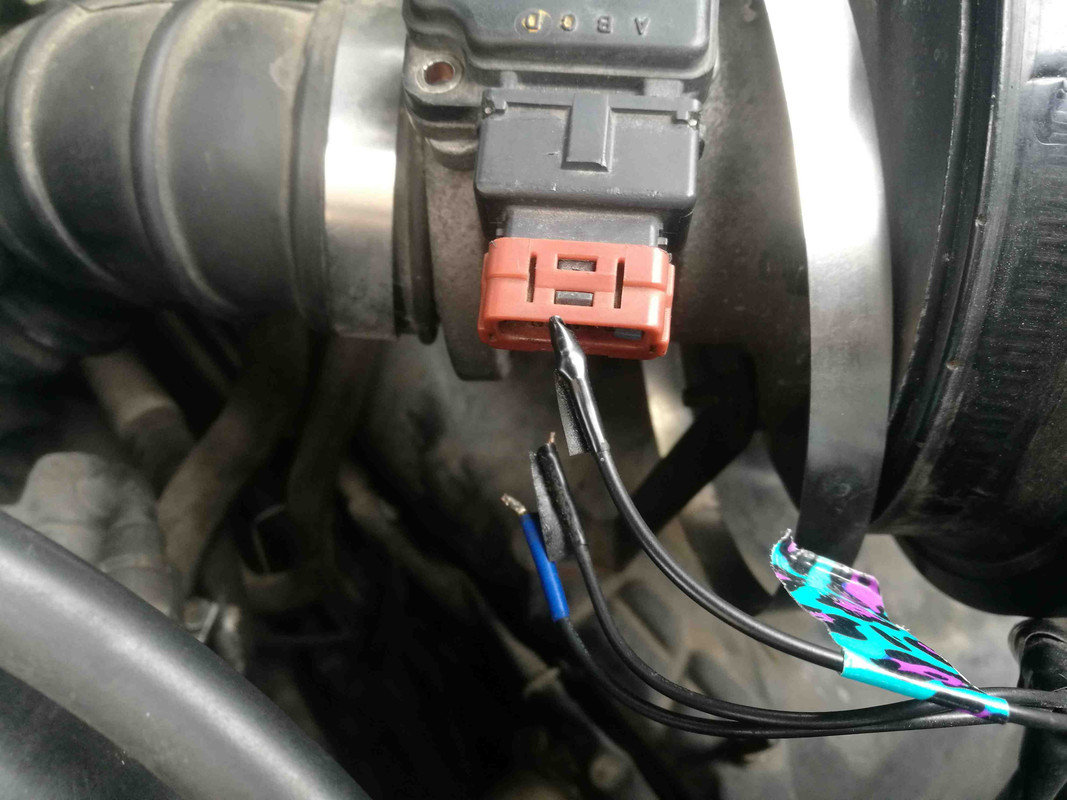
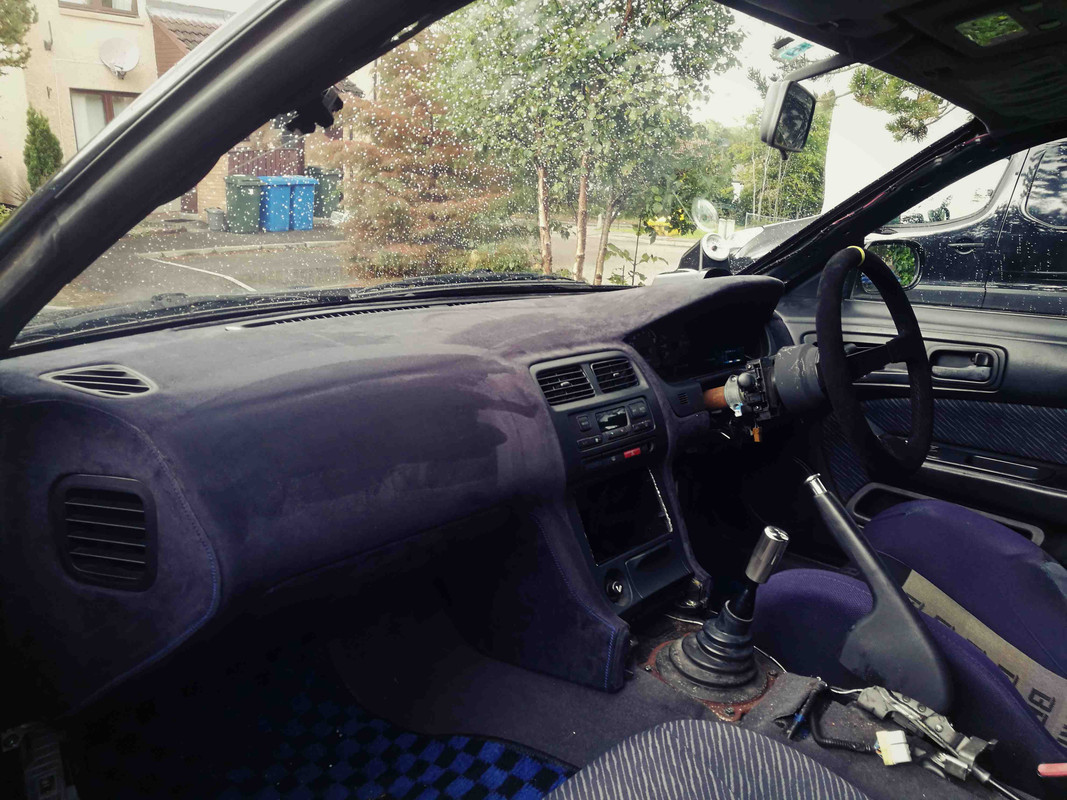
The TechTom that came with the car wasn't working, I took it apart and fixed it, which is great because the speedo doesn't work. I'll post up the symptoms in the tech section, because there's some really weird **** going on in there....

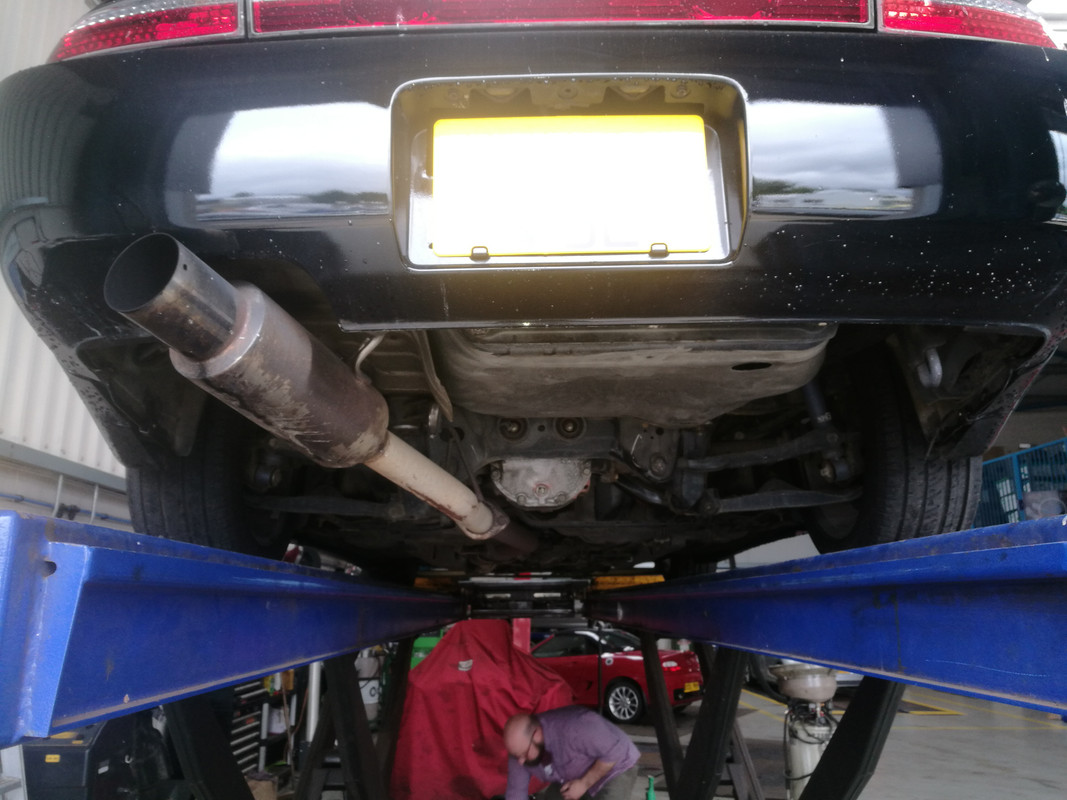
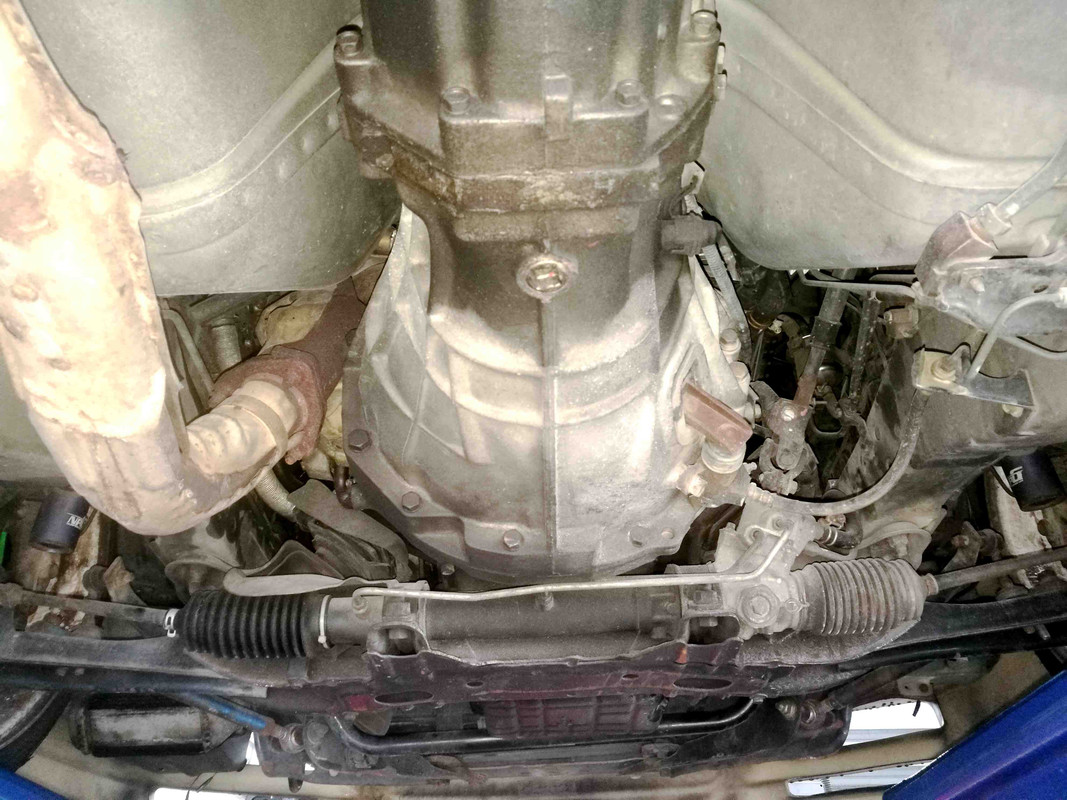
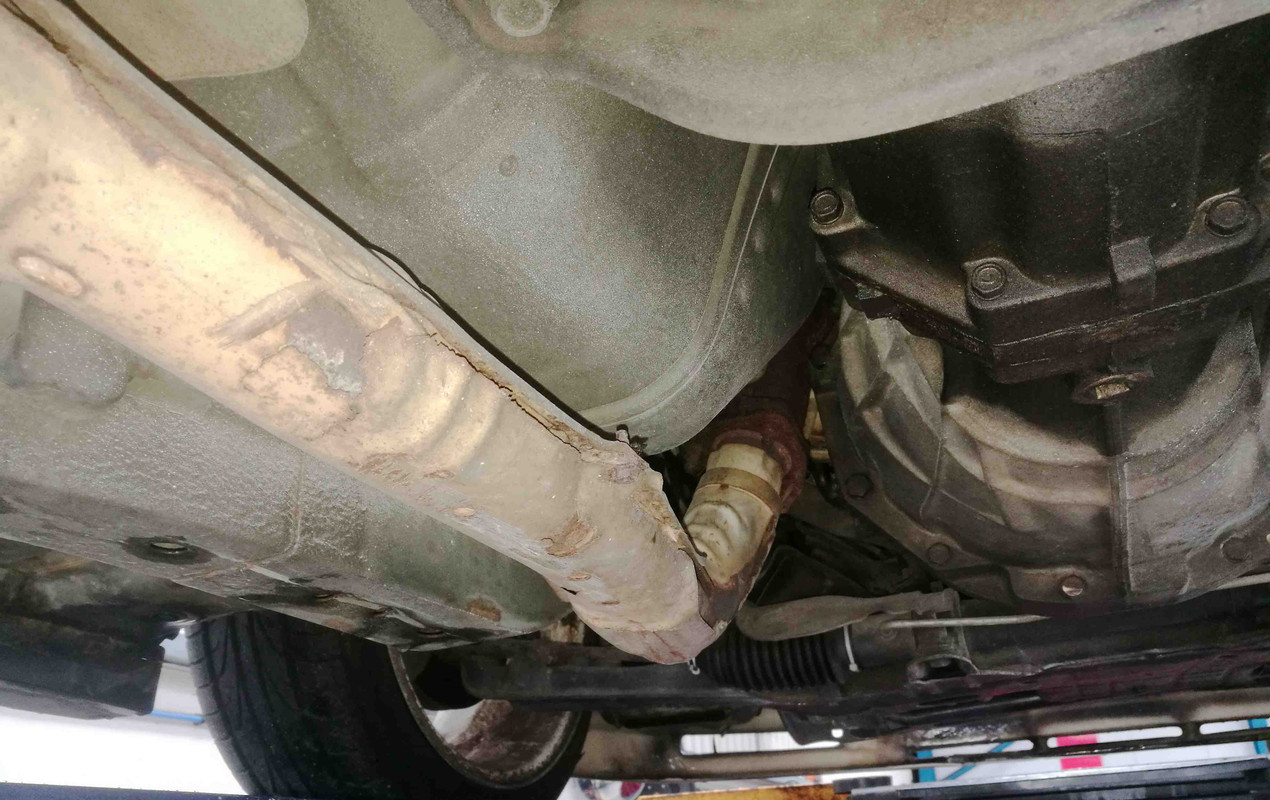
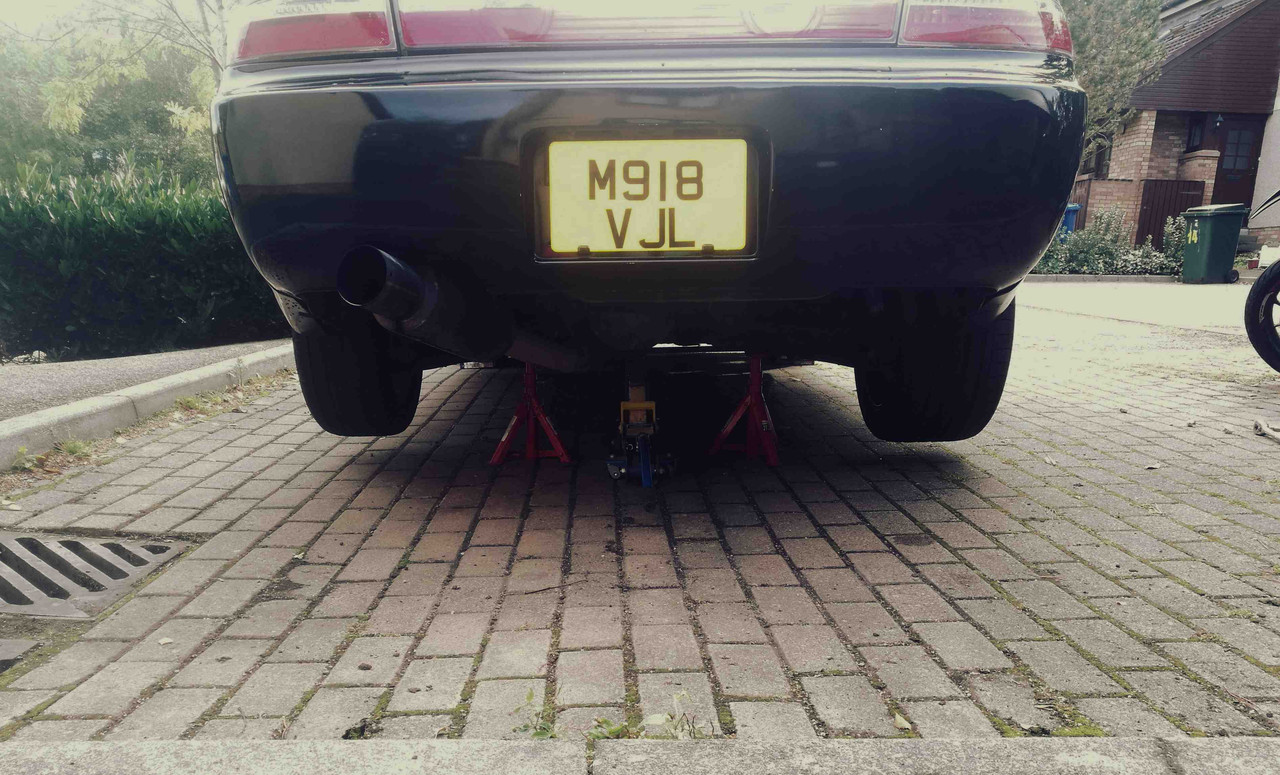
All the usual service stuff; plugs (old ones were in really good shape), oil and filter, and it's just been to a garage to get it up on the ramps and have a good once-over. Actually, it's still sitting there waiting on the elusive alternator bolt, because **** trying to change that from above. I've changed the brake pads, and I've got a full rebuild kit including pistons and braided lines all around, but that will have to wait without the garage.
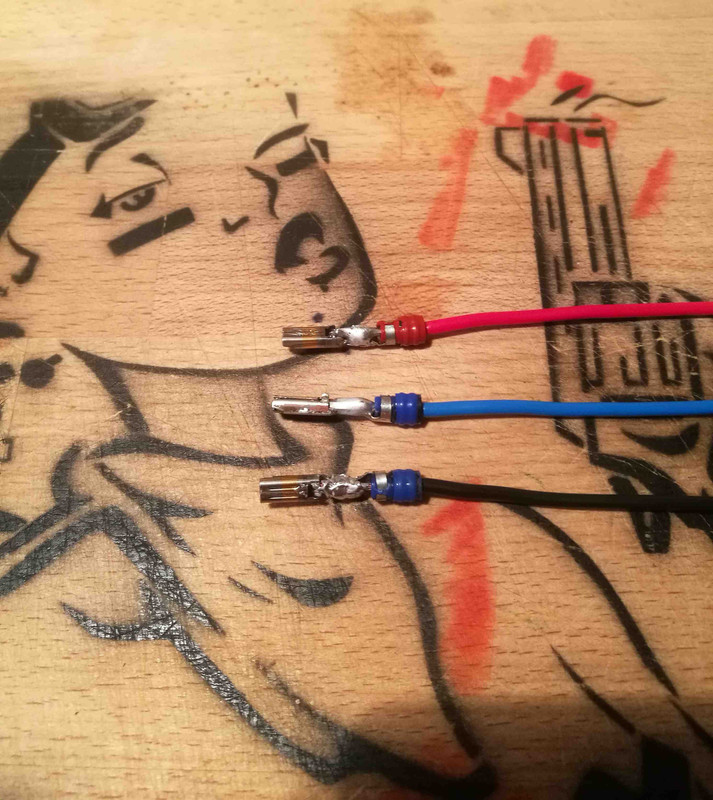
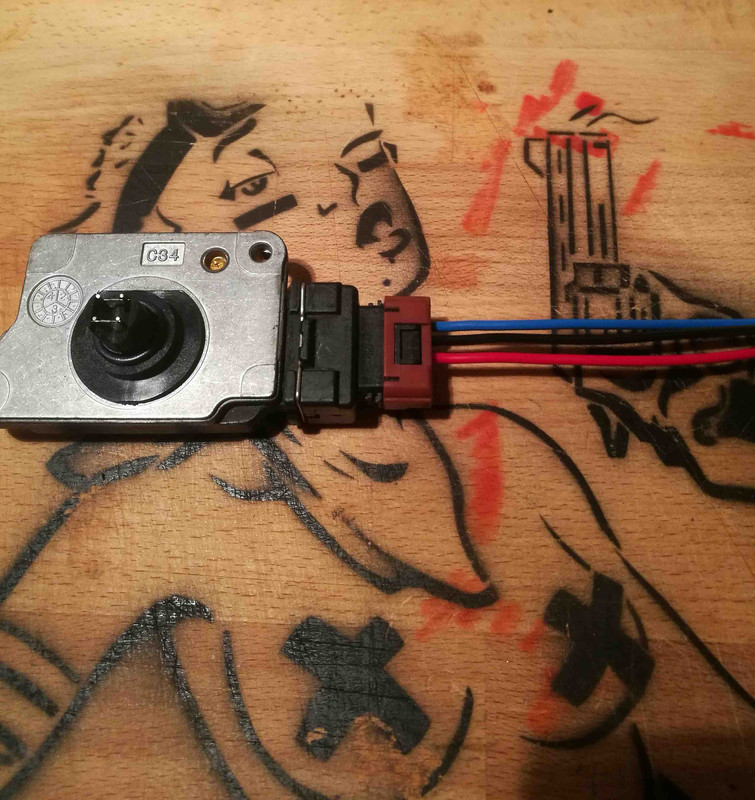
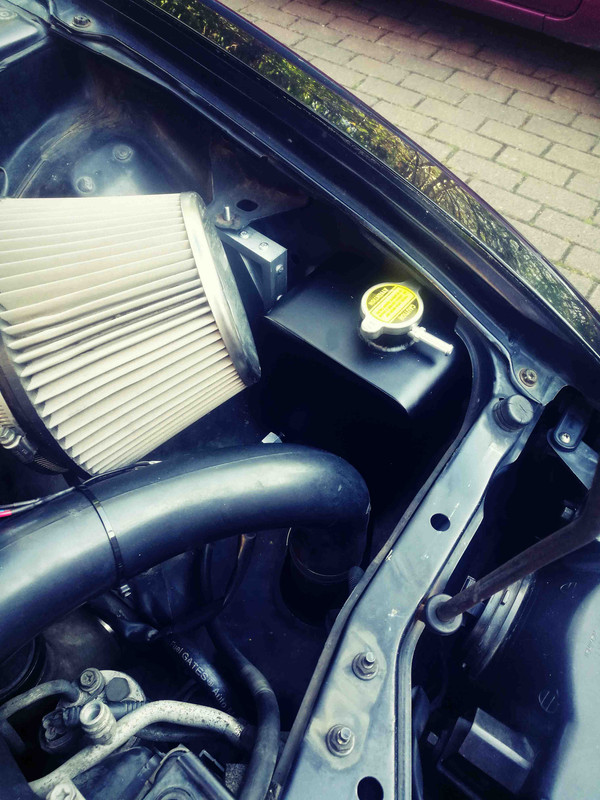
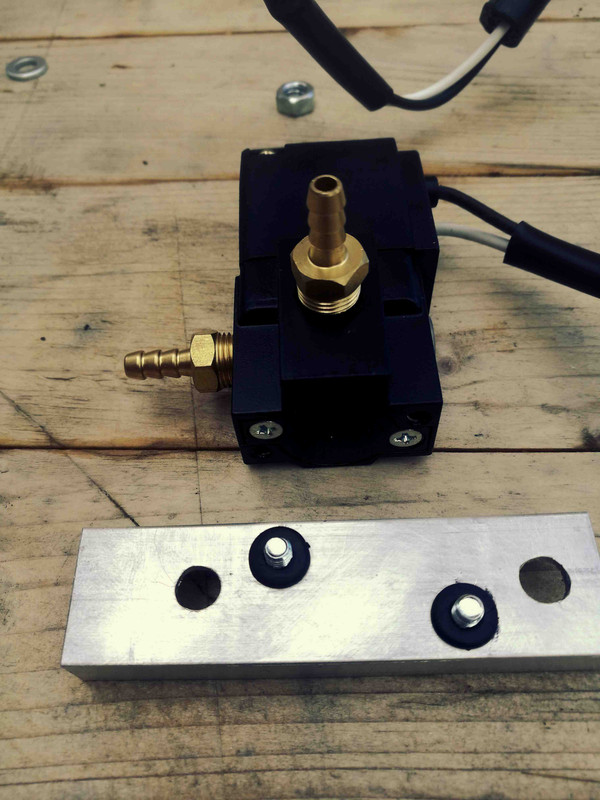
JDM gadget porn:
IMG_20180505_151239_Fotor.jpg


IMG_20180516_045214_Fotor.jpg
 
Last edited by a moderator:
Plans are, as always every changing, but currently:

Fix that bloody speedo.
Rebuild brakes.
Fix indicators (from oem four down to two on the front, just need to track down the wiring and fix).
NEW WHEELS.
There's a Rocket Bunny spoiler living on my couch right now.
Fit my tasty Stack boost gauge.
Mega interior tidy up, there's wires everywhere and some shoddy trim.
Fix cracked dash and retrim.
Crank up the boost!
Send those awful tyres back to the pit from whence they came.
 
I'm getting right into the spirit of silvia ownership, today I had to bodge the alternator tensioner to get it home from the garage, so now it's held on by zipties. I'm fairly certain that's what the owners manual would recommend.

I ordered a bolt from Nissan two weeks ago, they sent it to the wrong place. Twice. Last I heard it should be in Amsterdam by the 27th So it's been sat outside the local garage for a week, which gave me lots of time to buy bits off the interweb...
Big pile on my couch: New windscreen mouldings, alloy radiator expansion tank, ducktail, bungs to block off the recirc valve, wheel nuts (to replace the nylon lock nuts some Japanese ****wit put on), battery, massive roll of black suede for the interior and a whole mess of nuts and bolts.

The garage let me use their lift, so I got my first proper look at the underside. Looks pretty damn solid to me. Well pleased about that.
IMG_20180710_144111.jpg


underside1_LQ.jpg


underside2_LQ.jpg


underside3_LQ.jpg
 
I seem to be spending my life fixing annoying little electrical problems, mostly I have no idea how it got like this in the first place, somebody has had some odd ideas about wiring. This is a good example; the wires going into the maf sensor had been cut or broken and were soldered in really badly, I guess I nudged them while removing the recirc valve output hose and two of them snapped right off. It took hours to strip the plug apart, solder on new wires and rebuild it. After googling images I'm not actually certain it's an S14 maf.

Before
maf1_LQ.jpg


During
maf2_LQ.jpg


After
maf3_LQ.jpg
 
I finally got around to making up new looms for the indicators, now I have two on the side of the front bumper and two in the fog light position. So now it's happy and flashing at a sensible speed and I have my sidelights back. I think that was my last big hurdle for an mot. No pics, because they're just wires.

Nissan found an oem windscreen moulding hiding away in a warehouse for me. It turned out to be a super easy job. There was a LOT of sh*t behind the old one, so it had a good clean and a few hours to dry in the sun. The new one is a massive improvement. No pics, can't find them atm.

I made up new mounting points for the front bumper using rivnuts. I came up with a cunning plan for the sides so I can remove them with bare hands, bolts with lots of nuts covered in heatshrink. It works surprisingly well. The picture I have is of the Mk1, the 2nd version is a bit longer and uses rivnuts instead of wingnuts. Now the bumper comes off with one allen key in less than a minute.

I've also removed the recirc valve and bunged up the holes, need to sort out my dump valve to work at full boost and allow surge at low boost. The carbon catch can thingy is gone as I need space for a new coolant expansion tank and catch can.

I've been having trouble figuring out the lack of boost. I leak tested the system (including a comedy moment when we forgot to ziptie in the rubber bung blocking off the dump valve hole. It's now in somebody's garden several houses away....). I've checked the wastegate actuator and the bearing on the wastegate, removed the restricted pipe on the solenoid.... I was stumped.... until I realised that it has a oem solenoid. The profec controller isn't connected to anything. Bloody weeks that took me. Yeah. I felt like a right ****.
 
Oh, and I took the spoiler off. Unfortunately the ducktail doesn't cover the holes from the old one, so they're ducktaped until I can be bothered to fill them and repaint the bootlid. I'm going to make a start fixing the fibreglass in the ducktail this weekend, it's in worse condition than I hoped. BUT..... I'm really starting to like it without a spoiler.
 
The interior retrim is coming along well, though only the dash is back in right now as I'm waiting on a few parts. It's slow going, but it looks SO much better. I wish I'd taken a before photo of the dash because it was in an awful state; the usual big cracks and a bunch of holes and damage. It's all repaired and covered in a fake suede material with blue stitching.


Dash and new wheel
dash1_LQ.jpg


dash2_LQ.jpg


Ebay special radiator expansion tank as the old plastic one was falling to bits.
tank1_LQ.jpg
 
I found some Buddyclub P1s for a good price, they were pretty scabby as they'd sat in a shed for a few years, but all straight with no damage other than paint. So I've stripped them down and repainted them, it's a pretty close colour to the original dark grey, I'll get some lacquer on them tomorrow. I've got some arch rolling to do and I'm waiting on spacers (I know, spacers are dirty), but should have them on in a week or so.

wheels1_LQ.jpg


I spent today hunting rattles. The worst one was coming from the boot lid. I adjusted the latch, but it wasn't enough, and I couldn't find the little rubber anti-rattle things anywhere in the UK. So I just got fed up and made some temporary ones for now. They're caps from glue bottles and a bit of tape inside old mountain bike handlebar grips, bolted through rivnuts on the boot lid. It might look stupid, but it works!

boot1_LQ.jpg


boot2_LQ.jpg
 
If you're wondering what's involved in retrimming the interior panels: Contact adhesive, patience, and a HEAP of clothes pegs. This has been my evenings for the last three weeks!

trim1_LQ.jpg


The wheels are painted and lacquered, they're curing inside until my spacers arrive, then I'll seal and wax them before they go on. They were a dark metallic grey, but living in a damp shed had taken it's toll and there was a lot of flaking paint. I stripped them down and primed them, then painted in Audi Dakota Grey with Halfords rattle cans (I have a lot of experience of painting with these). Unfortunately the last can was a dud, with only the face of the last wheel to paint. FFS. I took it back but none of the shops within three hours drive had any more cans! I tried to colour match with the caps on the cans, ended up with Ford Sea Grey, which was completely different once sprayed on. Another trip to Halfords and I got their own brand Anthracite wheels paint. It's an uncanny match to the Audi grey. Like, identical. So heaps of that plus a bunch of hardcore PU lacquer.


If I'm honest, it's not my best job ever, but by the standards of "things done in a couple of days in your mates' shed" it's freaking magnificent.

wheels3_LQ.jpg
 
The wheels have been on for about a week. SO MUCH BETTER. The car now looks like somebody actually likes it.
The arches had been hammered out, so I tidied up the rears and the fronts needed a pretty good roll. The fronts are pretty tight, there's a hint of rub on full lock but not enough to worry about. The rears are just tucked under nicely with those 255s.

wheels5_LQ.jpg


YES
wheels6_LQ.jpg
 
Mandatory broadway mirror.

mirror1_LQ.jpg


I finally found a solenoid for the Greddy EBC. It was a bit of a bugger to fit as it needs different sized hose compared to the wastegate and intake, but I found some reducers eventually. I took it out for a run in the dark, which was exciting because I have no light in the instrument panel, and it seems to be working. Unfortunately the clutch seems to be slipping as soon as I put more boost in. That's not going to be a fun job without a garage.


Solenoid with custom damped mount.
EBC1_LQ.jpg
 
Awesome work Jimbo. I wish I had your patience and half the mechanical knowledge!
 
Nice work mate, good to see you back on here - glad that it’s in something suitably daft.

Are there any plans to add a bit of the unique Jimbo flair that we’ve come to love? Saw a hint on the wooden board in the pic!
 
Love it dude. The P1’s work perfectly with the Zenki lines. Now don’t do what every other S Chassis idiot seems to do, get cocky and think they’re Mad Mike Whiddett, then stack it at the first roundabout :lol:


Sent from my iPhone using Tapatalk
 
Back
Top