
- Messages
- 20
***** Originally Posted on www.ephatch.com *****
**Please note, the specs used below are for the K20A3. (USDM engine in the Si)**
I did this following the instructions in the service manual (http://www.ephatch.com/forum/showthread.php?t=44979).
1. Make sure your engine bay is pretty clean; you don't want to drop any dirt or sand into the engine. The cylinder head also MUST BE COOL (under 100 F or 38 C).
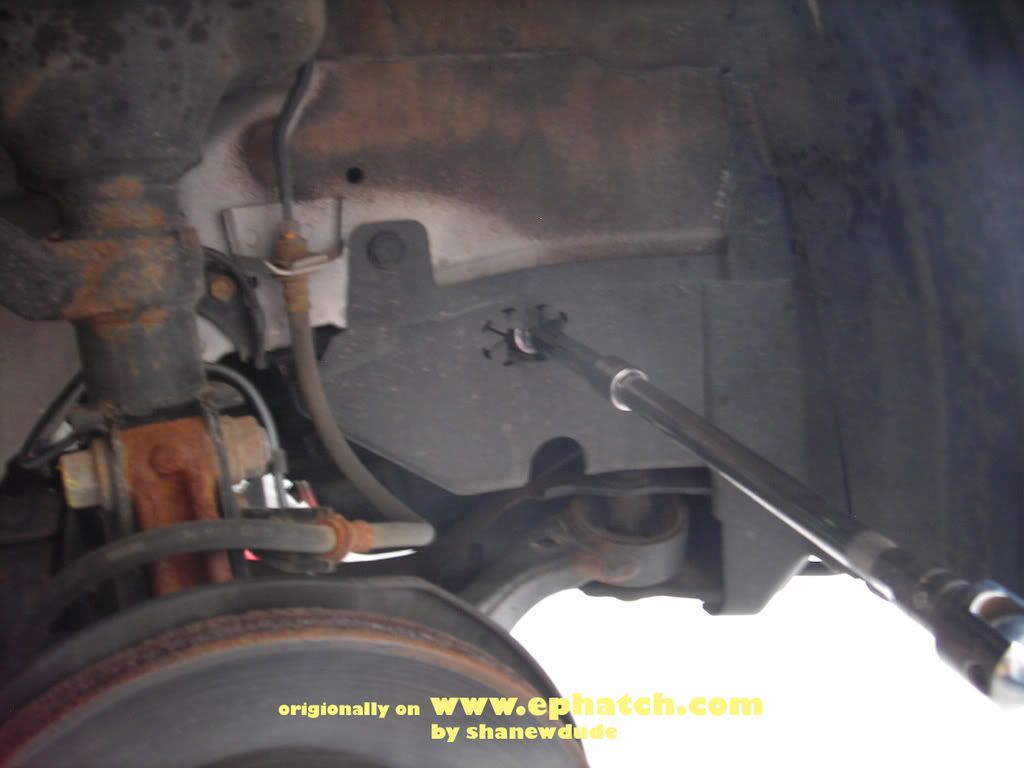
2. Jack and support the front end of your car and remove the passenger side front tire. (MIGHT BE OPTIONAL STEP DEPENDING ON DROP... SEE STEP #8 to see why)
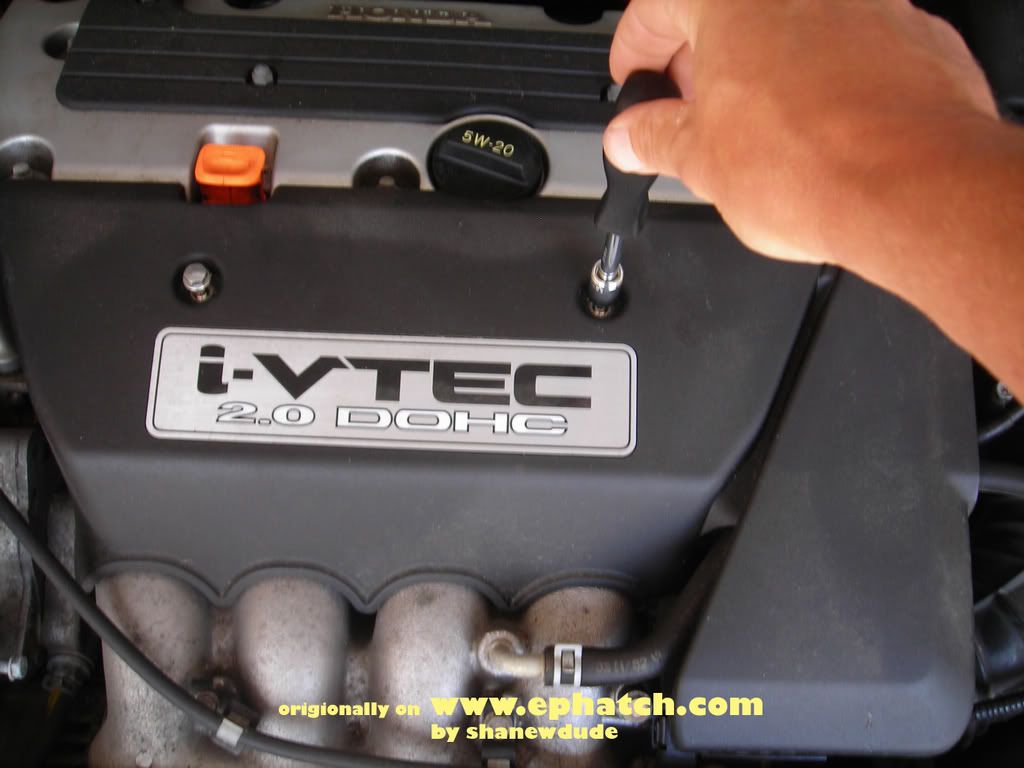
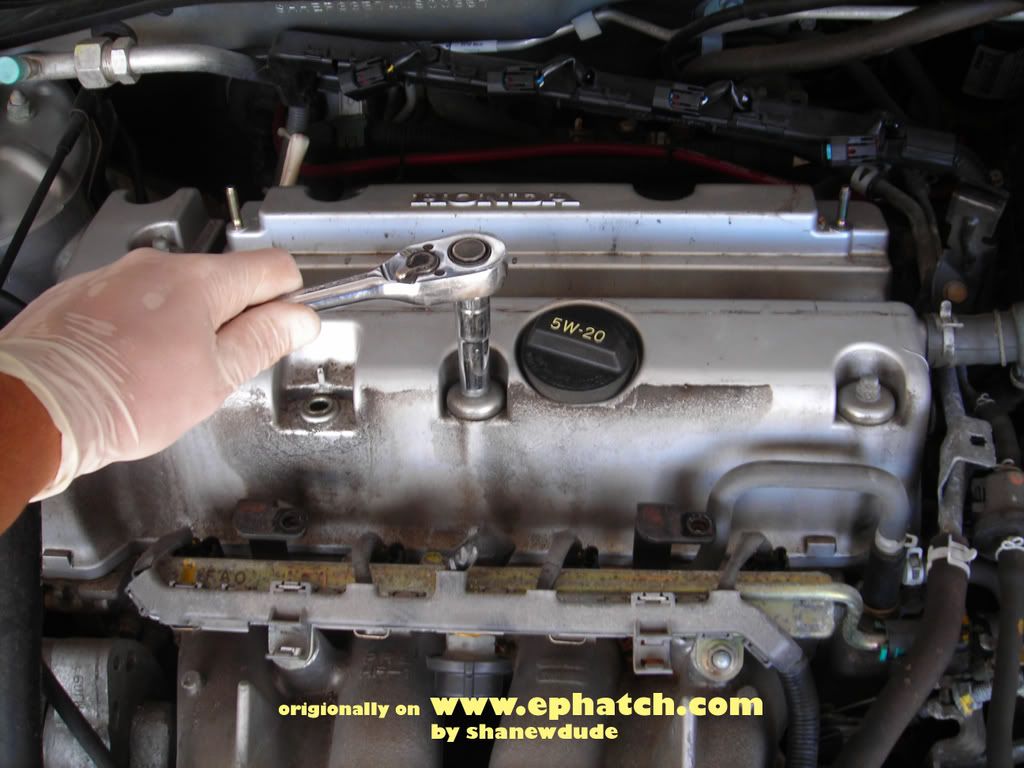
3. Remove the intake manifold cover: 2 bolts
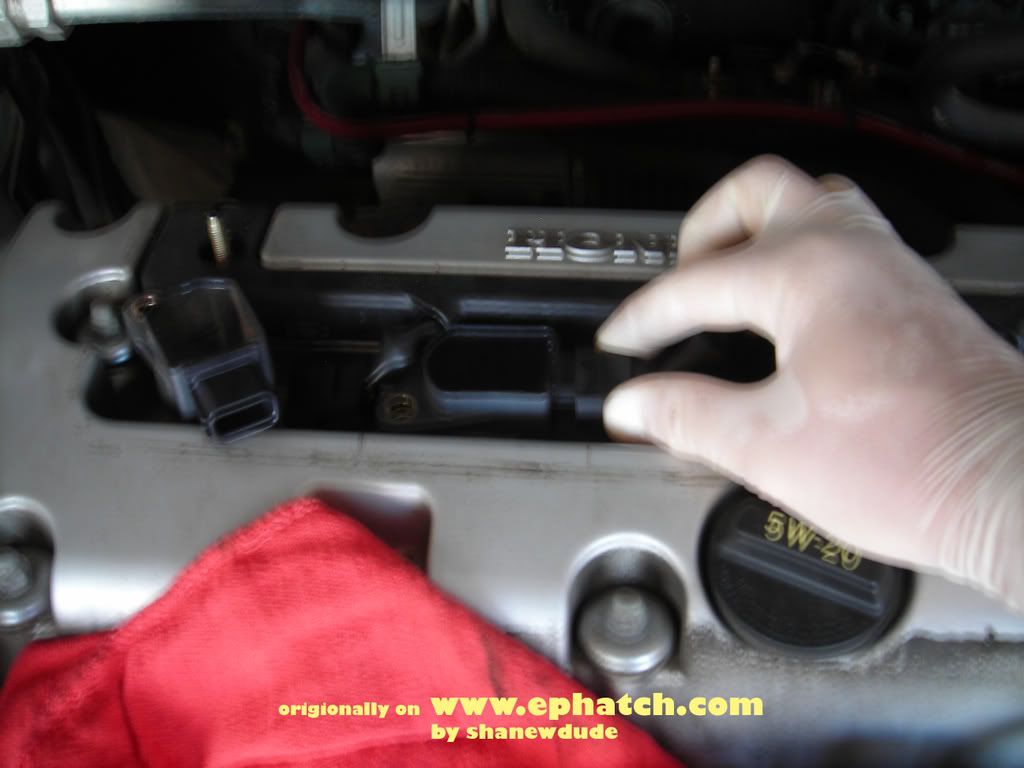
4. Remove the cover over the ignition coils; be careful not to drop the spacers under the two outside bolts. Underneath, there will be two ignition coils still bolted on; remove those two bolts.
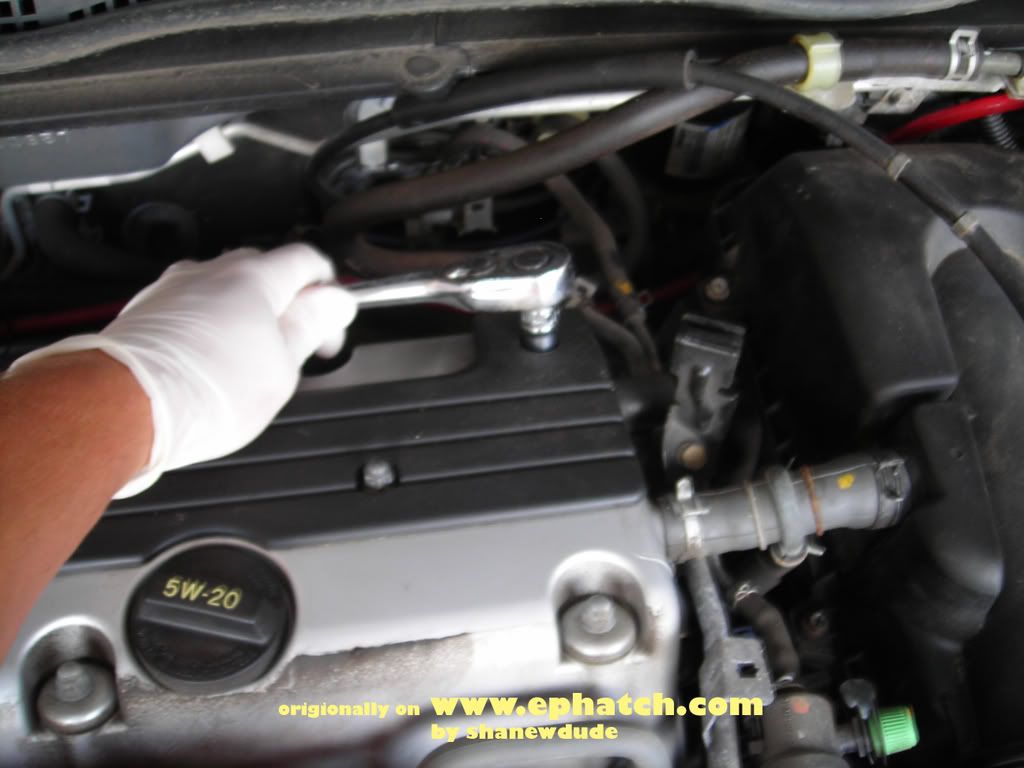
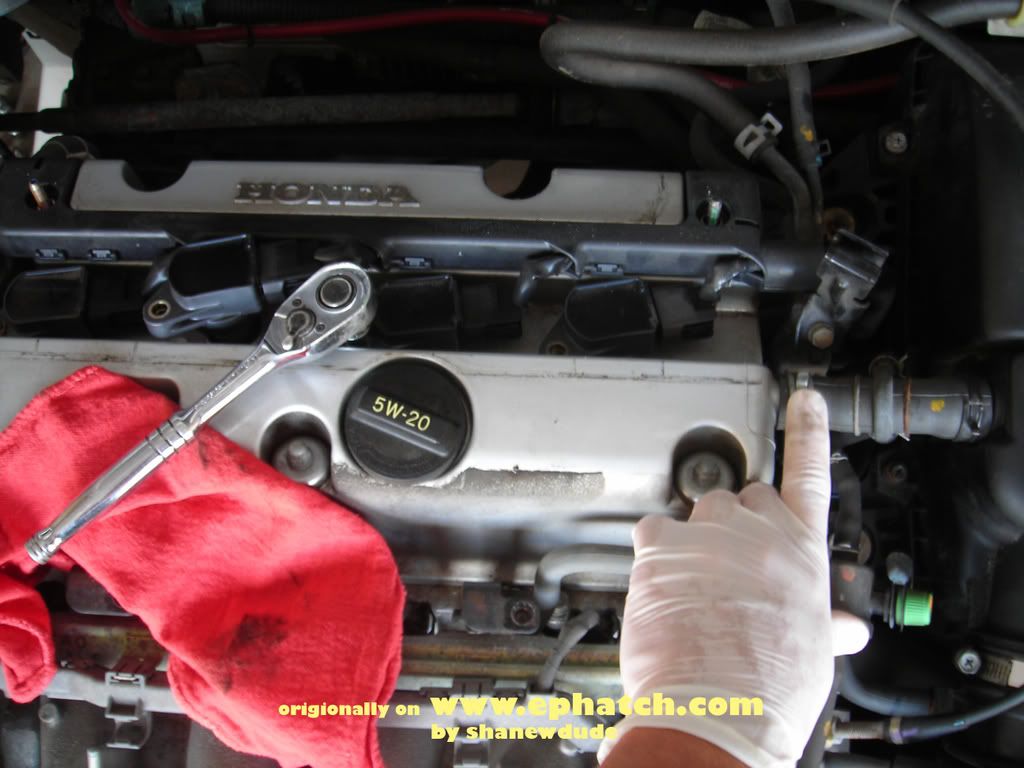
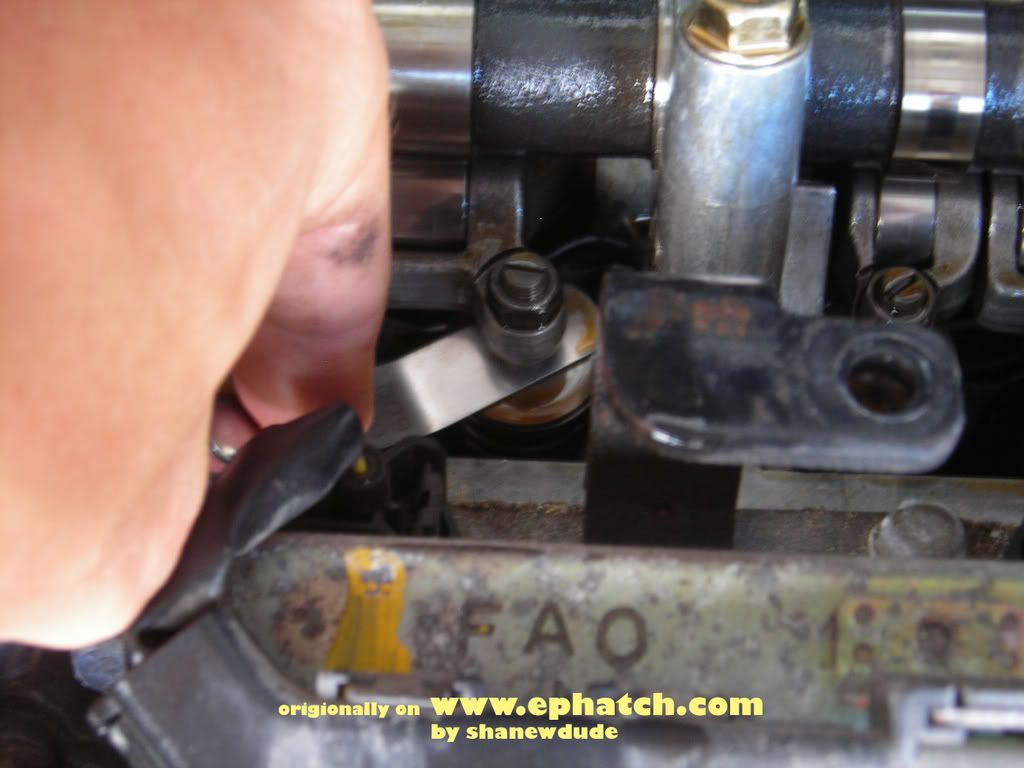
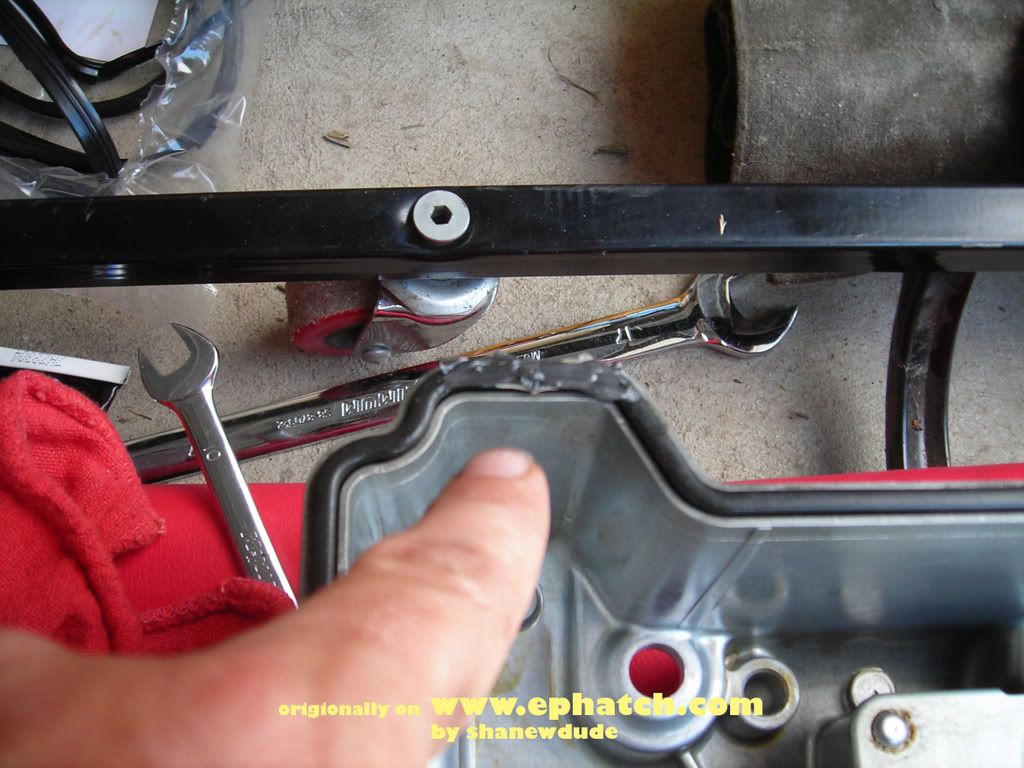
5. Remove the breather hose (I'm pointing to it below). I had to remove my air box cover to get the breather hose off (the ratchet is on one of the ignition coil bolts).
6. Remove the ignition coils. Pull up and loosen them, then you can twist the coil so you have enough grip on the release clip to remove the wire harness. (Sorry about the blurry pic)
 ]
]
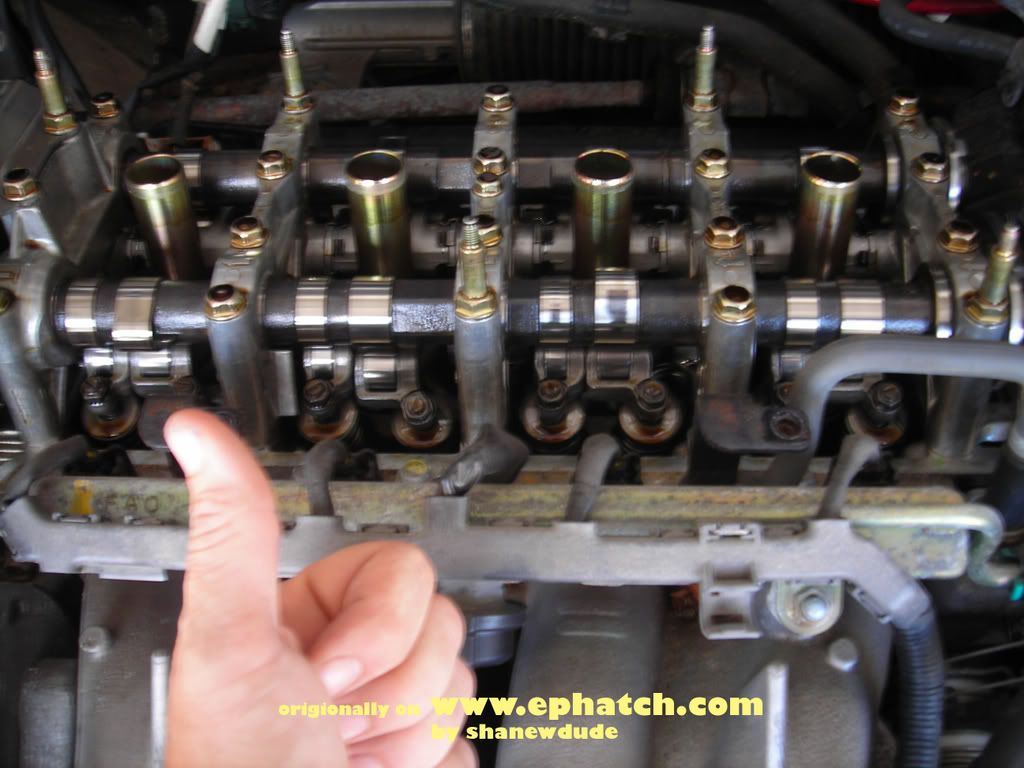
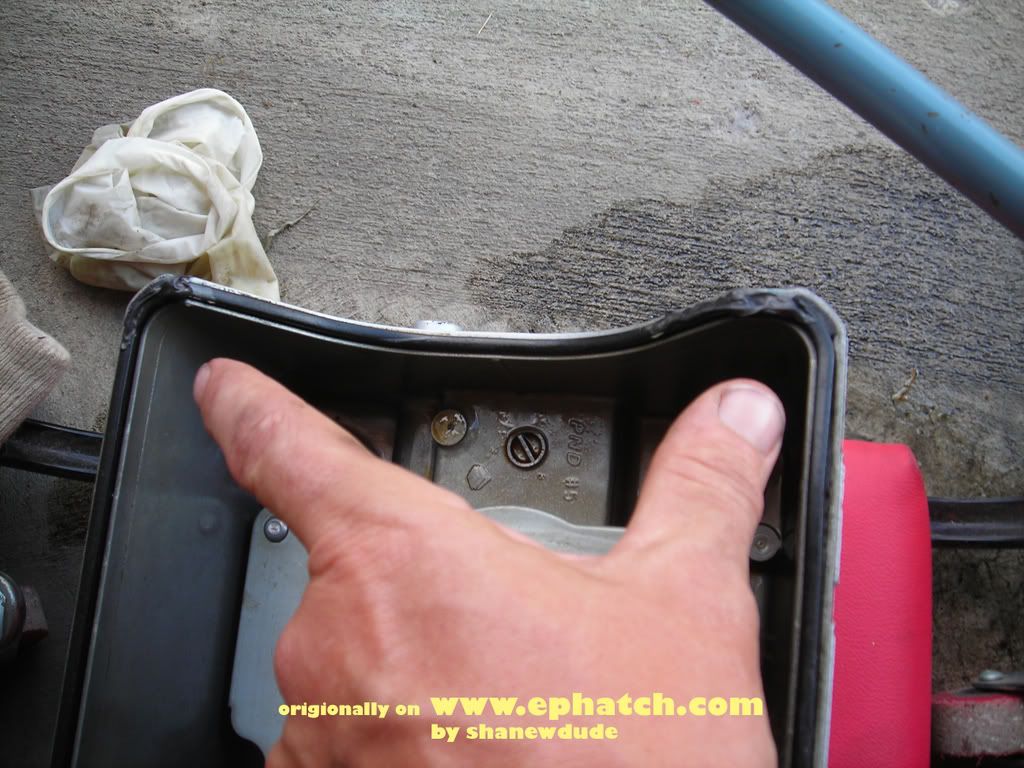
7. Remove the six cap nuts holding the valve cover on. I also removed the washers to make it easier to pull off. Remove your dipstick, too.
The valve cover should lift off with a little bit of tugging. If you have a spare pair of hands around, it might help to keep hoses and your throttle cable out of the way. Now, inspect your cams for gauling. None here!
8. Use a 19mm socket and long extension (you may need to use more than one extension) to turn the crank shaft. I used my 25" breaker bar instead of a ratchet to turn the crank, and it was very easy.
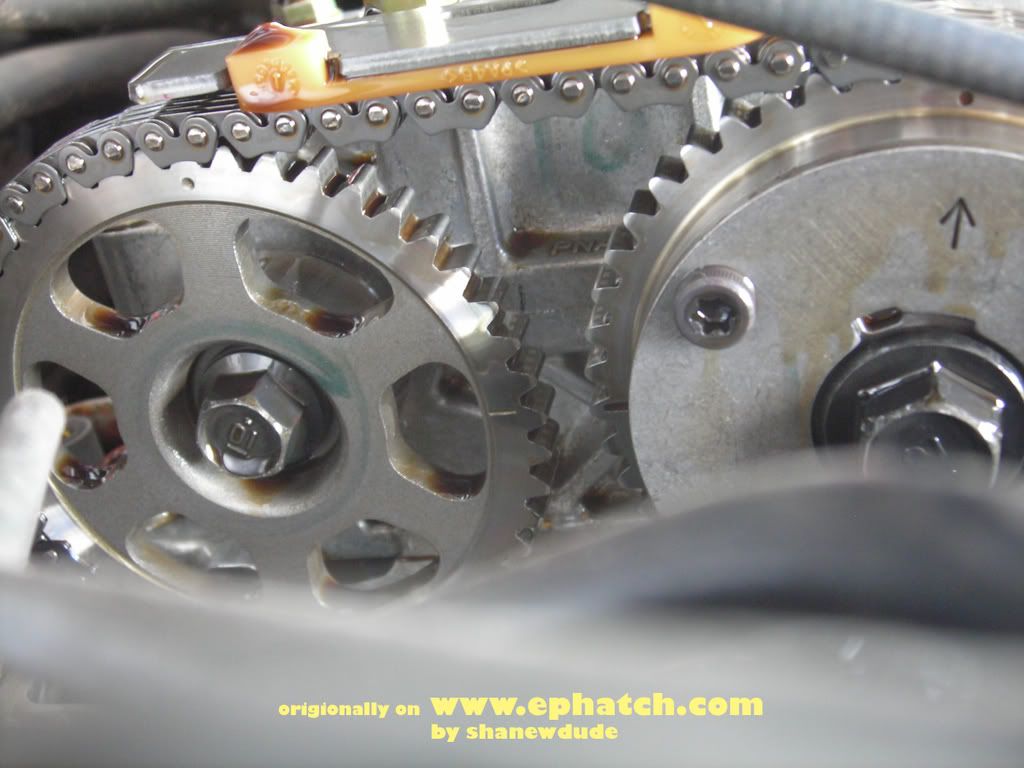
Turn the crank until the arrow on the VTC actuator is up, the punch mark on the exhaust camshaft sprocket is up, and then align the two marks on each sprocket so they match up. This give you top dead centre (TDC) for cylinder one (passenger side).
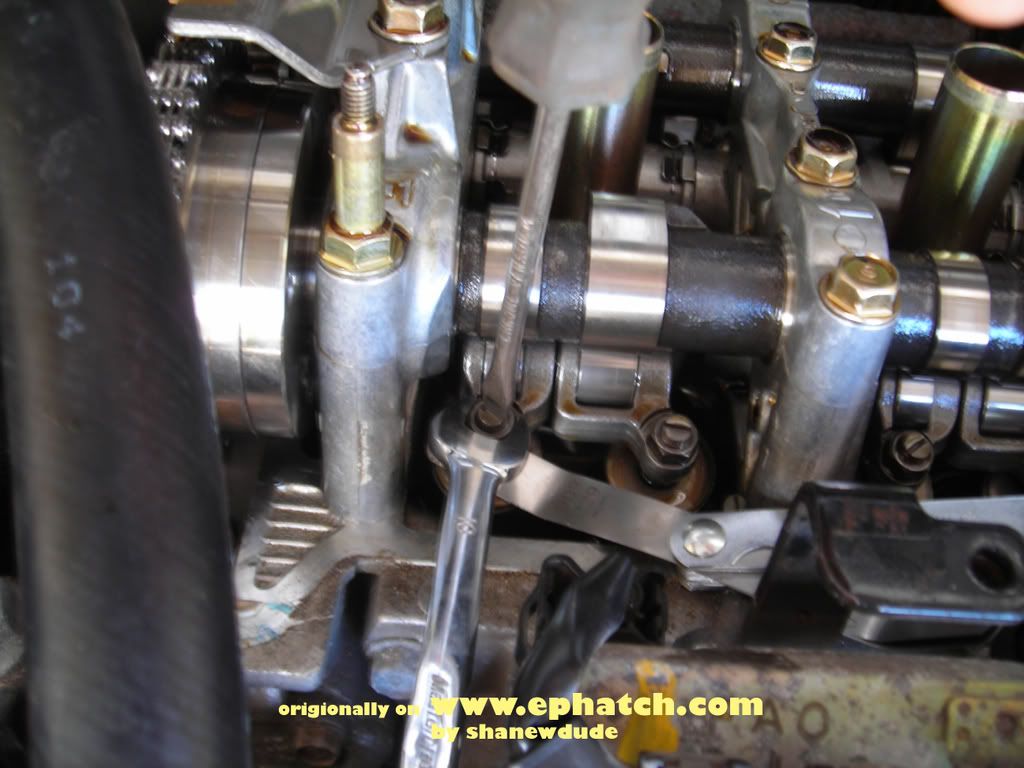
9. Here are the gauges I used for the intake side. The specification for the gap is 0.008 to 0.010 inches. Notice I have one in the middle, too. The exhaust gap should be from 0.011 to 0.013 inches. DON'T TAKE MY WORD FOR IT; MAKE SURE YOU HAVE THE RIGHT ONES.
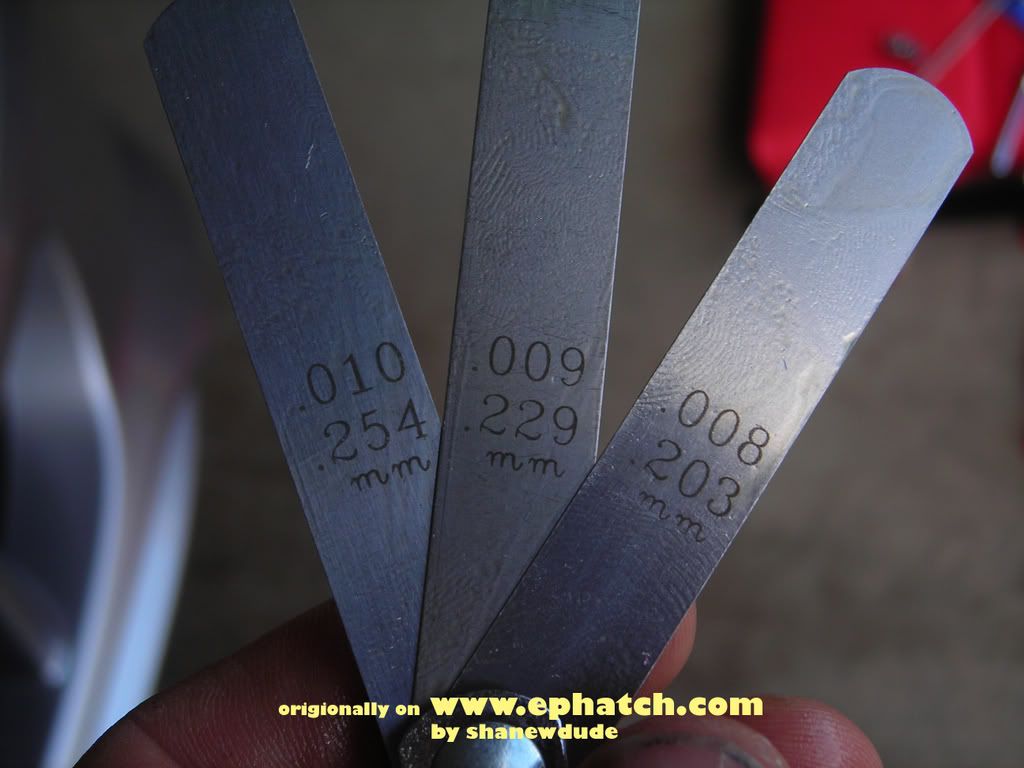
10. I put a bend in each of the gauges I intended to use to make it easier to fit them in between the valve stem and adjusting screw. There should be some drag on the gauge when you slide it back and forth. You should NOT be able to get the next gauge up in the gap (ie the 0.011" on the intake side).
11. If you do need to adjust the gap, I suggest using the .010 or .009 in the gap while you use a 10mm wrench to loosen the lock nut and a slot screwdriver to turn the adjuster. If you make if just snug enough on the larger gauge so you can still pull it out, it should be just right when you check the gap again.
This step requires a light touch. Loosen the lock nut with the wrench, then GENTLY turn the screwdriver a bit each way. You will be able to feel the adjuster connecting with your gauge. If you haven't done this before, take your time getting a feel for the right amount of tension on the adjuster screw that gives you the right gap.
Tighten the lock nut, then CHECK THE GAP AGAIN.
12. Check and adjust exhaust side, cylinder 1.
13. Rotate the crank 180 degrees clockwise (camshaft pulley rotates 90 degrees) and check CYLINDER THREE clearances.
14. Rotate crank 180 degrees clockwise and check cylinder FOUR.
15. Rotate crank 180 degrees clockwise and check cylinder TWO.
16. Install the valve cover in the reverse order that you took it apart. CHECK THE MANUAL for the order you need to tighten the bolts. I suggest using a torque wrench; many people have broken these in the past. You tighten them in 2 or 3 steps, in the right order (shown in the manual).
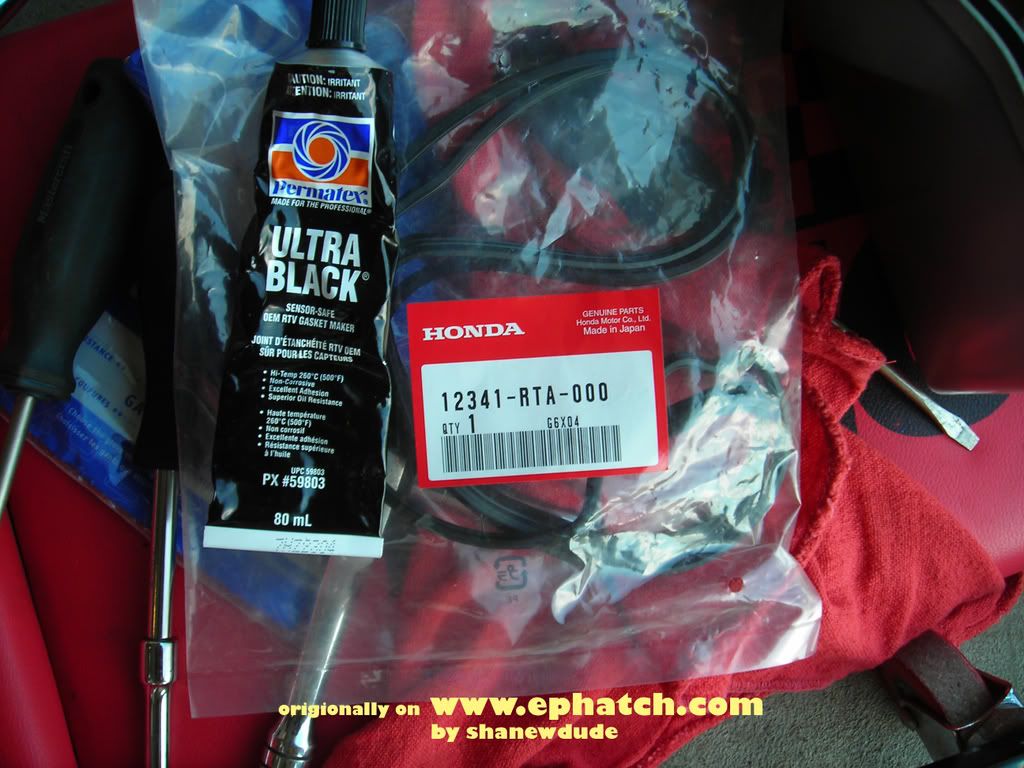
I bought a new gasket THAT DID NOT FIT, thanks Honda. You also need some gasket maker.
Clean the old gasket material where it is left on the engine, and apply the liquid gasket to the following spots (copy the spots from the old gasket if you can).

Don't forget to re-install the passenger side wheel before you drive away. Remember you are supposed to re-check the torque on your lug nuts after driving a little bit.
**Please note, the specs used below are for the K20A3. (USDM engine in the Si)**
I did this following the instructions in the service manual (http://www.ephatch.com/forum/showthread.php?t=44979).
1. Make sure your engine bay is pretty clean; you don't want to drop any dirt or sand into the engine. The cylinder head also MUST BE COOL (under 100 F or 38 C).
2. Jack and support the front end of your car and remove the passenger side front tire. (MIGHT BE OPTIONAL STEP DEPENDING ON DROP... SEE STEP #8 to see why)
3. Remove the intake manifold cover: 2 bolts
4. Remove the cover over the ignition coils; be careful not to drop the spacers under the two outside bolts. Underneath, there will be two ignition coils still bolted on; remove those two bolts.
5. Remove the breather hose (I'm pointing to it below). I had to remove my air box cover to get the breather hose off (the ratchet is on one of the ignition coil bolts).
6. Remove the ignition coils. Pull up and loosen them, then you can twist the coil so you have enough grip on the release clip to remove the wire harness. (Sorry about the blurry pic)
7. Remove the six cap nuts holding the valve cover on. I also removed the washers to make it easier to pull off. Remove your dipstick, too.
The valve cover should lift off with a little bit of tugging. If you have a spare pair of hands around, it might help to keep hoses and your throttle cable out of the way. Now, inspect your cams for gauling. None here!
8. Use a 19mm socket and long extension (you may need to use more than one extension) to turn the crank shaft. I used my 25" breaker bar instead of a ratchet to turn the crank, and it was very easy.
Turn the crank until the arrow on the VTC actuator is up, the punch mark on the exhaust camshaft sprocket is up, and then align the two marks on each sprocket so they match up. This give you top dead centre (TDC) for cylinder one (passenger side).
9. Here are the gauges I used for the intake side. The specification for the gap is 0.008 to 0.010 inches. Notice I have one in the middle, too. The exhaust gap should be from 0.011 to 0.013 inches. DON'T TAKE MY WORD FOR IT; MAKE SURE YOU HAVE THE RIGHT ONES.
10. I put a bend in each of the gauges I intended to use to make it easier to fit them in between the valve stem and adjusting screw. There should be some drag on the gauge when you slide it back and forth. You should NOT be able to get the next gauge up in the gap (ie the 0.011" on the intake side).
11. If you do need to adjust the gap, I suggest using the .010 or .009 in the gap while you use a 10mm wrench to loosen the lock nut and a slot screwdriver to turn the adjuster. If you make if just snug enough on the larger gauge so you can still pull it out, it should be just right when you check the gap again.
This step requires a light touch. Loosen the lock nut with the wrench, then GENTLY turn the screwdriver a bit each way. You will be able to feel the adjuster connecting with your gauge. If you haven't done this before, take your time getting a feel for the right amount of tension on the adjuster screw that gives you the right gap.
Tighten the lock nut, then CHECK THE GAP AGAIN.
12. Check and adjust exhaust side, cylinder 1.
13. Rotate the crank 180 degrees clockwise (camshaft pulley rotates 90 degrees) and check CYLINDER THREE clearances.
14. Rotate crank 180 degrees clockwise and check cylinder FOUR.
15. Rotate crank 180 degrees clockwise and check cylinder TWO.
16. Install the valve cover in the reverse order that you took it apart. CHECK THE MANUAL for the order you need to tighten the bolts. I suggest using a torque wrench; many people have broken these in the past. You tighten them in 2 or 3 steps, in the right order (shown in the manual).
I bought a new gasket THAT DID NOT FIT, thanks Honda. You also need some gasket maker.
Clean the old gasket material where it is left on the engine, and apply the liquid gasket to the following spots (copy the spots from the old gasket if you can).
Don't forget to re-install the passenger side wheel before you drive away. Remember you are supposed to re-check the torque on your lug nuts after driving a little bit.

