
- Messages
- 4,434
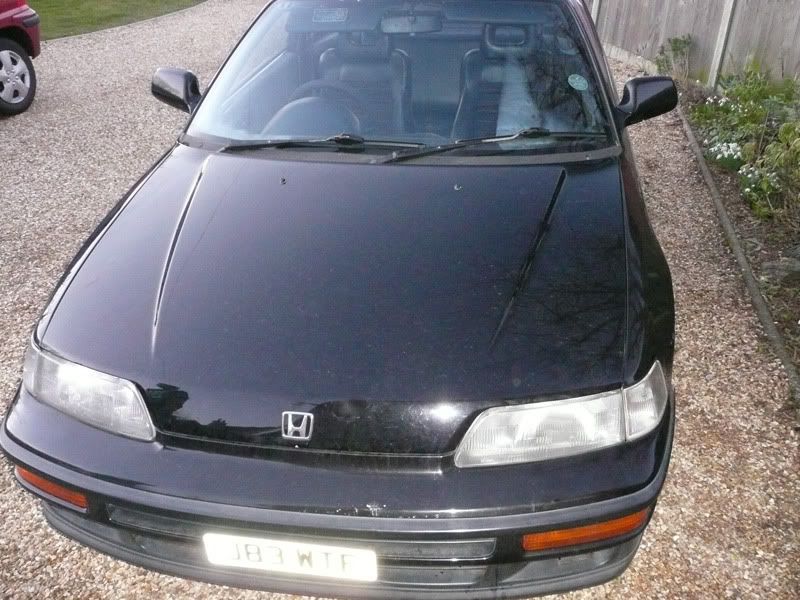
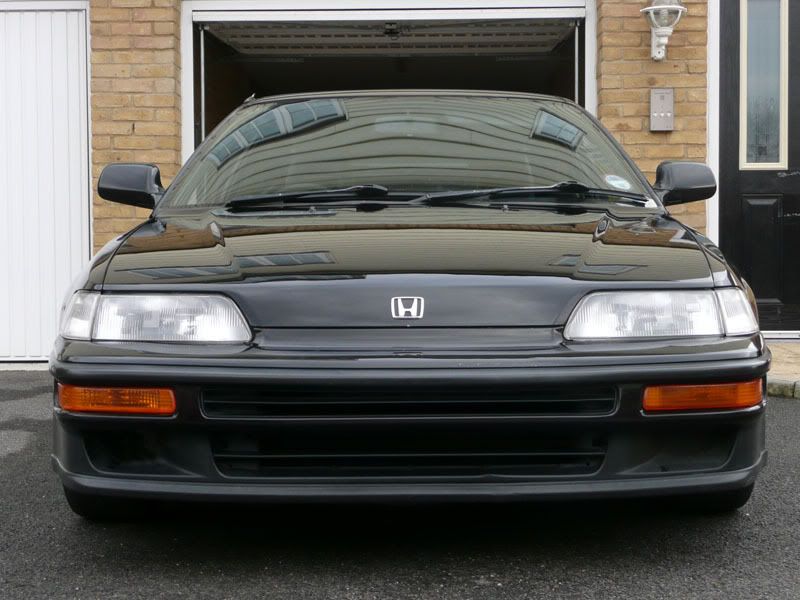
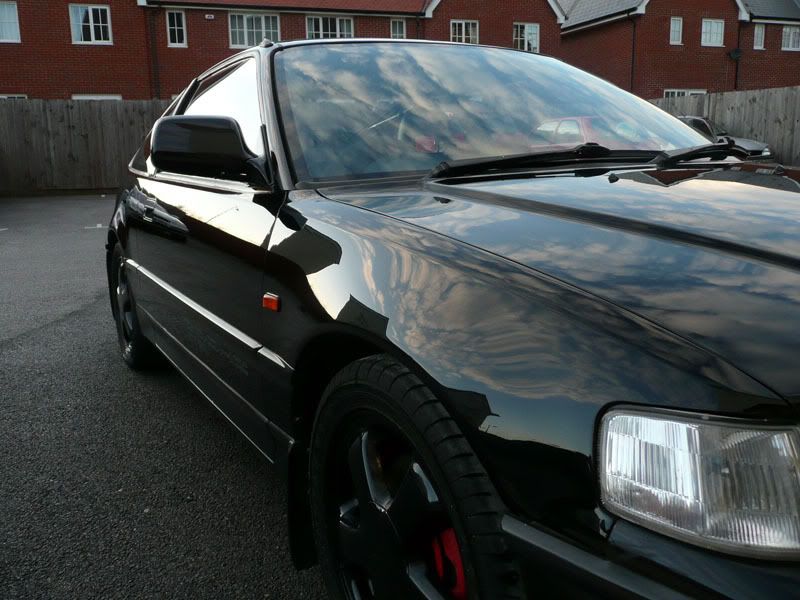
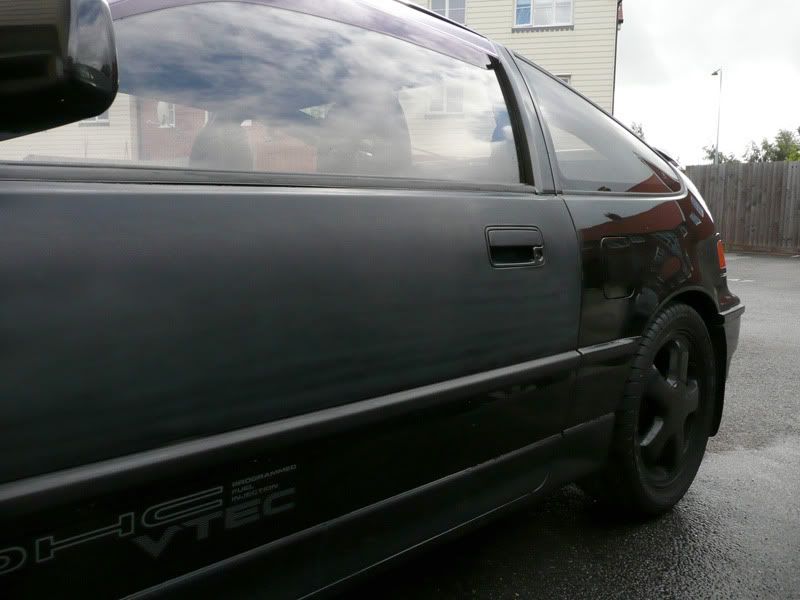
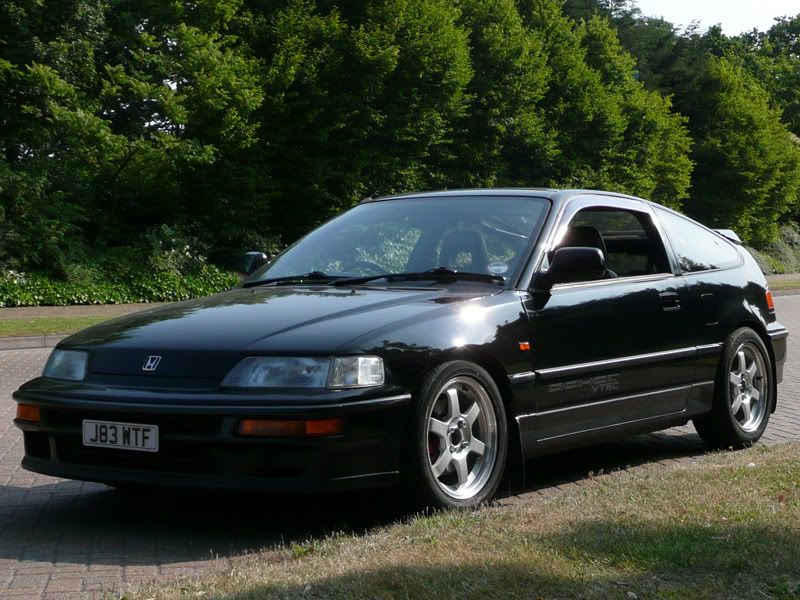
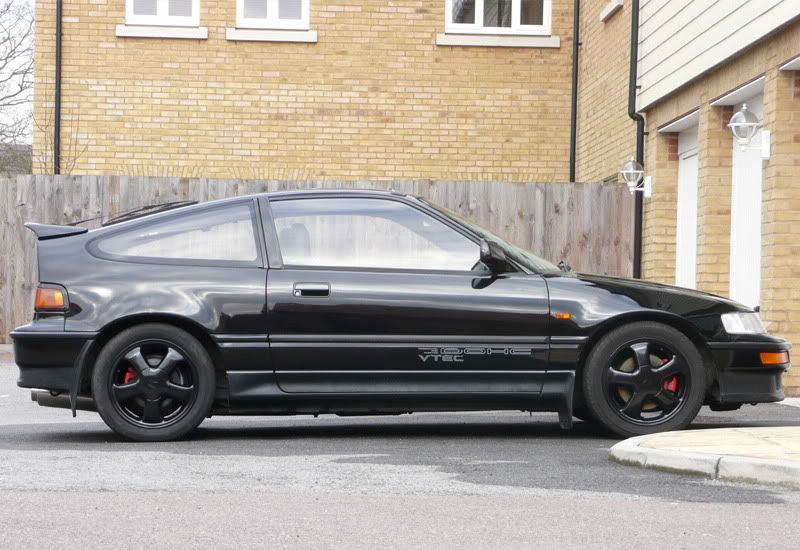
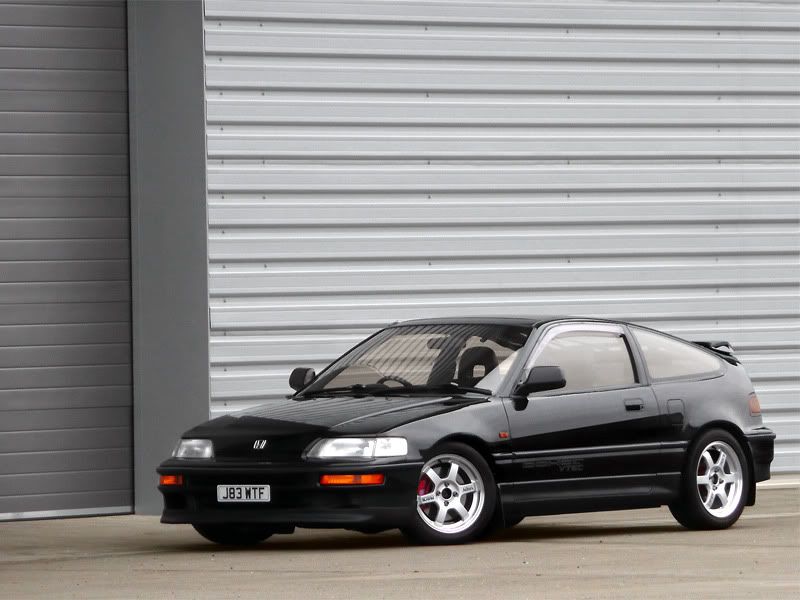
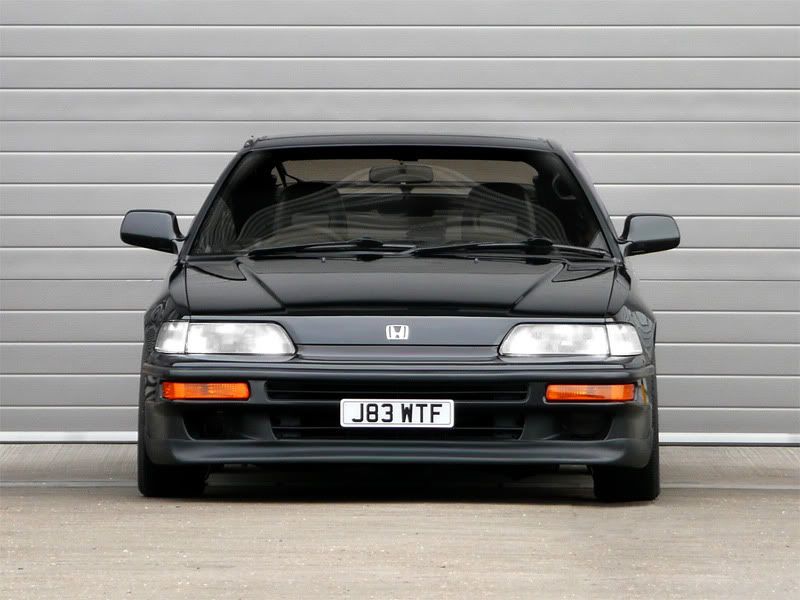
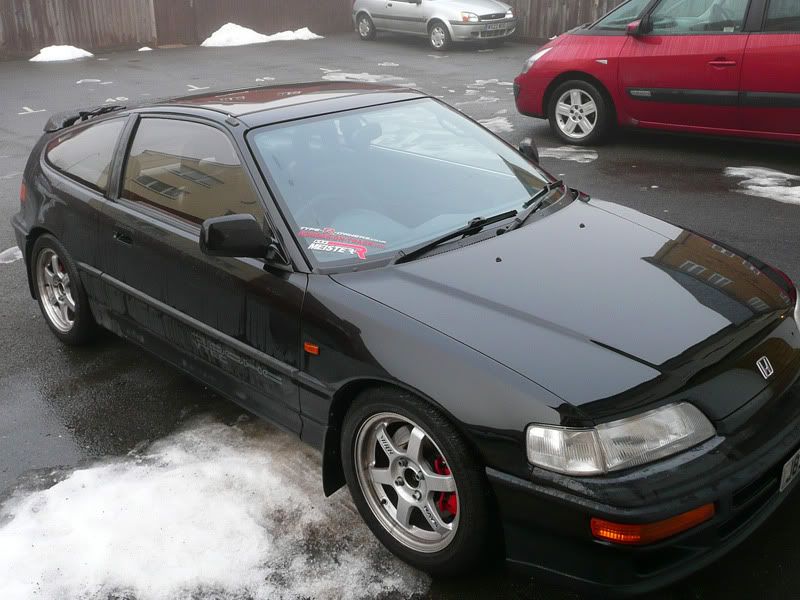
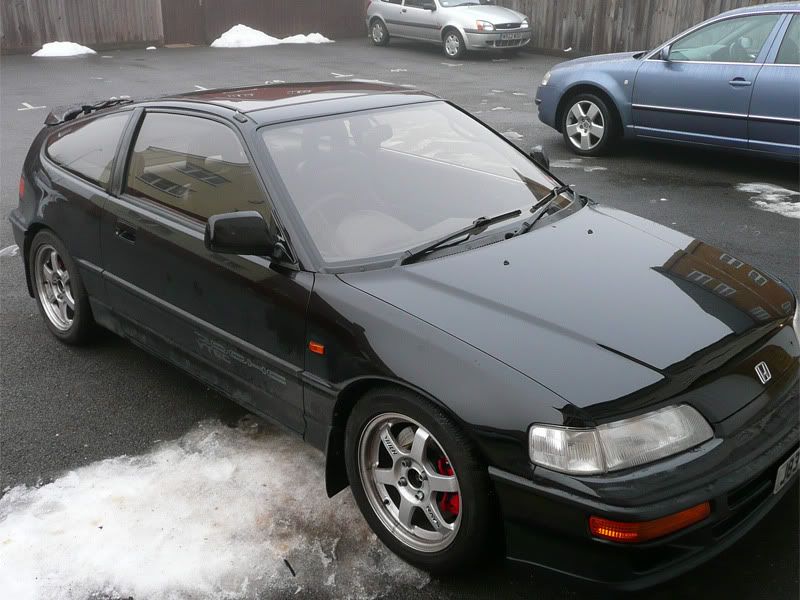
Project being the word, I've had nothing but problems with it since I bought it, but things are being fixed and I intend to bring it back to it's former glory. I bought it mid March 2010, it had been sitting around for a few years and looking a little sorry for itself. I bought it with a couple of known problems, firstly the fact you couldn't turn it off and awful suspension. The engine and gearbox were both strong and silky smooth, the bodywork was good, not perfect but almost rust free. The interior was one of the best I'd seen whilst trying to purchase.
Here's the spec, extras and a brief overview of what I've tackled in my ownership…
Factory spec
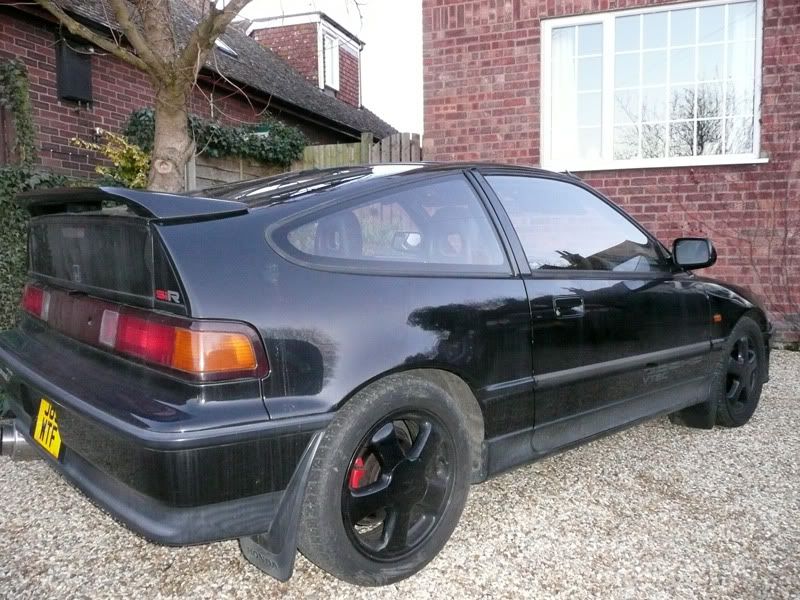
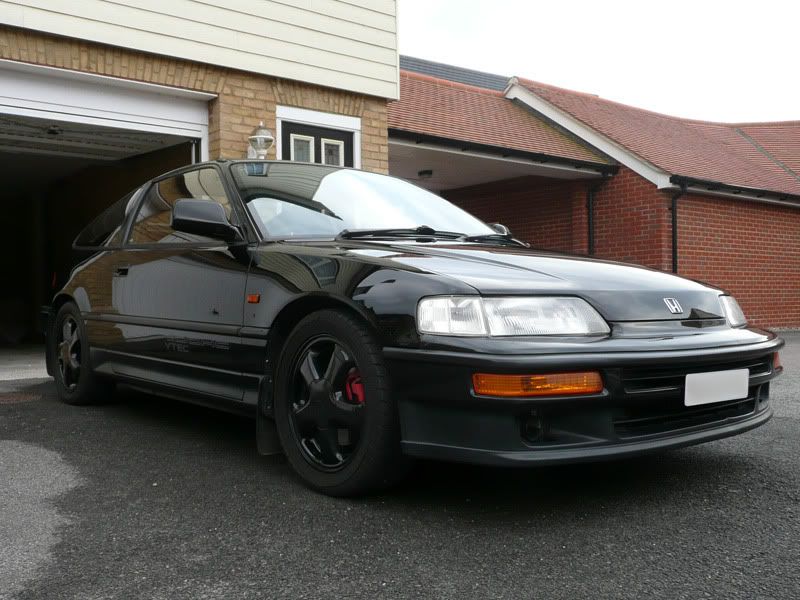
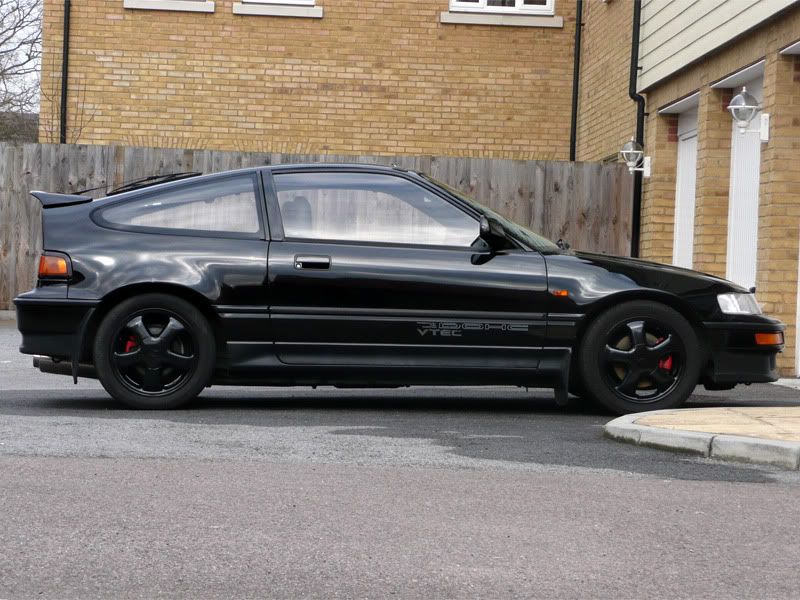
Flint Black
Glass Roof
Power folding mirrors
Climate control
Power steering
LSD (now gone)
Modifications
Engine/Intake:
• JDM B16
• ITR throttle body
• ITR cams
• Skunk 2 Adjustable cam gears
• Induction kit with cold air feed
• Tuned by DNR 179.5bhp @ 8k rpm
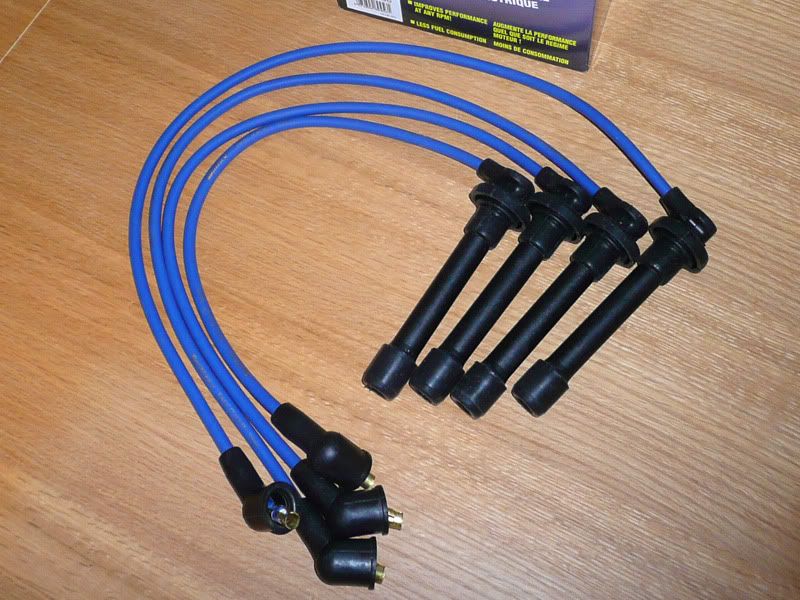
• Magnecor Electrosports 80 ignition leads
• Tegiwa aluminium radiator
• Exedy Clutch
Exhaust:
• 5zigen 4-2-1 manifold
• Decat
• Scorpion back box
Suspension & Bracing:
• MeisterR Zeta S coilovers
• Cyberspeed LCAs
• Eibach adjustable ball joints
• Eibach rear camber arms
• Tanabe front & rear braces
• Tanabe rear tie bar
• Geo setup by TGM, Fleet
Exterior/Wheels:
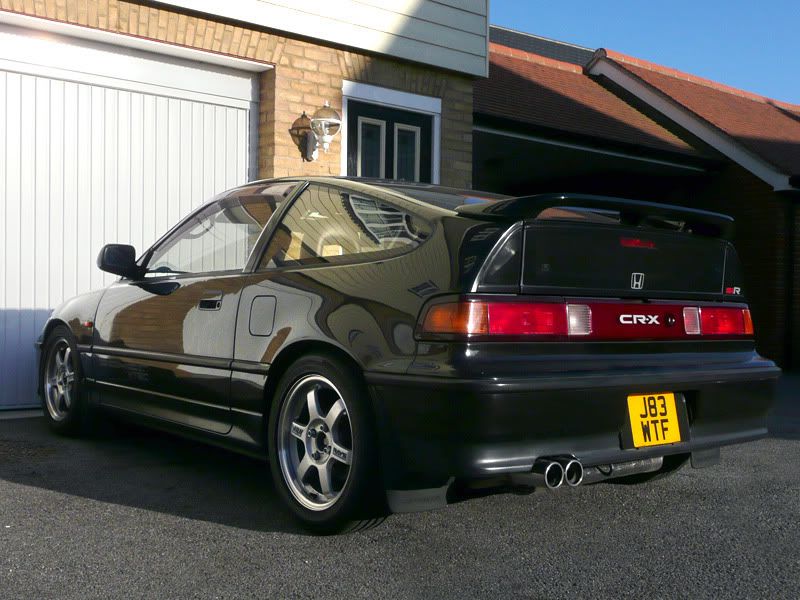
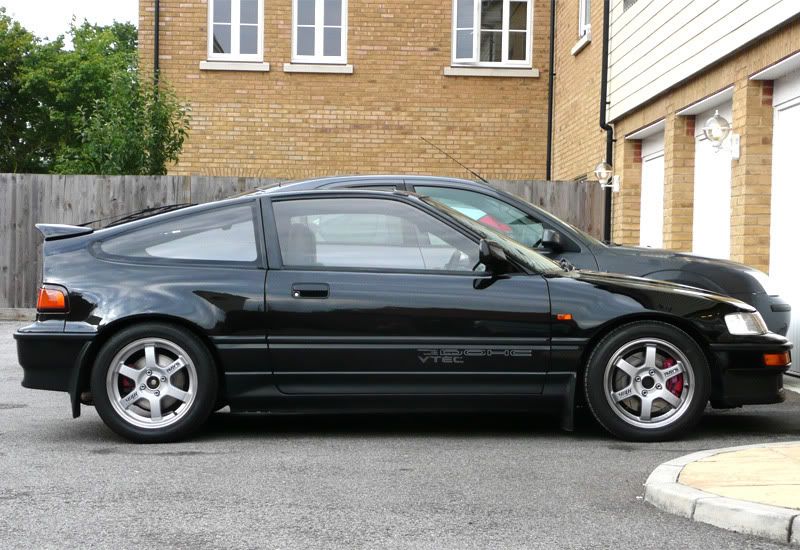
• Replica J’s Racing front lip
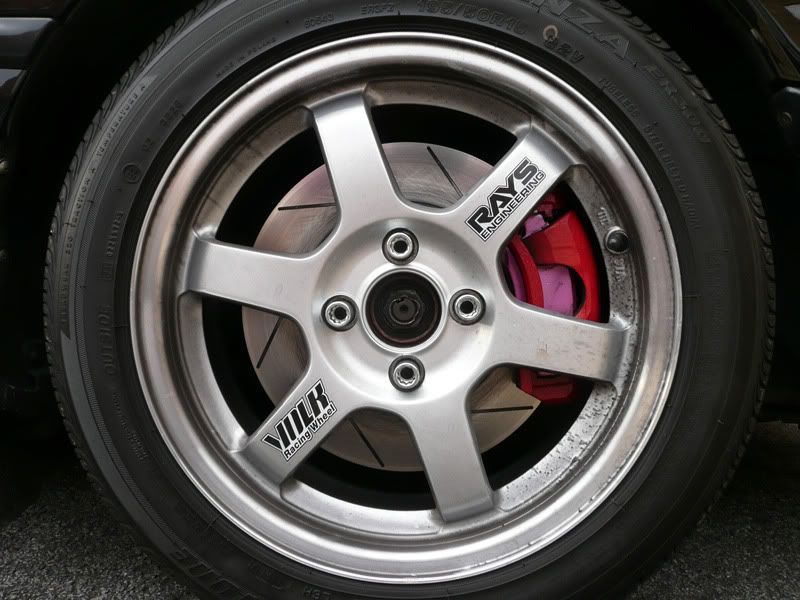
• Rays Volk TE37s 15x7
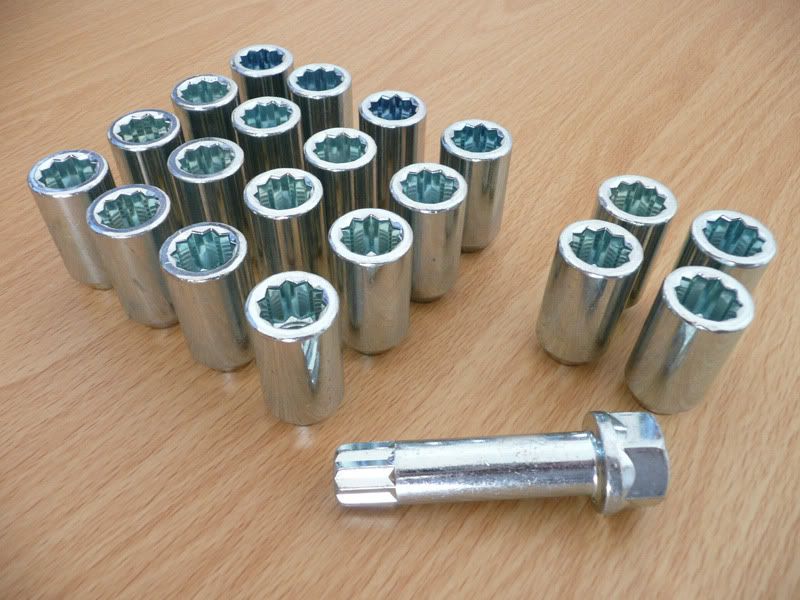
• Drop Engineering lug nuts
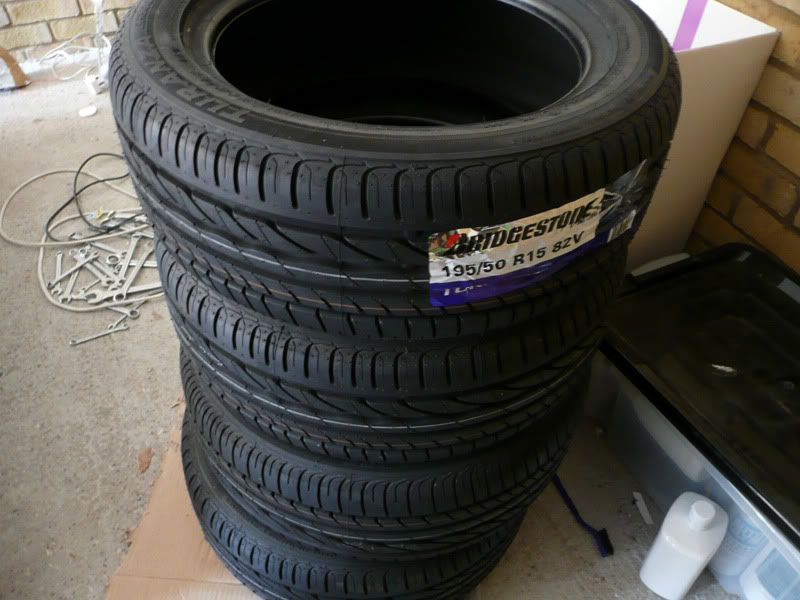
• Yokohama Advan Neova AD08s
Brakes:
• MeisterR big brake kit (286mm)
• MG ZS rear brake setup (262mm)
• Goodridge braided brakes lines
• Brembo LCF 600+ brake fluid
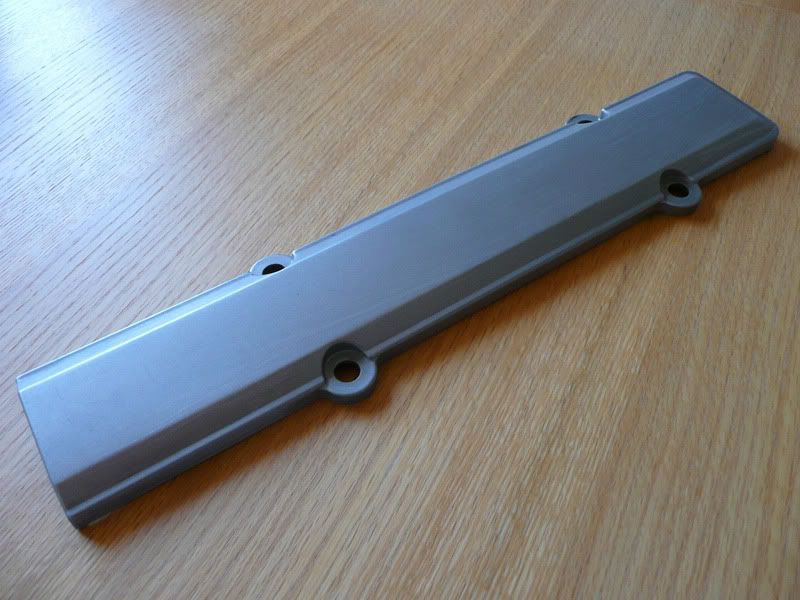
Engine Dress Up:
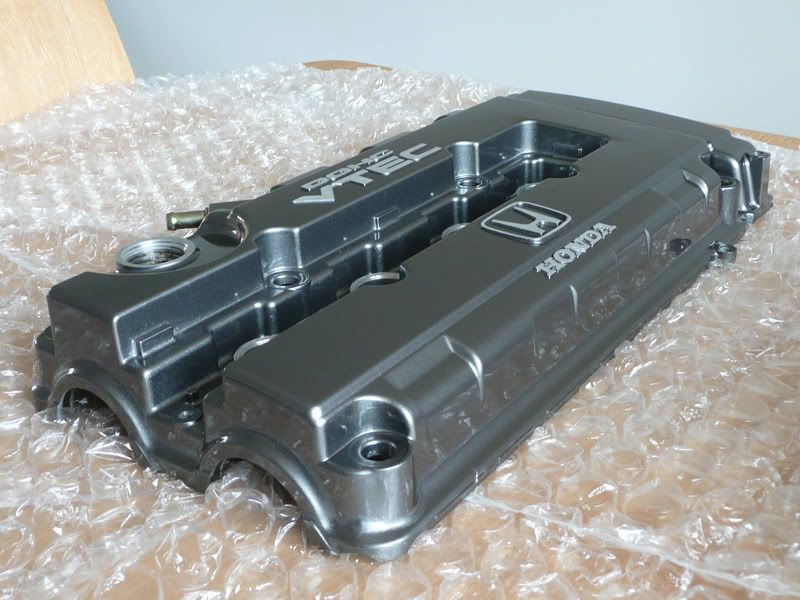
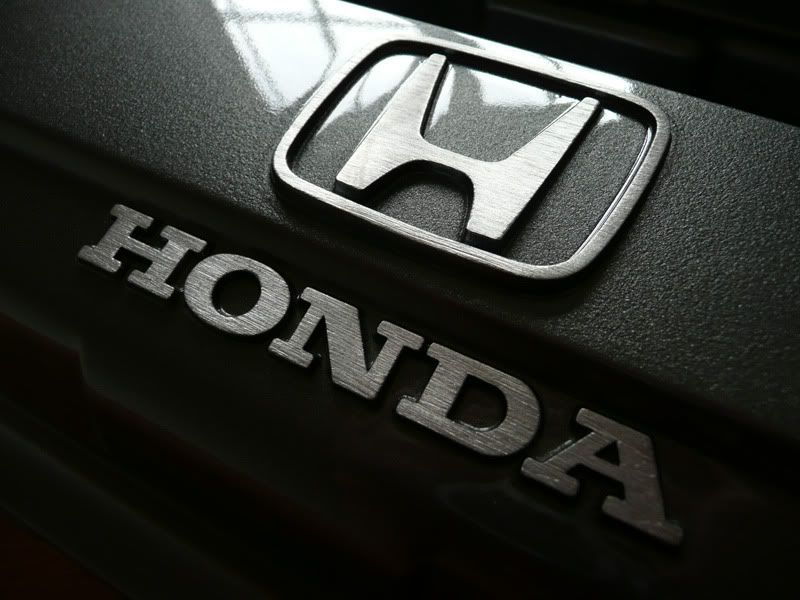
• Metallic grey cam cover
• Spoon socks
• Spoon radiator cap
• DC2 oil cap
Interior & Ice:
• Aftermarket steering wheel
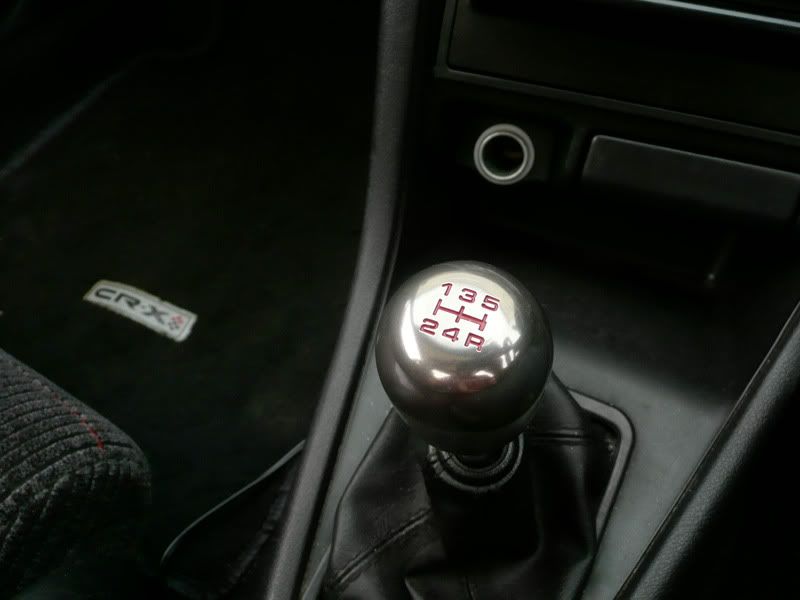
• DC2 gear knob
• Momo pedals
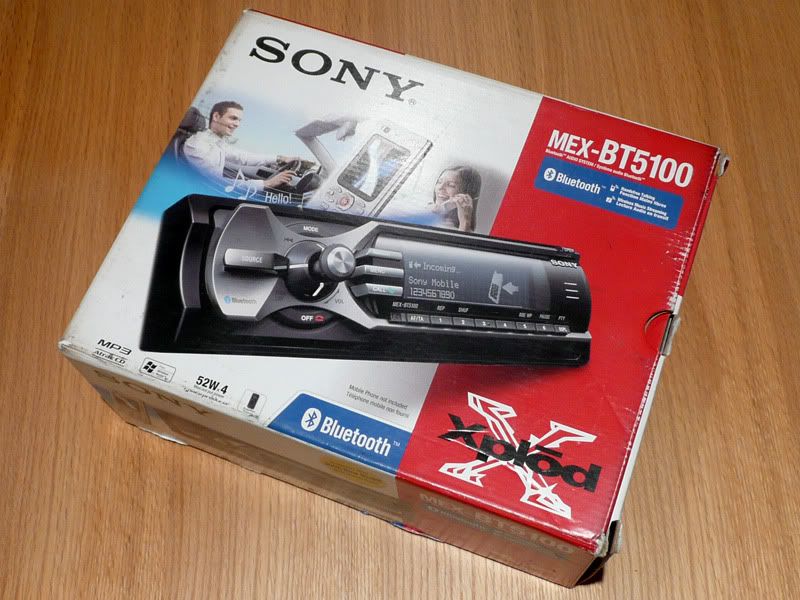
• Sony BT5100 headunit with handsfree and XA-100IP iPod controller
Misc:
• PIAA Xtreme white bulbs
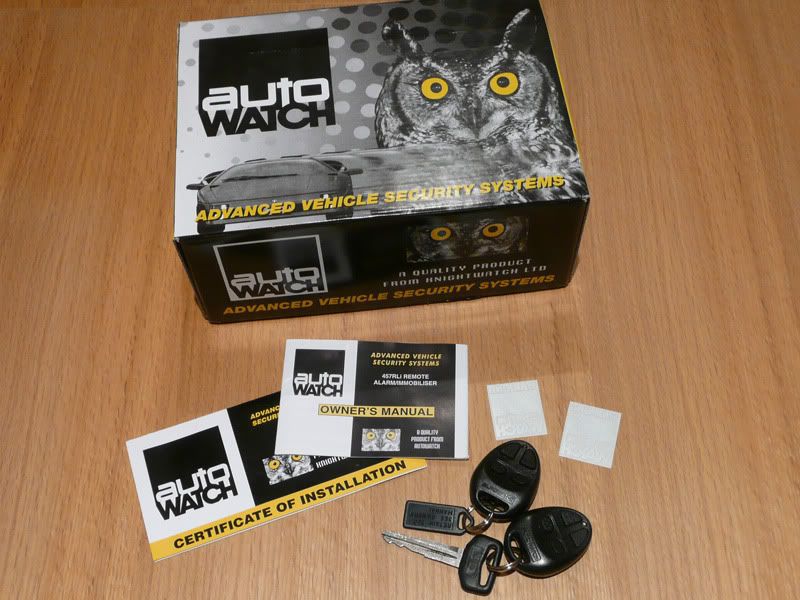
• Autowatch CAT 1 Alarm + RCL
• Weight reduction ~70kg (estimated kerb weight 940kg)
The build
The starting point
It had been sitting around for some time before I'd bought and looked rather unloved.
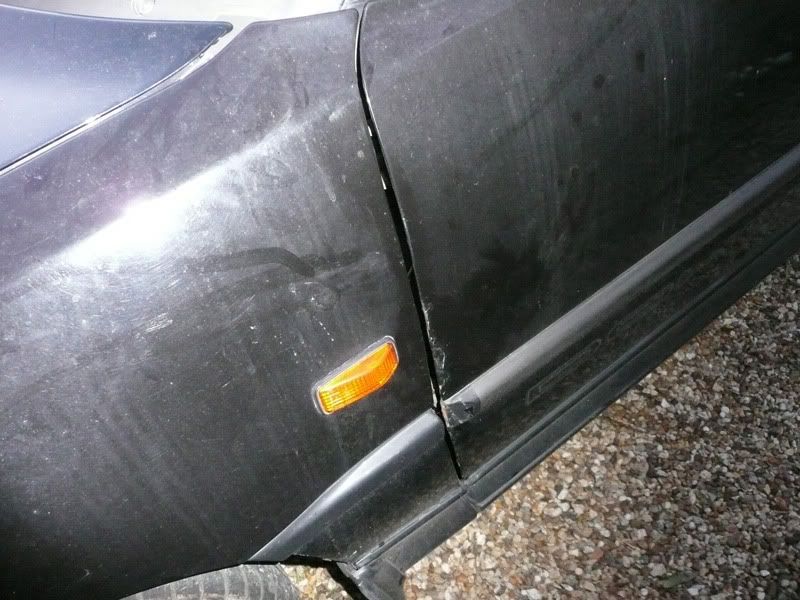
Some damage to wing and door, some evidence of a pretty poor repair.
30th March 2010: In car swimming pool
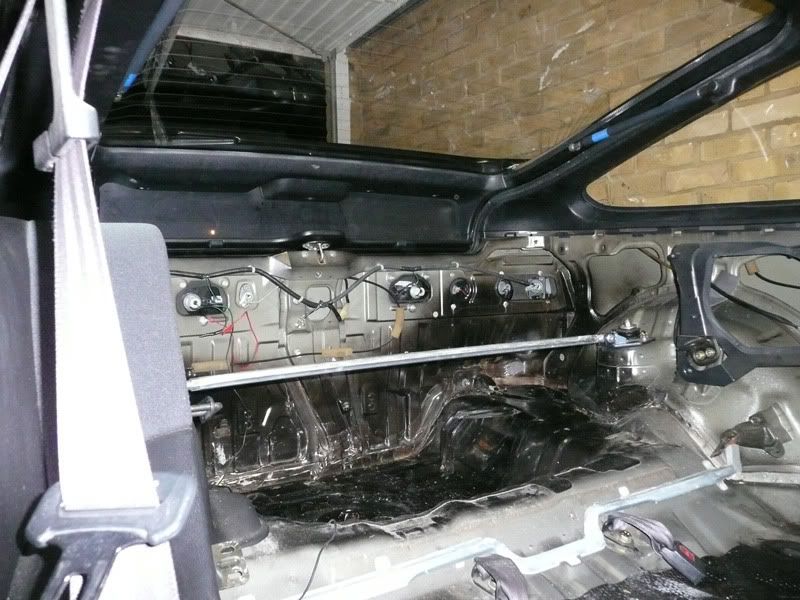
It's been the first real day the car has been sitting out in the rain. When I left work, I noticed a sloshing sound in the boot, after a quick inspection when I got home, it was clear the car had taken on a good bit of water...
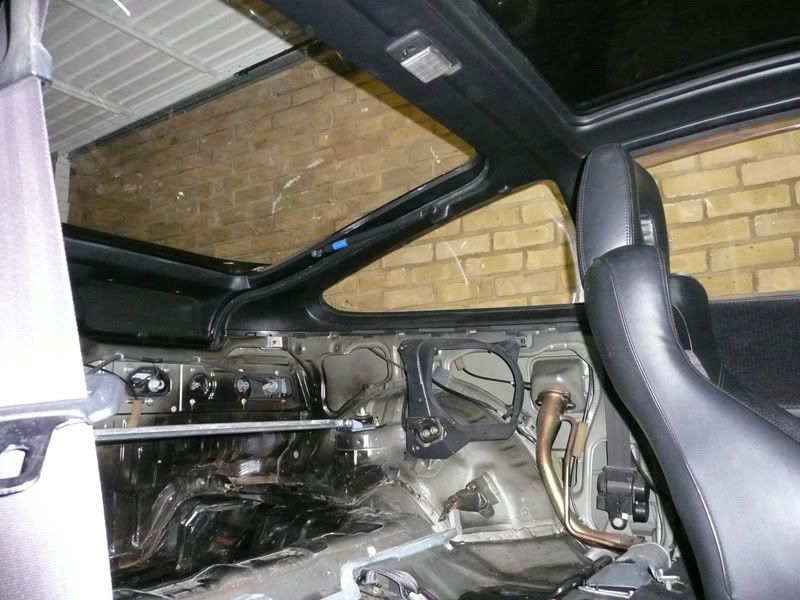
I've spent most of the evening grovelling around in my tiny garage/car trying to strip the interior out. I have most of it out, but didn't have time to see where the water was coming in. I'm hoping it's got nothing to do with the glass roof, but it's certainly coming in from high up.
The only pleasant thing that was achieved, was to find an annoying rattle that's been bugging me since I've had it, turned out to be a loose boot catch!
To be continued...
4th April 2010: First Big Clean
The first clean and polish rendered some pretty good results…

6th April 2010: Alarm
I first thing I had to address was being able to turn off the car with the key I got an alarm installer to come and have a look as I did suspect it was the alarm. That was very quickly confirmed and he managed to disconnect it with relative ease. He came back a week later and tore out the amateur install and fitted a Autowatch CAT1 alarm.
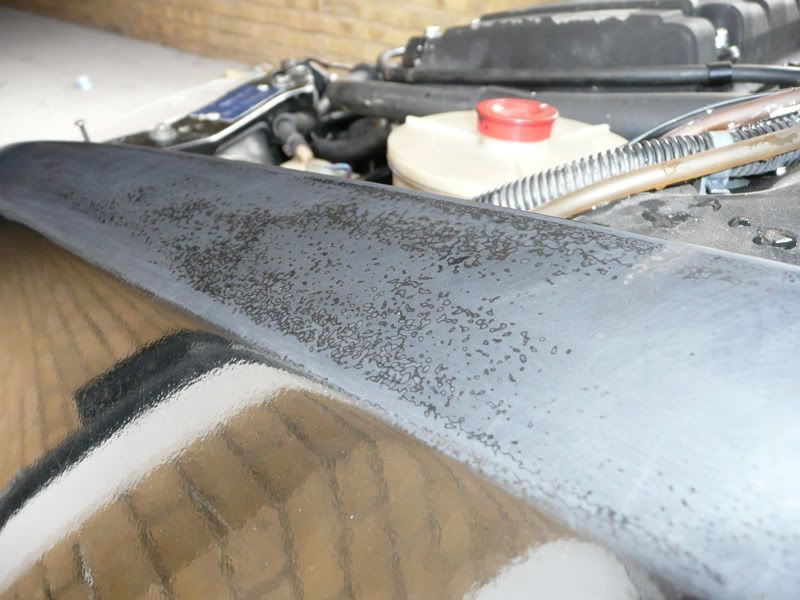
10th April 2010: Some bad news
I took it down to TGM sport racing where I previously took my DC5, for a full service and once over. As soon as it was lifted in the air, my heart sank, the whole belly of the car was covered in oil, I had noticed a few oil patches beneath the car previously but didn't realise the scale of the problem until then.
7th May 2010: All fixed and an empty wallet
After spending 4 weeks at TGM, I've finally got my car back, I picked it up from TGM Friday evening, much to the relief of Tom. I've been driving him nuts since it's been there...
The work carried out - Initially, Tom suspected it might just have been the diff bearings and seals, but after replacing them, there was still a bit of play in the o/s driveshaft. Luckily one of Tom's guys had a gearbox lying around so ended up swapping the diff over, as well as the casing (mine had a damaged front mount). He also swapped the 5th gear/reverse syncro as it was better than mine.
As the gearbox was out, it was silly not to change the clutch, so this was replaced with a new 3 piece Exedy clutch kit. The rear engine mount was broken so this was replaced also...
The gearbox feels great now, tbh it was pretty good before despite the problems, hopefully I wont have to worry about anything gearbox related for a very long time.
I went to a Norwich Honda meet the following day, and it was the first bit of fun I've had with the car. Much to my relief it behaved itself and seemed to keep up with the rest of the pack rather well.
I took a couple of pics on the way home this evening, most turned out pretty carp, but thought this was pretty cool...
14th May 2010: Sony BT5100 headunit install + door solinoids
I bought this headunit from a member on TRO. I'm chuffed to bits with it, it has bluetooth for hands free talking and wireless music streaming. I've also just purchased an iPod adaptor for it, which I'll fit at a later date.
14th May 2010: Water tight + boot struts
I worked out water was coming in through one of the roof seams. A little sealant soon sorted the problem out and I was able to put the interior back into the car after being out for several weeks. The instant refinement, was very welcome. I also fitted some replacement boot struts, another welcome addition, meaning I wasn't risking being decapitated each time I went into the boot.
22nd May 2010: Wiper Stalk Refurb
Before and after…
23rd May 2010: Brakes Fail
After a productive last couple of weeks, fitting my new head unit, boot struts, installing door solenoids to have remote central locking and refurbing my wiper stalks, I've just taken it for a quick spin and the brakes have failed. I mean FFS.
25th May 2010: Brakes Fixed
The conclusion from the local garage is that the fluid had gone bad. So new fluid went in, it was also pointed out that one of my rear callipers had been binding, in-turn, ruining the one of the discs and pads. So new discs and pads were fitted and I was on my way… again.
2nd June 2010: New Suspension
Received these goodies through the post.
Meister R Zeta S coilovers (Fork rear to work with the LCAs)
Cyberspeed LCAs
13th June 2010: Suspension fitted, new problems + new bling
Well I took my car to TGM yesterday to have my cambelt, tensioner and waterpump done. I also took along my MeisterRs coilovers and Cyberspeed LCAs to be fitted if Tom had enough time to do them.
After taking many bits to pieces, he discovered my crankshaft pulley had a chunk out of it and would be best to replace that before changing the cam belt etc to avoid further labour charges. So ideally I need to find a secondhand replacement. My alt, a/c and p/s belts had seen better days, so these will need to be replaced too.
It was mentioned the cam belt did look in VGC with writing still emblazoned along it and the waterpump looked shiny and new. However as I have no history of it being changed, I feel it's better to be safe than sorry. So it's going back in on the 5th July.
As I had time booked, Tom went about fitting the coilovers and LCAs. He found a few more bushes that needed replacing in the process. He also run into issues fitting the RARB to the new LCAs, which I'm currently trying to resolve with Jerrick from MeiserR. After adjusting the ride height and setting the dampers to the middle of their range, I must say I'm very pleased with the results. My first thoughts are poop to a blanket.
It looks like this car is continuing to cost me a fair whack, however this was made slightly easier after it returned 40mpg on the last tank.
And I also picked up a bit of bling, as my rad cap had seen better days…
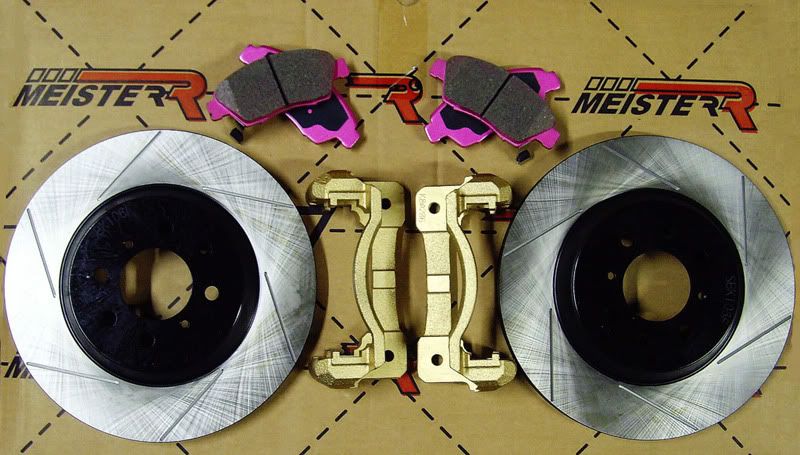
14th June 2010: MeisterR Big Brake kit
Still mentally scarred from the brakes letting me down, I ordered a few bits. These will be waiting for me at TGM when I return in a few weeks.
19th June 2010: DIY Paint Correction
Saturday I got brave with the paint. The upper part of my N/S wing and door had been resprayed badly at some point of it's life, the colour match was good but suffered badly from orange peel.
With a bit of 1500 grit, a soapy bucket of water, some Farcela G3/Autoglym SRP and a Argos buffing machine, I set to it.
Nasty orange peel
The wing partially sanded
The wing sanded.
The wing machine buffed
The door partially sanded

The door sanded
Sanded
First pass with buffer (G3)
Second pass with buffer (G3)

Final buff with Autogylm SRP

I'm very happy, but it could of went very wrong, as I've not really got any experience with this sort of thing.
23rd June 2010: New Boots and Nuts
I've got my new boots, and some new nuts today for the impending arrival of my new wheels… roll on the weekend.
26th June 2010: My new TE37's
I can't get over how light these things are! Just put one on the scales... 4.3kg! The tyres weigh far more than the wheels! I weighed them just before I put them on with brand new tyres and they weighed 12.3kg. The fat fives with shot tyres which I removed weighed just over 15kg. That's a nice 11 kg of unsprung weight gone.
28th June 2010: Radiator exploded
The radiator decided to explode on me. I've manage to patch it up for now, but have ordered a large Aluminium rad from Tegiwa. I intend TGM to fit it on my next visit.
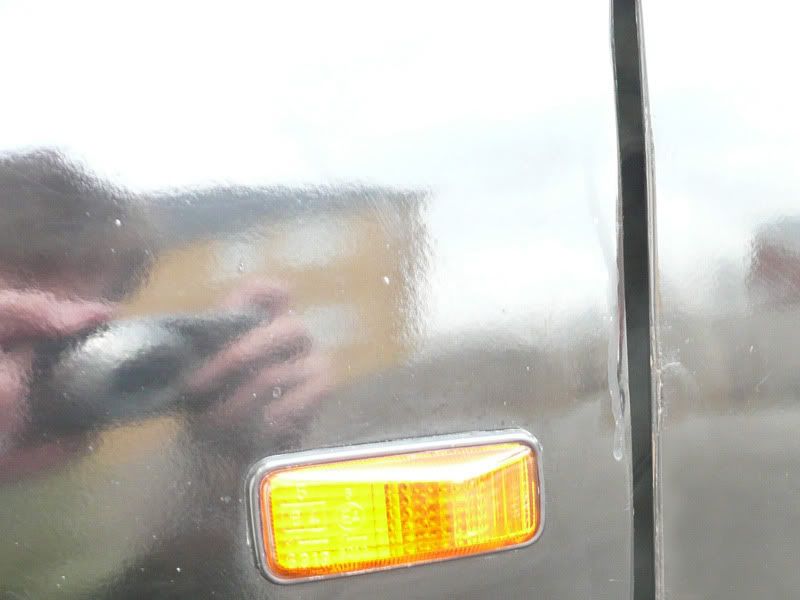
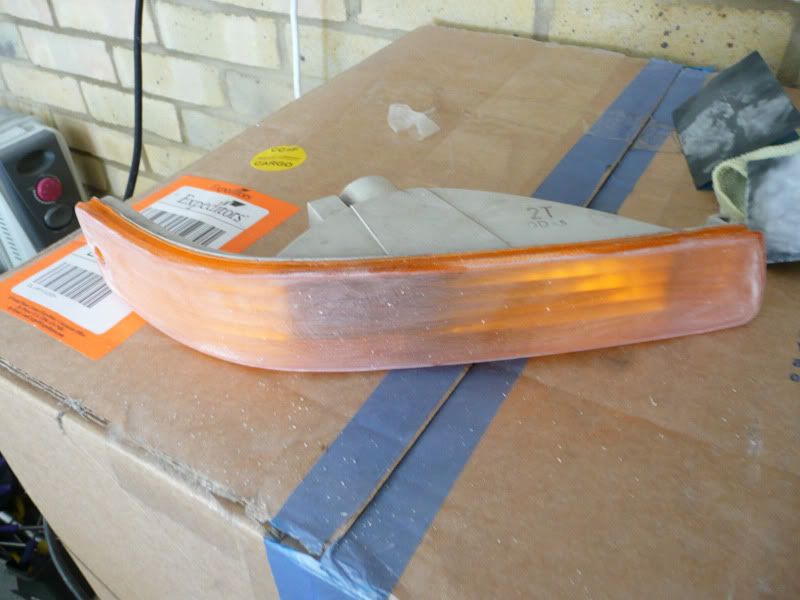
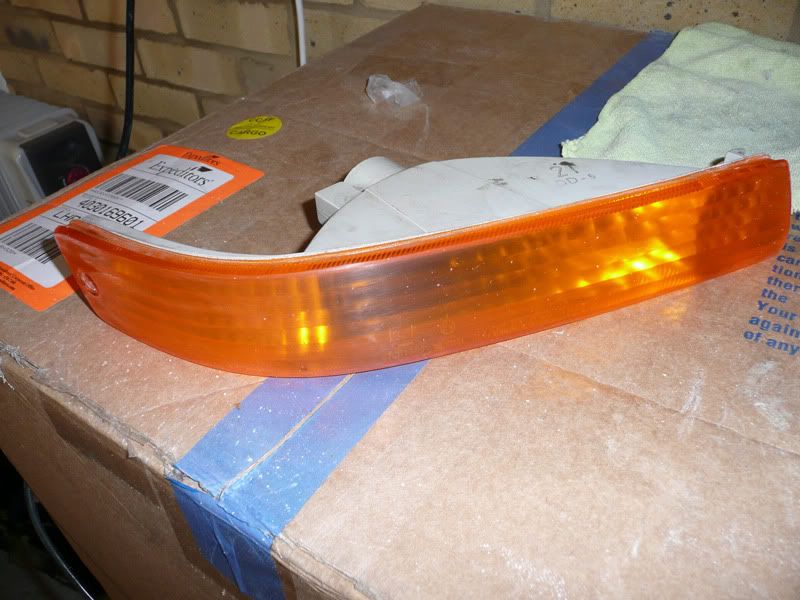
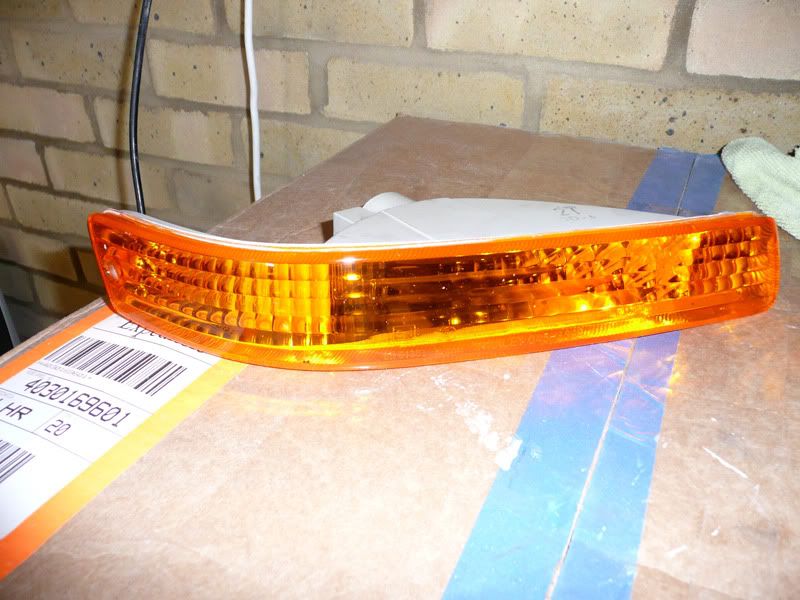
4th July 2010: Indicator refurb
I decided they looked a little flat, so broke out the sand paper and polish again.
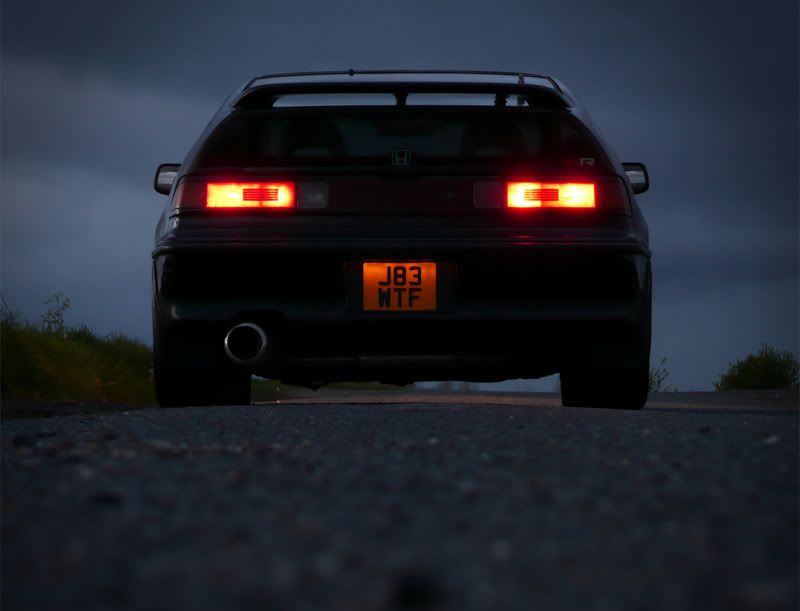
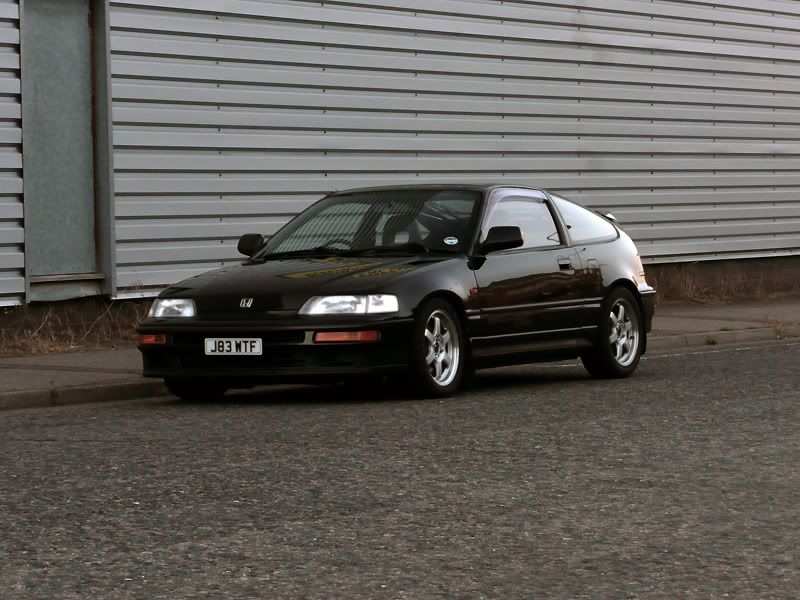
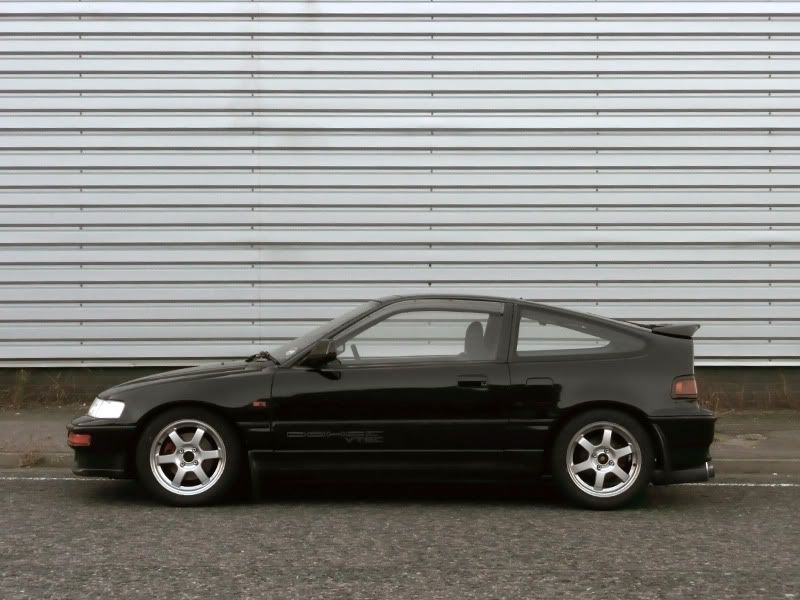
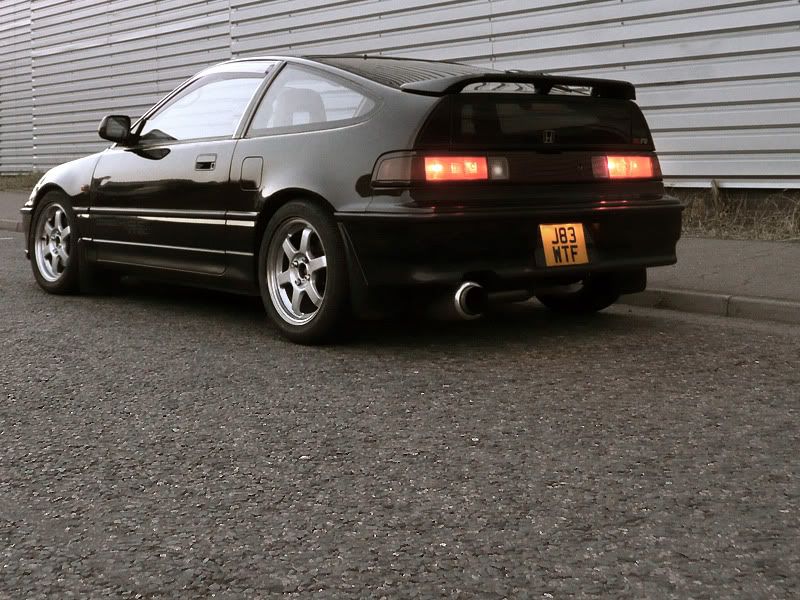
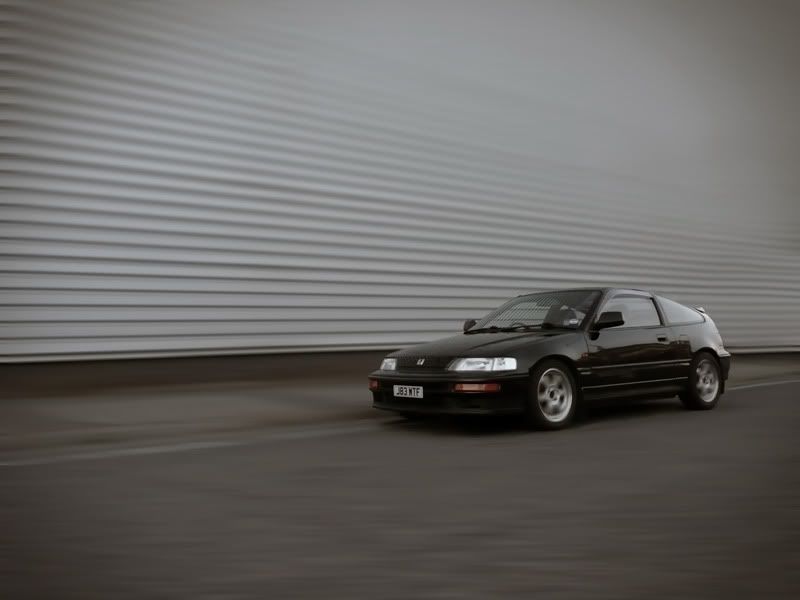
4th July 2010: Mini Photoshoot
I gave her a bit of a clean yesterday and did a little photoshoot.


7th July 2010: New bits
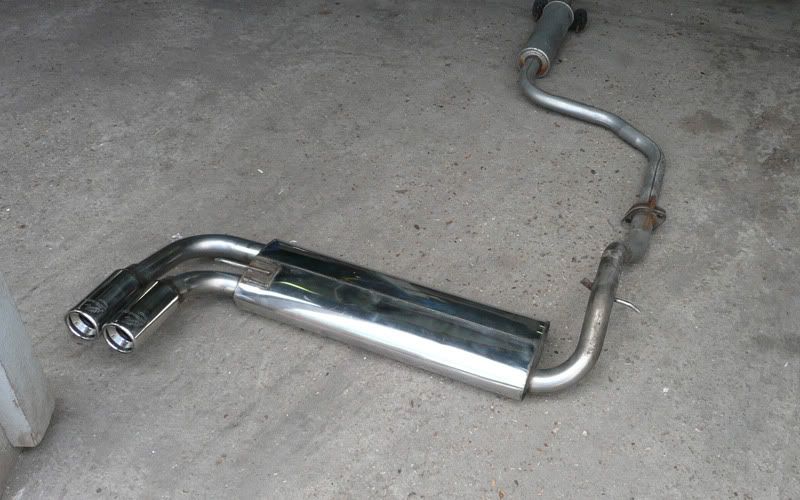
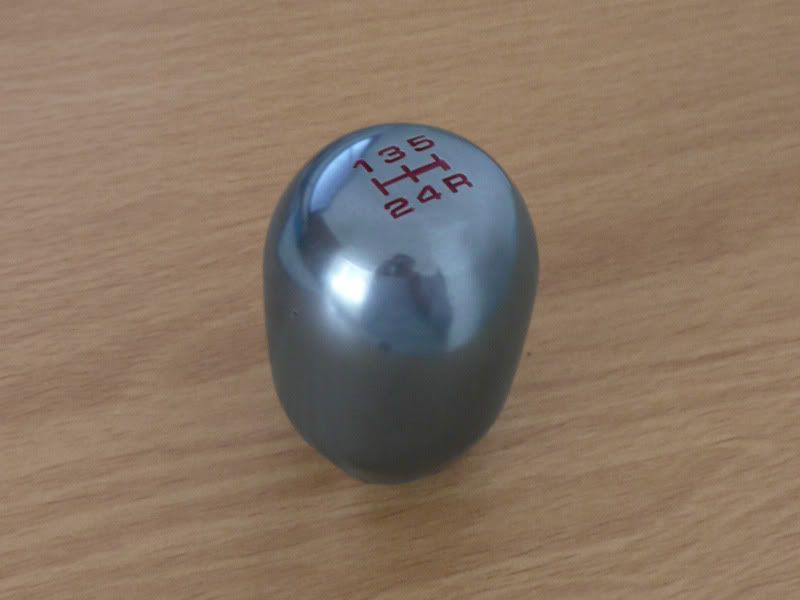
I picked up and couple of bits on the way to TGM this morning, a Scorpion exhaust and a DC2 gearknob.
Despite going down to get my brakes fitted, TGM had a few problems fitting the Meister R upgrade today, so we had to leave it for another day. They managed to put the exhaust on, I'm not 100% happy how it sits, but I'll be looking at that at a later date. Performance feels down slightly, but the noise (or shall I say lack of it) is much better. Makes a lovely roar in VTEC, much deeper than the Tanabe system. In appearance it looks 10,000% better IMO and overall I'm very happy.
Scorpion Exhaust and OEM centre section
DC2 Knob
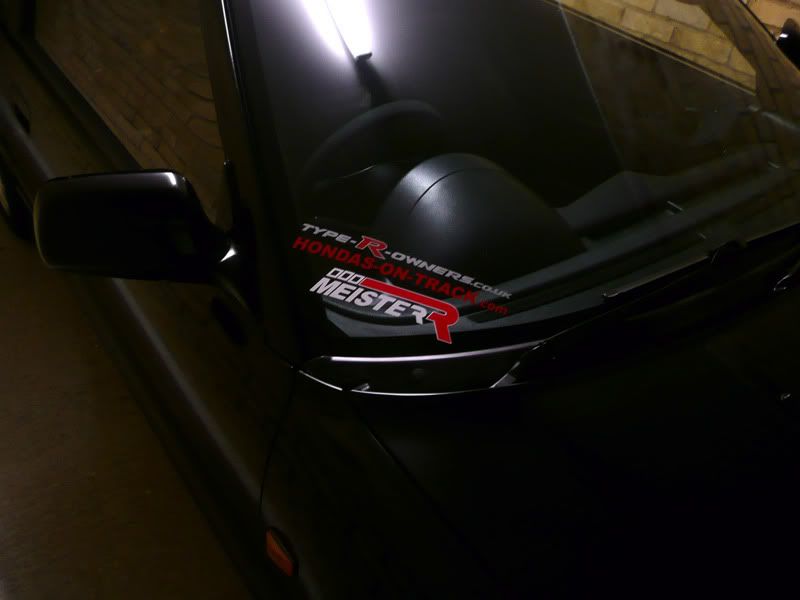
15th July 2010: New decals
I got hold of a CR-X vinyl for the rear light, which will do for now, but I have something much better in the pipeline... I also got some Volk Rays decals for the wheels, they're only replicas, but again will do until I get my wheels refurbed come springtime.
Pics, please excuse the dirt.
25th July 2010: Big brake kit(s) fitted
The last time TGM attempted to fit the MeisterR big brake kit to my car, they run into problems with differences in parts between the CR-X and the Civic (which the kit was designed to fit). Jerrick from MeisterR bought some Civic calipers and dropped them down to TGM, this allowed them to rob the parts they needed from the Civic calipers.
During the run up to getting my car to TGM, my rear brakes seized up again. It was suffering with a seized rear caliper. So with a brand new disc turning black on the outside from the heat, I decided to bite the bullet AGAIN and bought the MG rear brake setup. This consisted of secondhand calipers, carriers and some brand new discs and pads. Time will tell how suited they are to the MeisterR front brake kit...
Everything was fitted at TGM on Saturday, it's too early to review them yet as I've only driven it back from TGM and used them a handful of times. But if looks are anything to go by, then they should be excellent.
I can review the handbrake now though, it's amazing...
Some pictures (and yes my car is actually dirty):
Front brakes before

Front brakes after
Rear brakes before
Rear brakes after
And dragging an old photo out... before
And after.
The calipers need a bit of TLC, but with help from a Welsh friend, hopefully this will be sorted soon.
Got this on too.
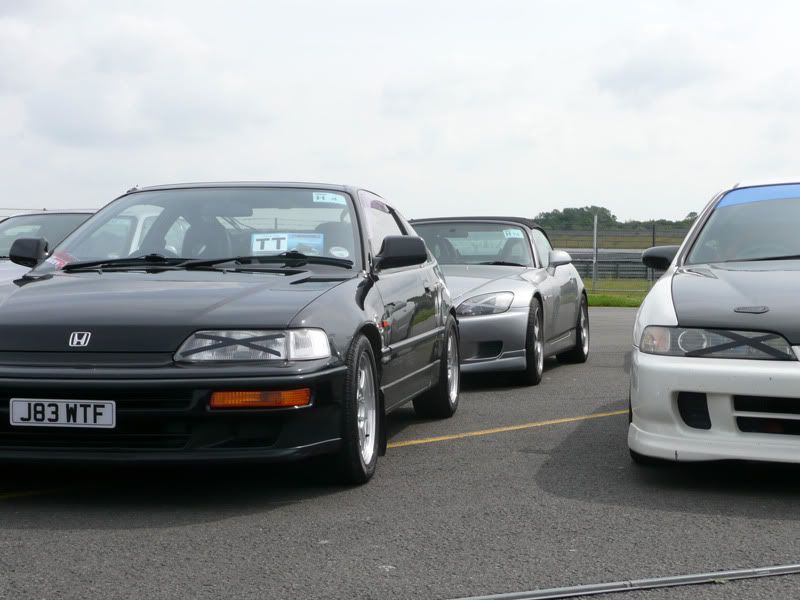
4th August 2010: 2 days of detailing for Japfest 2
Just a couple pics...
Firstly I enlisted the help of my housemate for the second day to help me prepare the car, here he is at work.

Shiny wheels
Shiny exhaust
Shiny car
And a few stickers applied for tomorrow
5th August 2010: Pictures from Japfest
23rd November 2010: General Update
The car has been pretty well behaved lately and sailed through it's MOT last month without any problems. Inevitably though the car has a new problem, the speedo has stopped working and I've got the CEL up on the dash (fault code 17 - Vehicle Speed Sensor). I haven't got round to having a proper look at it yet, however I'm hoping it's just going to be a loose connection, rather than a faulty VSS. So for the time being, I have no VTEC..!
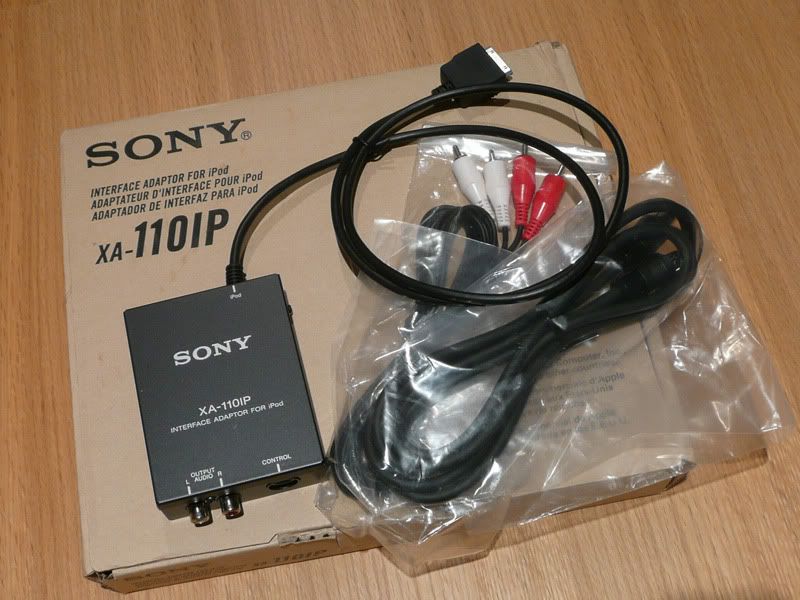
On a more positive note, I managed to install my iPod adapter and rewire my aerial at the weekend, so at least my journeys aren't totally boring.
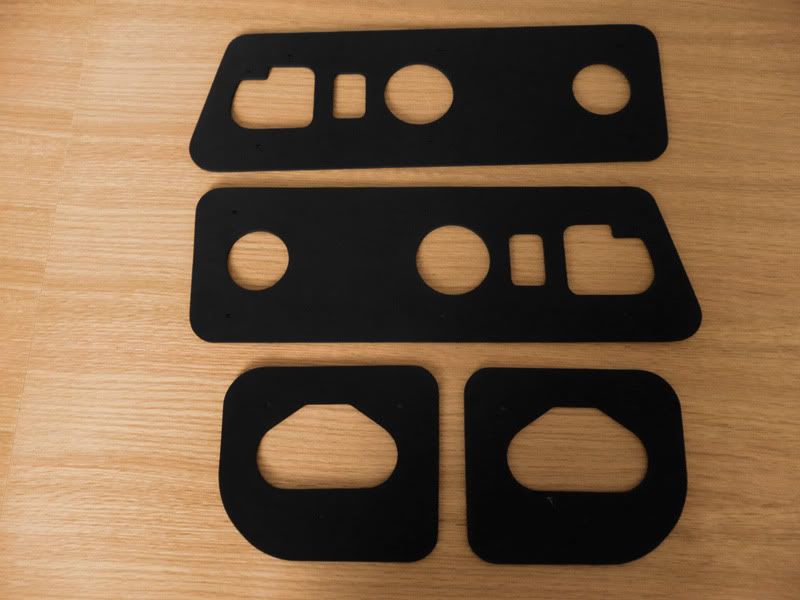
Back on a more negative note, my boot is still getting a bit of water in it, it's definitely getting in through the rear lights. My offside light has had half the fixings snapped off it, so I've purchased another. I've also bought some new rear light seals which I hope will solve the problem once and for all (well for a few years anyway).
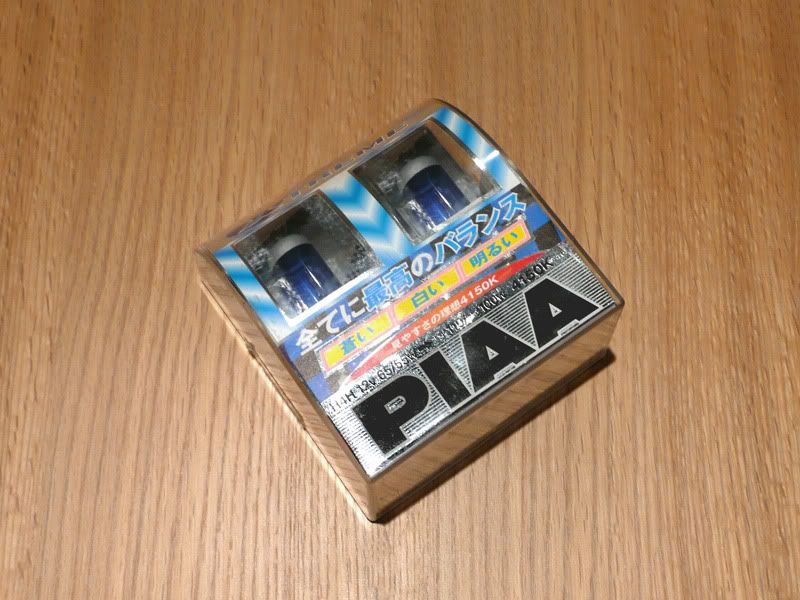
Now the days are silly short, I find myself driving round in the dark a lot, with candles for headlights, so thought I get hold of some better bulbs. Unfortunately my trip to Halfrauds yielded no results as the bulbs are pretty unusual (H4H fitment), so had to splash out and buy some PIAA 'JDM YO' bulbs. After successfully fitting the first one, I moved onto the second one, only to find an ordinary H4 bulb in there, FFS. Someone has obviously modified the headlight to accept a H4 bulb, so I'm now left with the dilemma of either, leaving it bodged and buying a uprated H4 bulb, try to revert the modification or replace the headlight unit altogether.
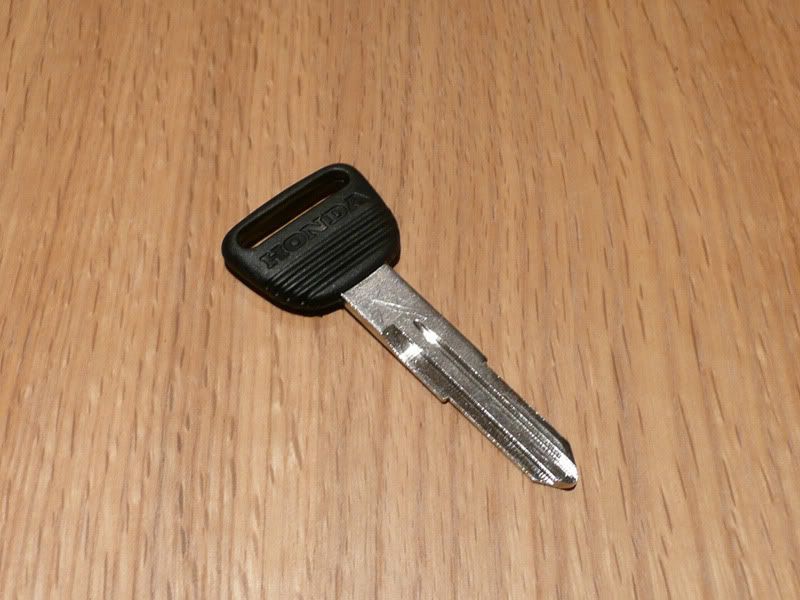
I got a new spangly key, as I've only ever had one key since I bought it, which was pushing my luck should I of lost it.
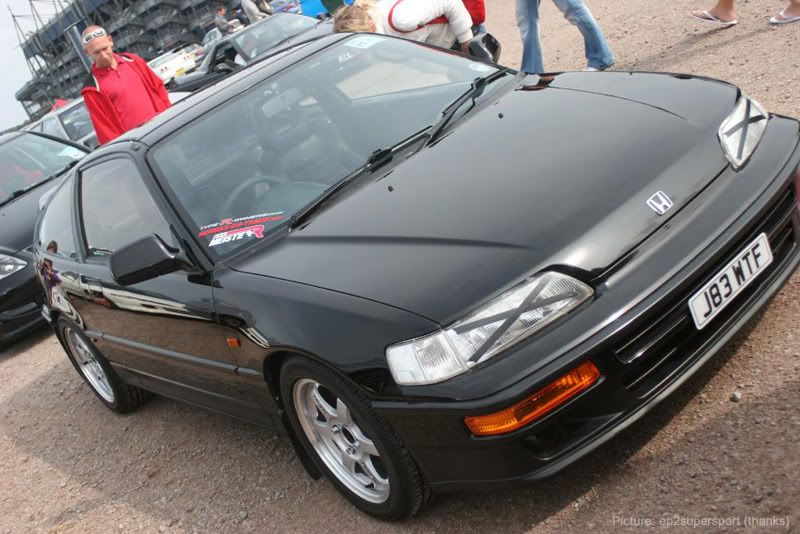
Finally, a little birdy told me my J's Racing replica lip is ready for delivery. I can't wait to get this on, it's one of only a few external modifications I want to make. Here's a shamelessly stolen picture of a J's lip fitted to another car. *EDIT fitted on my car***
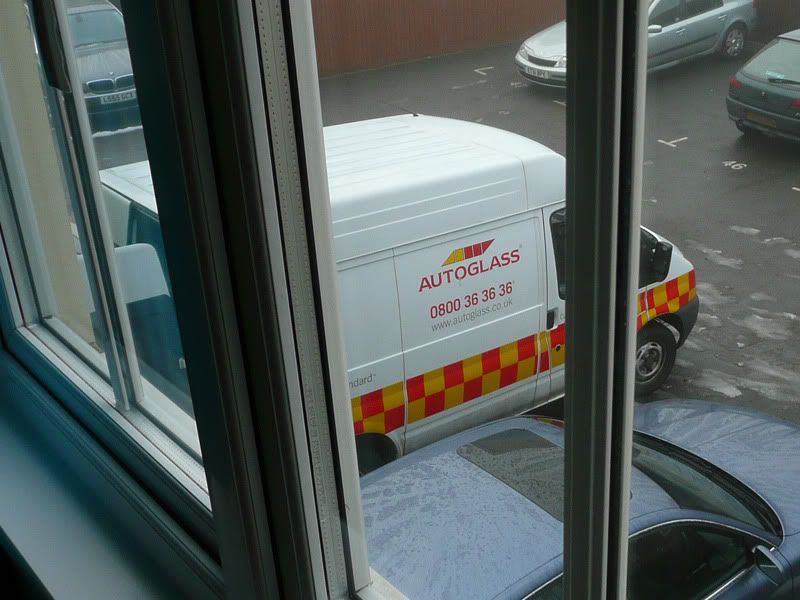
29th December 2010: New Windscreen fitted
Not the most exciting of updates, but little things please me. My car originally had a green/blue windscreen fitted, however it stood out like a sore thumb against the rest of the bronze glass.
I picked up a couple of stone chips back in the summer, but during this recent cold spell, one of them decided to crack wide open. I was happy to swallow the £70 excess and wait 3 weeks for a bronze one to arrive off the boat.
The Crack
Green/Blue
Autoglass also fitted the trim surround, which I was previously missing altogether, looks a lot cleaner now.
Bronze
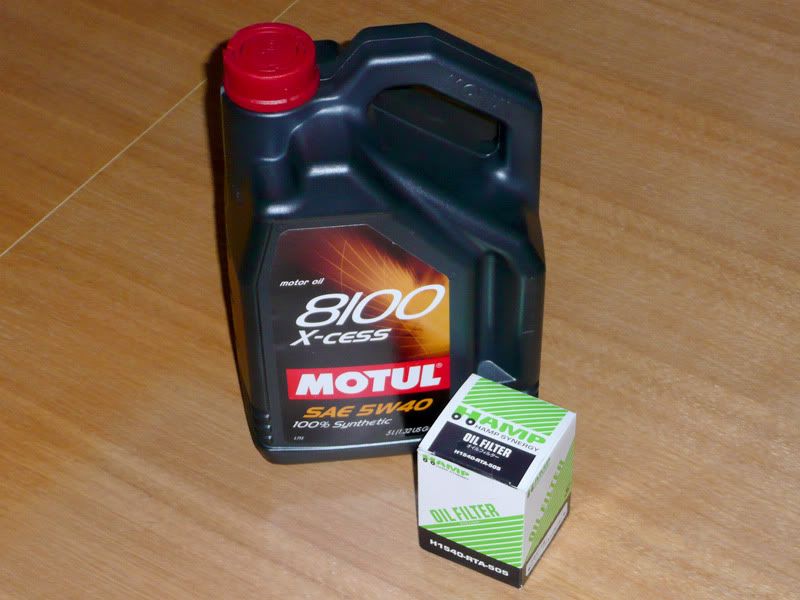
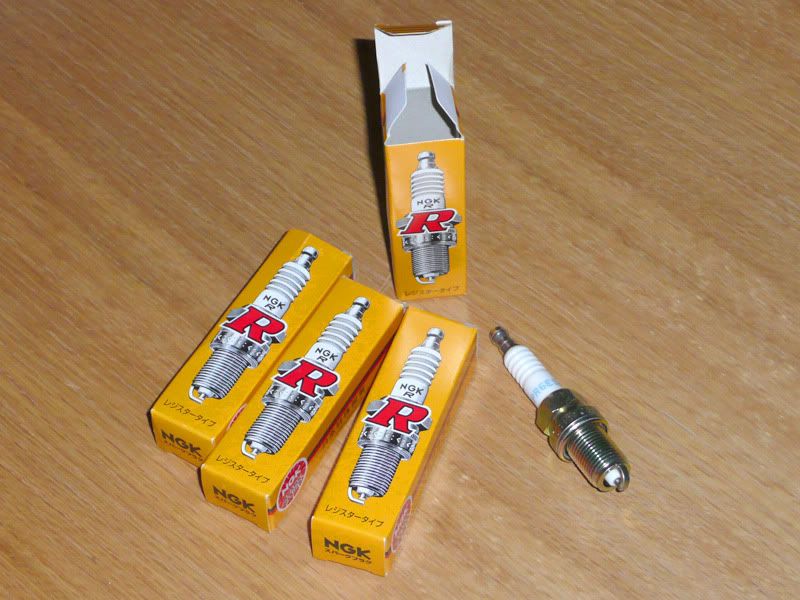
UPDATE: Bits and Bobs 01/04/11
Not really an update of sorts, I just wanted to reassure people I was still throwing money away. I've been collecting quite a few bits and pieces over the last few months and most of them should be on the car in the next few days.
I have it booked in for a service on Monday, just having the general routine bits fitted.
Motul 8100 Engine Oil
Hamp Filter + sump washer
NGK Plugs
Splitfire Leads (though I'm 99% sure I've been supplied the wrong ones)
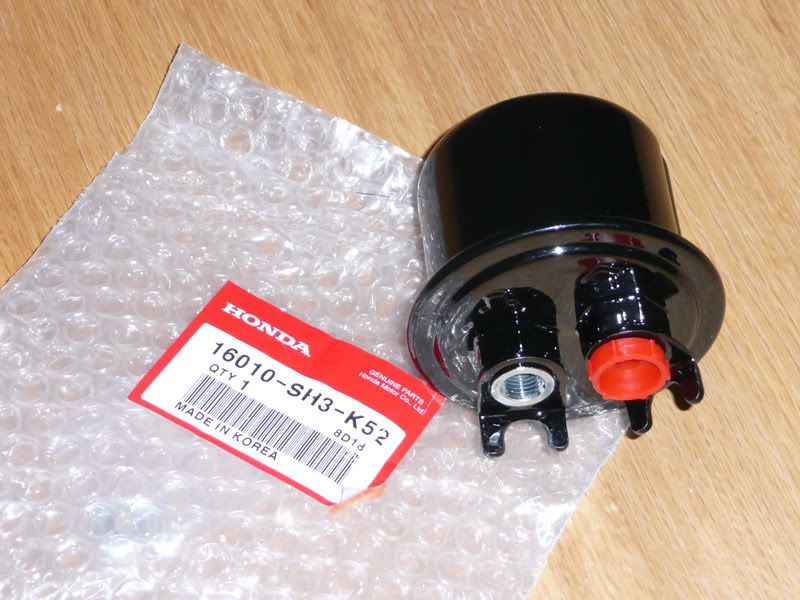
Honda Fuel Filter
Secondly, it looks a state under the bonnet, so here's a few items to begin to remedy that, including a few to stop some minor oil leaks
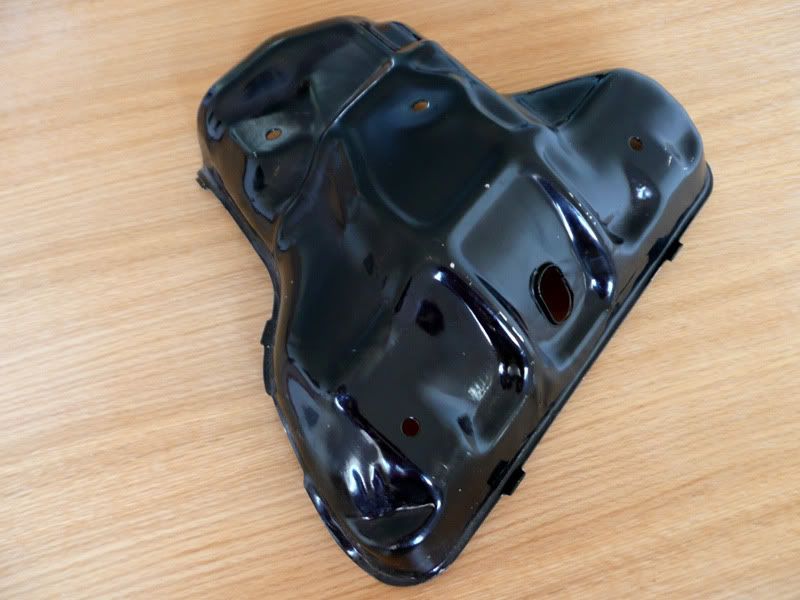
Refurbed Cam Cover (From Bren)
Replacement Plug Cover
Rocker Cover Washers
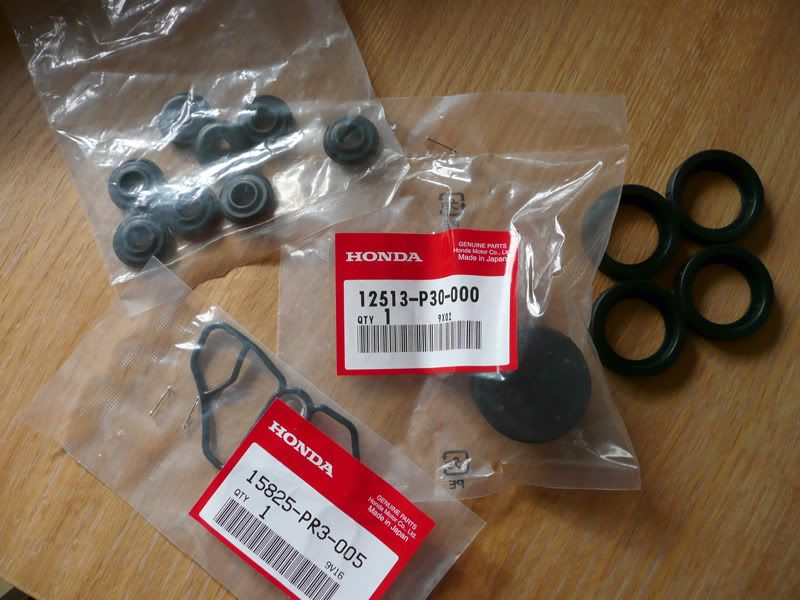
Plug Seals
Cam End Seal
VTEC Solenoid Gasket
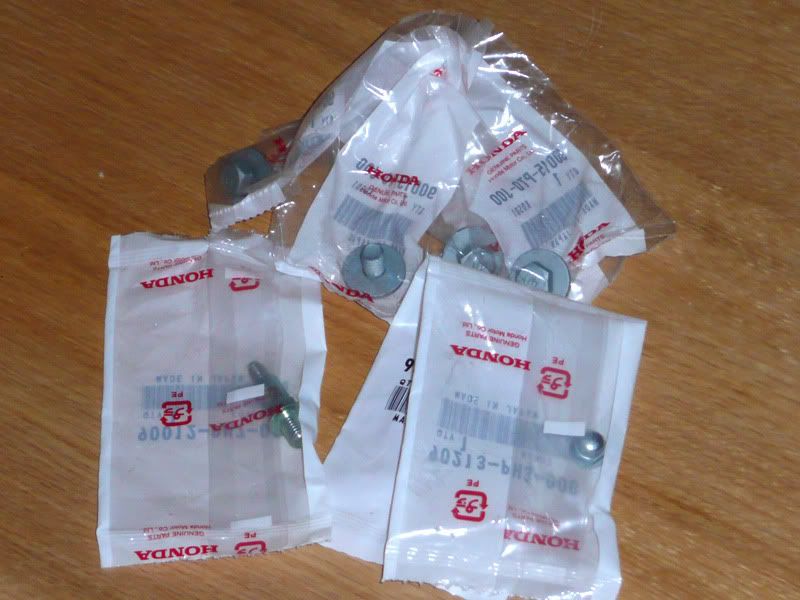
A few nuts and bolts
Exhaust Manifold Shield
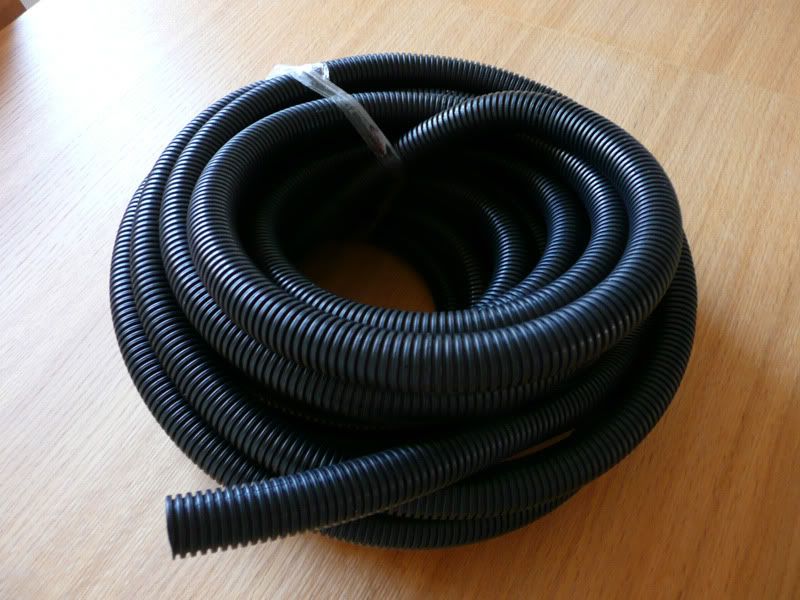
Black Conduit to dress the wiring up a little
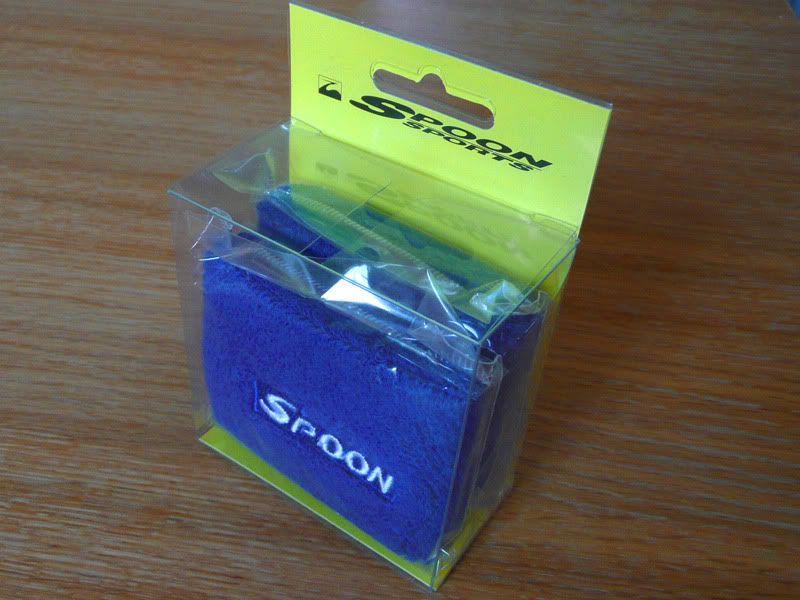
Spoon Socks
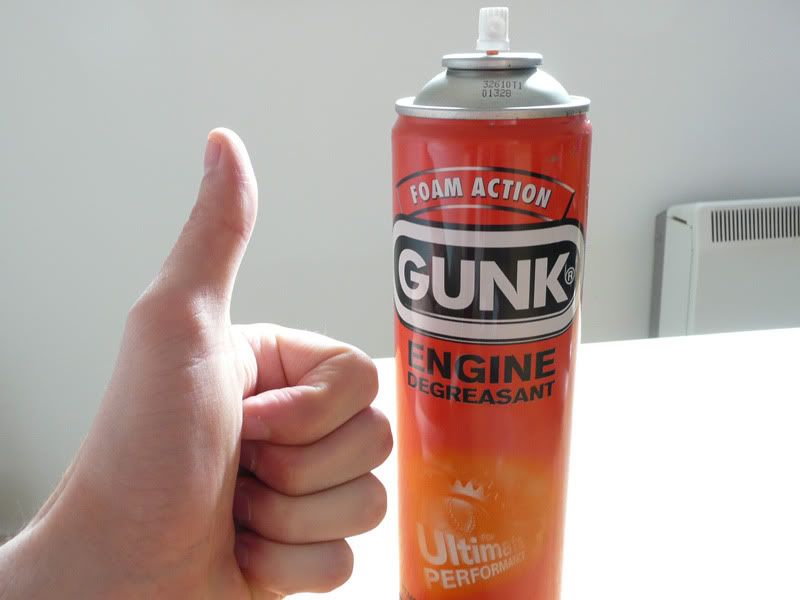
Gunk Degreasant
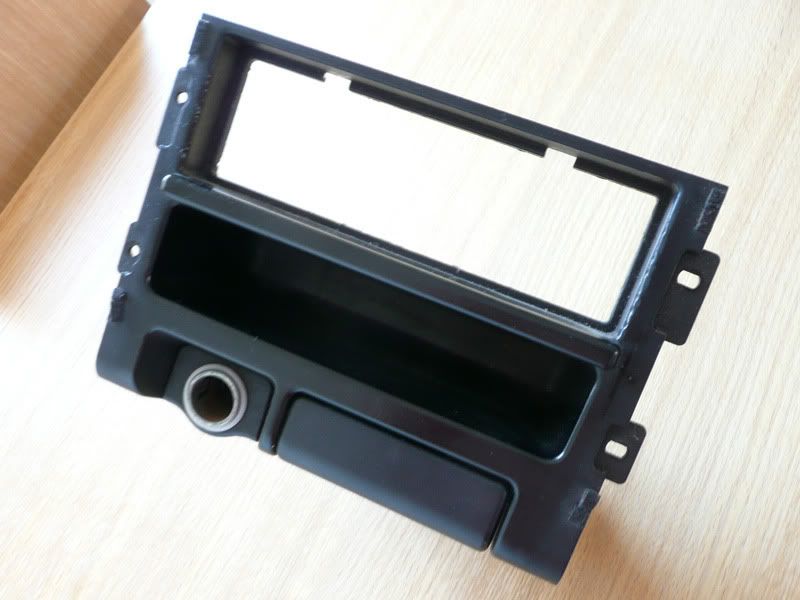
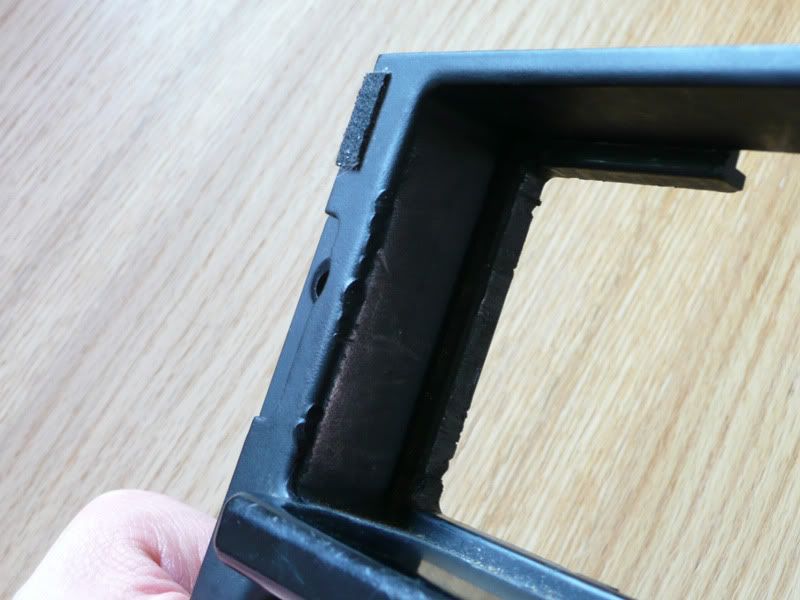
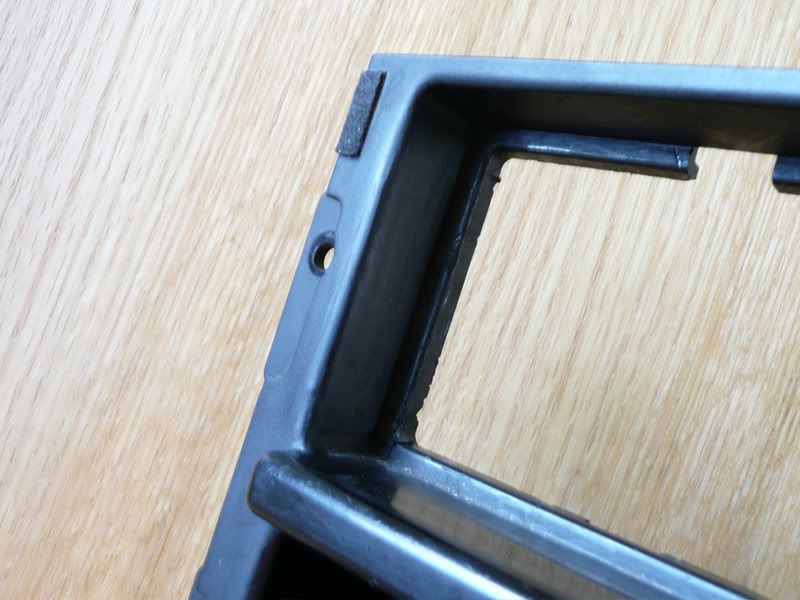
I bought a secondhand centre console from Ebay to replace a bodged double DIN to single DIN conversion. Trouble is when it turned up the plastic was badly damaged where someone had obviously removed a hifi when a large screwdriver. But with a lot of perseverance I got it looking 100 times better.
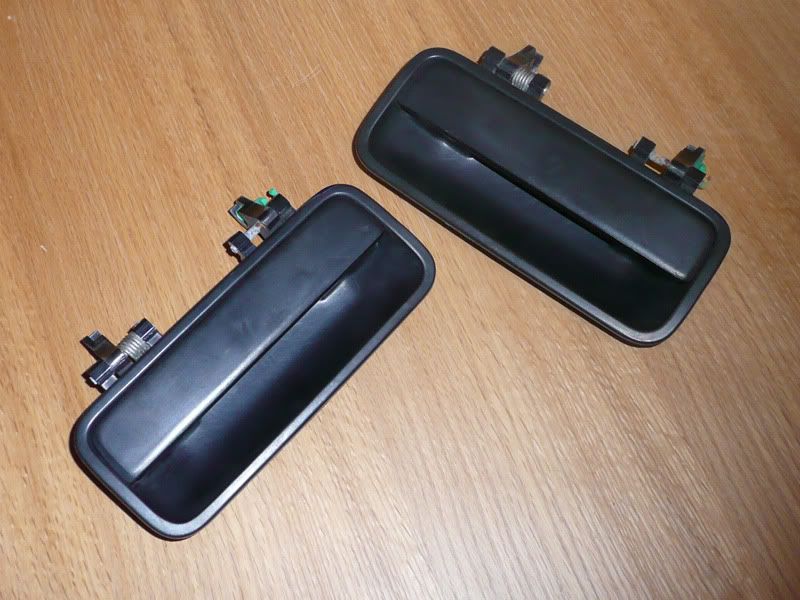
Thanks to the 90's Honda/Rover collaboration lockless handles are available (rear Rover door handles), I don't intend to fit these particularly soon, as they need to be sprayed, but I'm looking forward to getting them on.
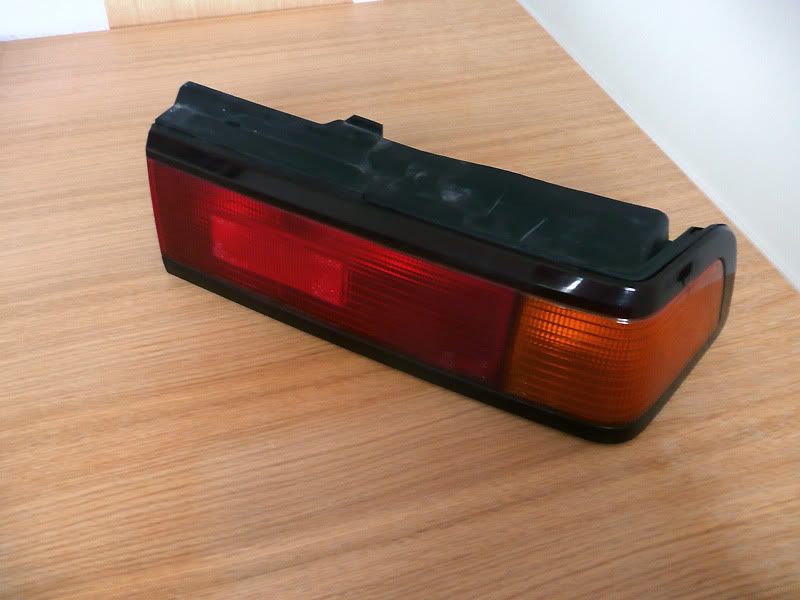
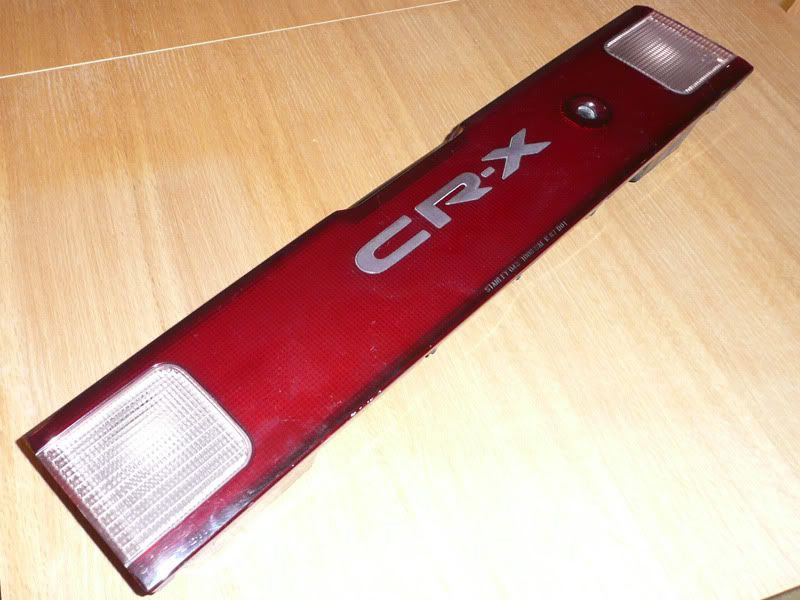
JDM rear light cluster, twin reverse lamps and original raised lettering. It needs a good buff to remove the surface scratches, but it's in great condition.
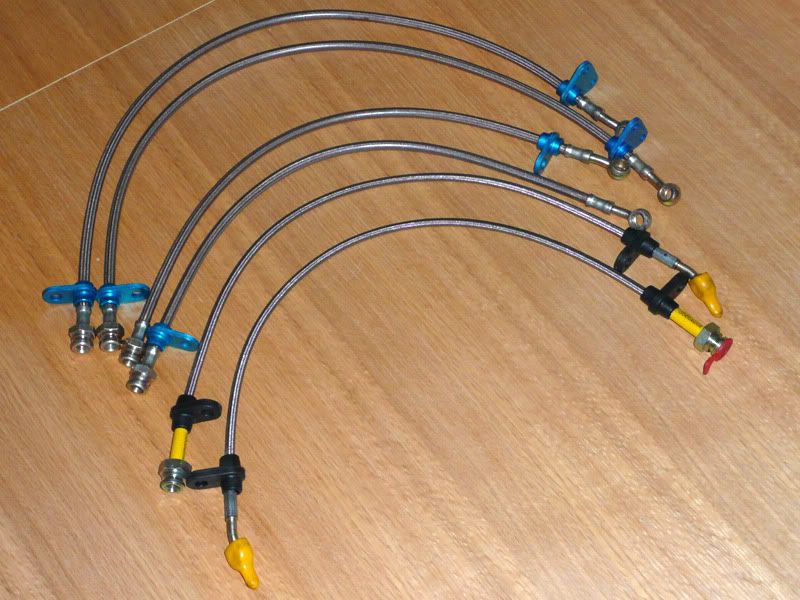
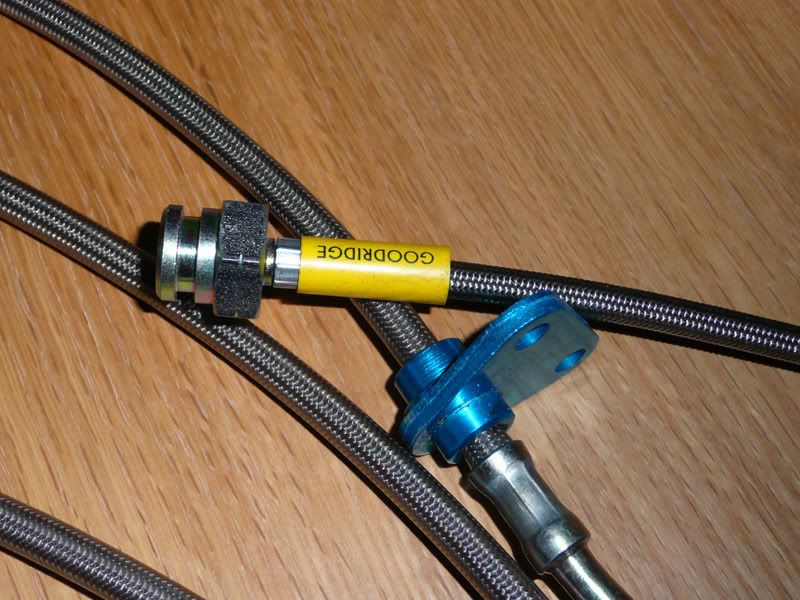
Finally some new Goodridge braided brake hoses, these will be fitted next time I'm down at TGM. :smt047
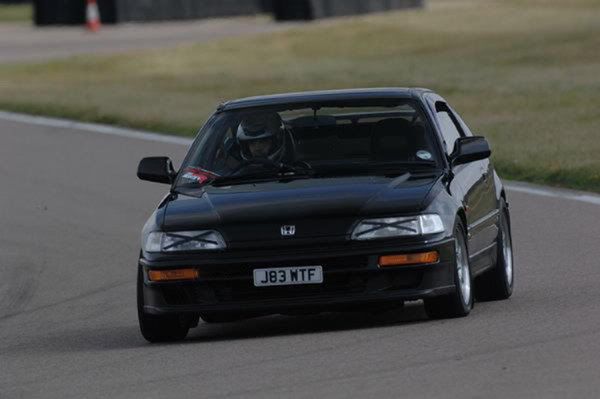
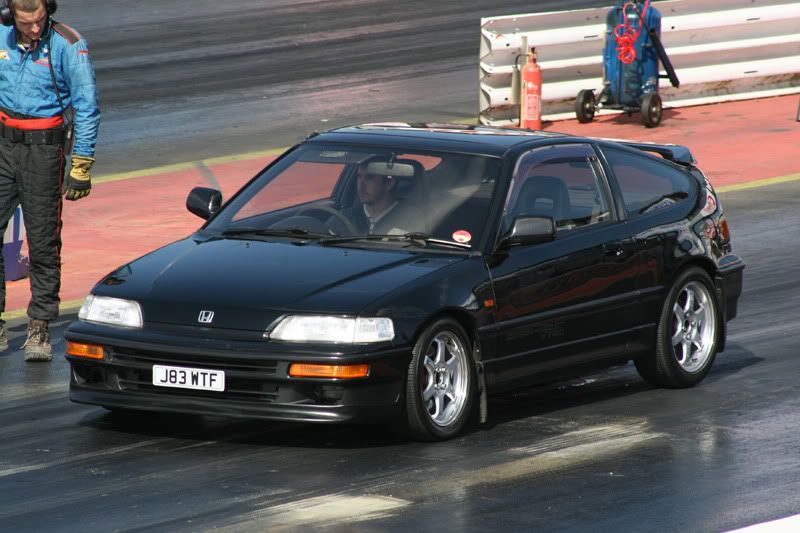
UPDATE: Santa Pod Efforts 09/04/11
I had 5 runs in total, here's a quick video I knocked up of my runs.
[video=youtube;-57WT1KQ8rc]http://www.youtube.com/watch?v=-57WT1KQ8rc[/video]
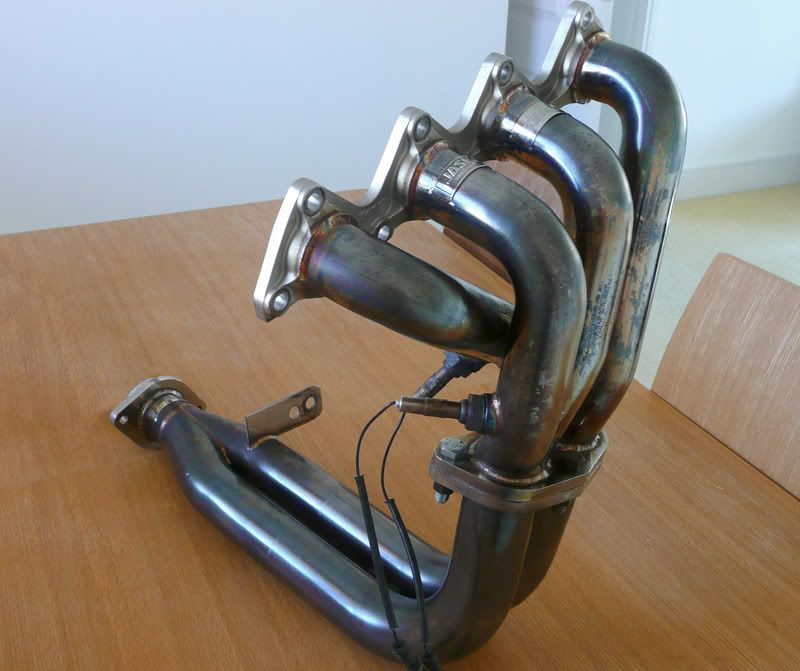
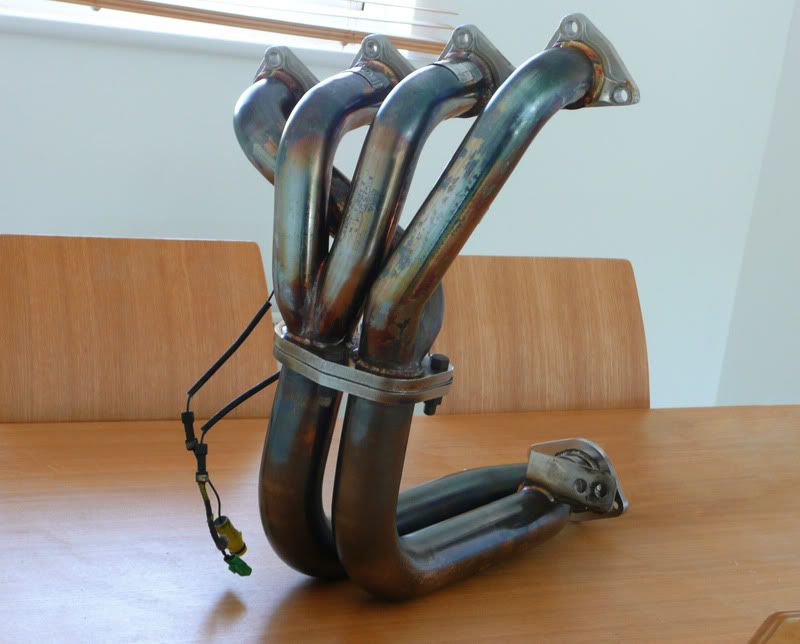
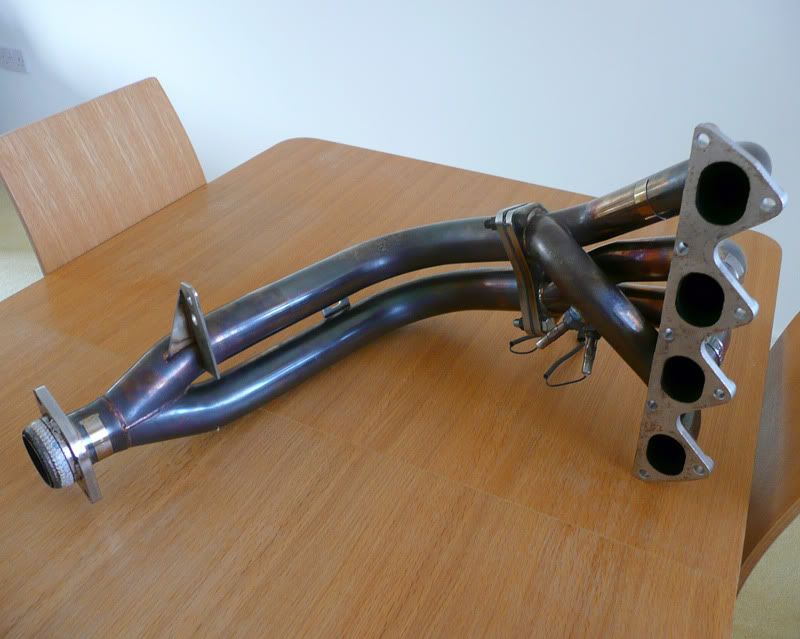
Update: 01/05/2011 - New 5zigen 4-2-1 Manifold

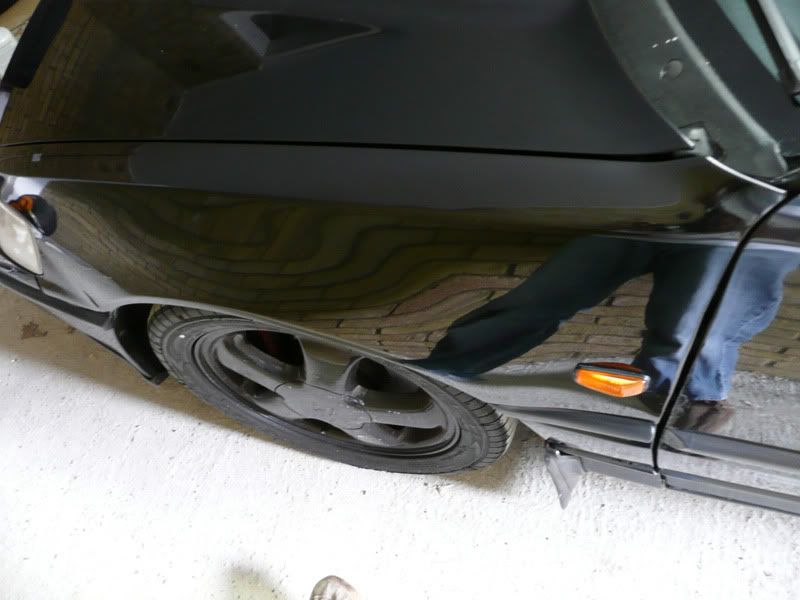
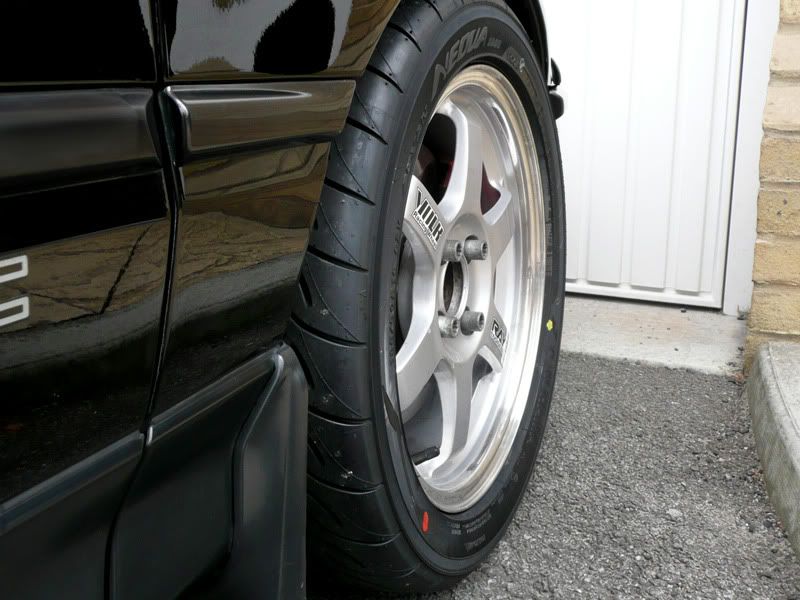
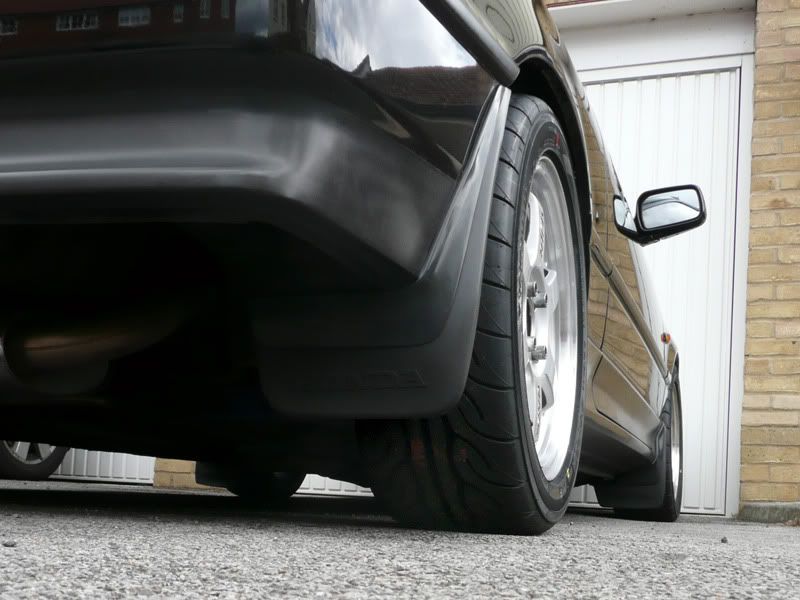
Update: 14/05/2011 - New Yokohama ADVAN Neova AD08's
I had them put on this morning and wow they're burly looking. Looks as though the width is just about OK, the rears sit inline with the arch and the fronts just tuck a little in, and will probably sit inline after a bit of camber adjustment.
I look forward to scrubbing them in seeing what they're like.

Update: 17/05/2011 - 5zigen 4-2-1 manifold fitted + Full Geometry setup
I went down to TGM yesterday to get my manifold fitted and to get rid of my tyre destroying camber. After a 4.5 hour journey down (car parked on roof on M3 :evil , my Eibach front adjustable ball joints and rear camber arms were fitted without a drama. Ken set the car up with front camber reduced to -0.9° and rear to -1° and a slight toe in at the rear to help stability. The tyres now sit perfectly in line with the outer face of the arch and there's no scrubbing.
Fitting of the manifold didn't quite go as smoothly, one of the manifold studs in the head was already sheared off causing it to blow slightly. It was always a possibility more were going to break when the old manifold was removed. Which is exactly what happened, Tom then spent what seemed like the next two hours carefully drilling the remnants of a few snapped studs from within the head. Once the old manifold was off and the studs replaced (now 6pm) it was just a case of fitting the new manifold, well not quite. As I have a large ali radiator, air con pipes running in every direction and two fans, the new manifold with long slow bends meant it wouldn't fit.
Anyway to cut a long story short, I left at 9:15pm after Tom having to unbolt the rad, dumping the coolant and removing/*******ising the air conditioning system to get it fitted. At a later date, I'll either to source a super slim air con fan or remove the system all together (it doesn't really work anyway).
The result of the AD08's and geo setup is it has given me comical levels of grip and turn in. :twisted: After the geo setup I also got an unexpected but welcome heavier 'on centre' steering feel which makes it a lot less fidgety to drive.
The manifold helps the car make a savage sound in vtec, whilst the tone and noise during normal driving is unaffected (video and pictures coming soon). As for increase in power, I'm not sure, it certainly sounds faster and is a good 10kg lighter than the original system. I will really need to get it tuned to make the most of the mods I now have on the car...
I should really say a huge thanks to Tom at TGM for persevering with it and giving up his evening for me. :smt023
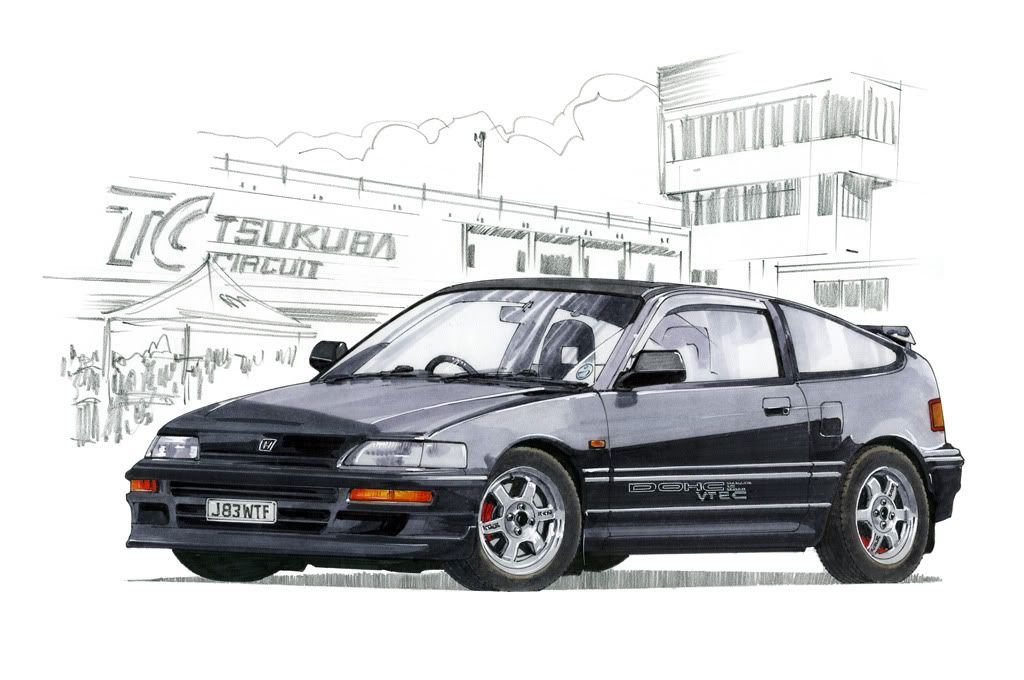
UPDATE: Grandad's Drawing 19/05/11
I've been pestering my grandad lately to draw my car and he's finally come up trumps...
The Future
Parts on order/will be fitted in the next few weeks
-
Immediate future
JDM front plate, get rid of the tiny bike plate
Long term plan
Respray remainder of car
Refurb alloys in bronze
Wind deflectors
Recaro or Bride seats
Raxxles
LSD
Long long term plan
B18C engine swap
Here's the spec, extras and a brief overview of what I've tackled in my ownership…
Factory spec
Flint Black
Glass Roof
Power folding mirrors
Climate control
Power steering
LSD (now gone)
Modifications
Engine/Intake:
• JDM B16
• ITR throttle body
• ITR cams
• Skunk 2 Adjustable cam gears
• Induction kit with cold air feed
• Tuned by DNR 179.5bhp @ 8k rpm
• Magnecor Electrosports 80 ignition leads
• Tegiwa aluminium radiator
• Exedy Clutch
Exhaust:
• 5zigen 4-2-1 manifold
• Decat
• Scorpion back box
Suspension & Bracing:
• MeisterR Zeta S coilovers
• Cyberspeed LCAs
• Eibach adjustable ball joints
• Eibach rear camber arms
• Tanabe front & rear braces
• Tanabe rear tie bar
• Geo setup by TGM, Fleet
Exterior/Wheels:
• Replica J’s Racing front lip
• Rays Volk TE37s 15x7
• Drop Engineering lug nuts
• Yokohama Advan Neova AD08s
Brakes:
• MeisterR big brake kit (286mm)
• MG ZS rear brake setup (262mm)
• Goodridge braided brakes lines
• Brembo LCF 600+ brake fluid
Engine Dress Up:
• Metallic grey cam cover
• Spoon socks
• Spoon radiator cap
• DC2 oil cap
Interior & Ice:
• Aftermarket steering wheel
• DC2 gear knob
• Momo pedals
• Sony BT5100 headunit with handsfree and XA-100IP iPod controller
Misc:
• PIAA Xtreme white bulbs
• Autowatch CAT 1 Alarm + RCL
• Weight reduction ~70kg (estimated kerb weight 940kg)
The build
The starting point
It had been sitting around for some time before I'd bought and looked rather unloved.
Some damage to wing and door, some evidence of a pretty poor repair.
30th March 2010: In car swimming pool
It's been the first real day the car has been sitting out in the rain. When I left work, I noticed a sloshing sound in the boot, after a quick inspection when I got home, it was clear the car had taken on a good bit of water...
I've spent most of the evening grovelling around in my tiny garage/car trying to strip the interior out. I have most of it out, but didn't have time to see where the water was coming in. I'm hoping it's got nothing to do with the glass roof, but it's certainly coming in from high up.
The only pleasant thing that was achieved, was to find an annoying rattle that's been bugging me since I've had it, turned out to be a loose boot catch!
To be continued...
4th April 2010: First Big Clean
The first clean and polish rendered some pretty good results…
6th April 2010: Alarm
I first thing I had to address was being able to turn off the car with the key I got an alarm installer to come and have a look as I did suspect it was the alarm. That was very quickly confirmed and he managed to disconnect it with relative ease. He came back a week later and tore out the amateur install and fitted a Autowatch CAT1 alarm.
10th April 2010: Some bad news
I took it down to TGM sport racing where I previously took my DC5, for a full service and once over. As soon as it was lifted in the air, my heart sank, the whole belly of the car was covered in oil, I had noticed a few oil patches beneath the car previously but didn't realise the scale of the problem until then.
7th May 2010: All fixed and an empty wallet
After spending 4 weeks at TGM, I've finally got my car back, I picked it up from TGM Friday evening, much to the relief of Tom. I've been driving him nuts since it's been there...
The work carried out - Initially, Tom suspected it might just have been the diff bearings and seals, but after replacing them, there was still a bit of play in the o/s driveshaft. Luckily one of Tom's guys had a gearbox lying around so ended up swapping the diff over, as well as the casing (mine had a damaged front mount). He also swapped the 5th gear/reverse syncro as it was better than mine.
As the gearbox was out, it was silly not to change the clutch, so this was replaced with a new 3 piece Exedy clutch kit. The rear engine mount was broken so this was replaced also...
The gearbox feels great now, tbh it was pretty good before despite the problems, hopefully I wont have to worry about anything gearbox related for a very long time.
I went to a Norwich Honda meet the following day, and it was the first bit of fun I've had with the car. Much to my relief it behaved itself and seemed to keep up with the rest of the pack rather well.
I took a couple of pics on the way home this evening, most turned out pretty carp, but thought this was pretty cool...
14th May 2010: Sony BT5100 headunit install + door solinoids
I bought this headunit from a member on TRO. I'm chuffed to bits with it, it has bluetooth for hands free talking and wireless music streaming. I've also just purchased an iPod adaptor for it, which I'll fit at a later date.
14th May 2010: Water tight + boot struts
I worked out water was coming in through one of the roof seams. A little sealant soon sorted the problem out and I was able to put the interior back into the car after being out for several weeks. The instant refinement, was very welcome. I also fitted some replacement boot struts, another welcome addition, meaning I wasn't risking being decapitated each time I went into the boot.
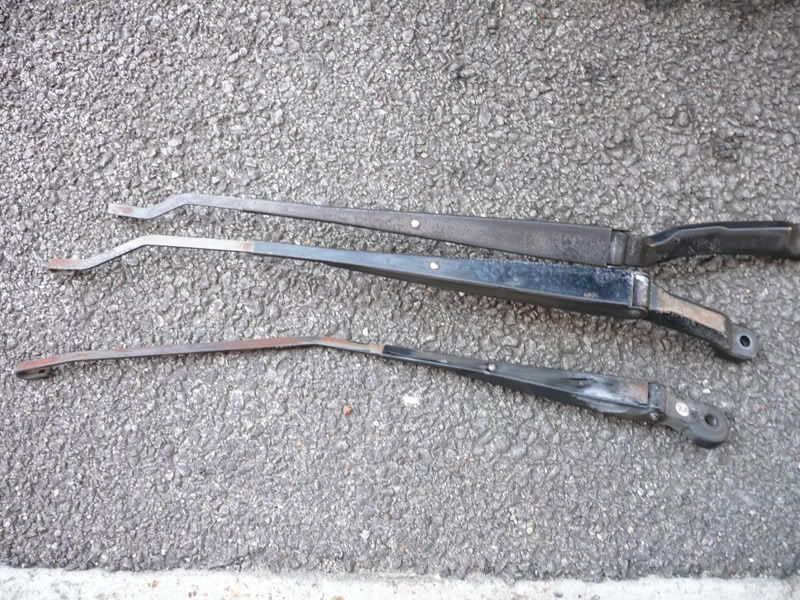
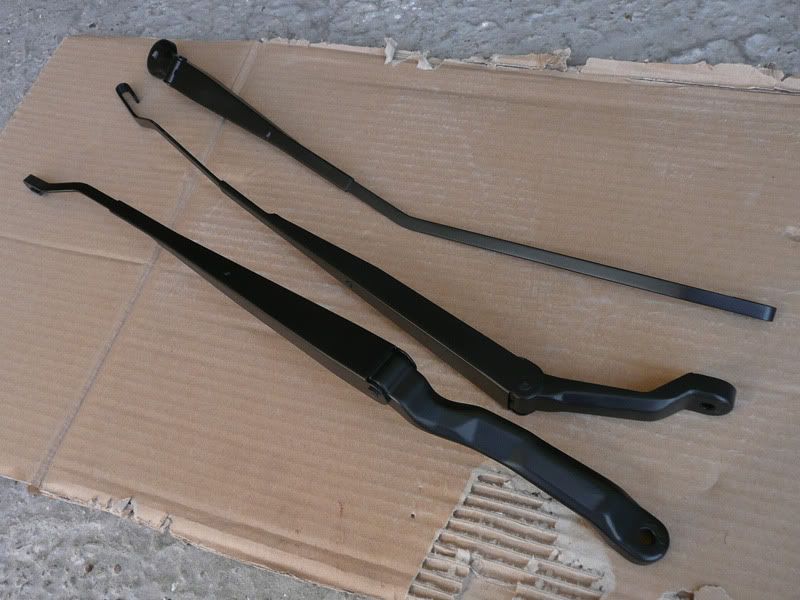
22nd May 2010: Wiper Stalk Refurb
Before and after…
23rd May 2010: Brakes Fail
After a productive last couple of weeks, fitting my new head unit, boot struts, installing door solenoids to have remote central locking and refurbing my wiper stalks, I've just taken it for a quick spin and the brakes have failed. I mean FFS.
25th May 2010: Brakes Fixed
The conclusion from the local garage is that the fluid had gone bad. So new fluid went in, it was also pointed out that one of my rear callipers had been binding, in-turn, ruining the one of the discs and pads. So new discs and pads were fitted and I was on my way… again.
2nd June 2010: New Suspension
Received these goodies through the post.
Meister R Zeta S coilovers (Fork rear to work with the LCAs)
Cyberspeed LCAs
13th June 2010: Suspension fitted, new problems + new bling
Well I took my car to TGM yesterday to have my cambelt, tensioner and waterpump done. I also took along my MeisterRs coilovers and Cyberspeed LCAs to be fitted if Tom had enough time to do them.
After taking many bits to pieces, he discovered my crankshaft pulley had a chunk out of it and would be best to replace that before changing the cam belt etc to avoid further labour charges. So ideally I need to find a secondhand replacement. My alt, a/c and p/s belts had seen better days, so these will need to be replaced too.
It was mentioned the cam belt did look in VGC with writing still emblazoned along it and the waterpump looked shiny and new. However as I have no history of it being changed, I feel it's better to be safe than sorry. So it's going back in on the 5th July.
As I had time booked, Tom went about fitting the coilovers and LCAs. He found a few more bushes that needed replacing in the process. He also run into issues fitting the RARB to the new LCAs, which I'm currently trying to resolve with Jerrick from MeiserR. After adjusting the ride height and setting the dampers to the middle of their range, I must say I'm very pleased with the results. My first thoughts are poop to a blanket.
It looks like this car is continuing to cost me a fair whack, however this was made slightly easier after it returned 40mpg on the last tank.
And I also picked up a bit of bling, as my rad cap had seen better days…
14th June 2010: MeisterR Big Brake kit
Still mentally scarred from the brakes letting me down, I ordered a few bits. These will be waiting for me at TGM when I return in a few weeks.
19th June 2010: DIY Paint Correction
Saturday I got brave with the paint. The upper part of my N/S wing and door had been resprayed badly at some point of it's life, the colour match was good but suffered badly from orange peel.
With a bit of 1500 grit, a soapy bucket of water, some Farcela G3/Autoglym SRP and a Argos buffing machine, I set to it.
Nasty orange peel
The wing partially sanded
The wing sanded.
The wing machine buffed
The door partially sanded
The door sanded
Sanded
First pass with buffer (G3)
Second pass with buffer (G3)
Final buff with Autogylm SRP
I'm very happy, but it could of went very wrong, as I've not really got any experience with this sort of thing.
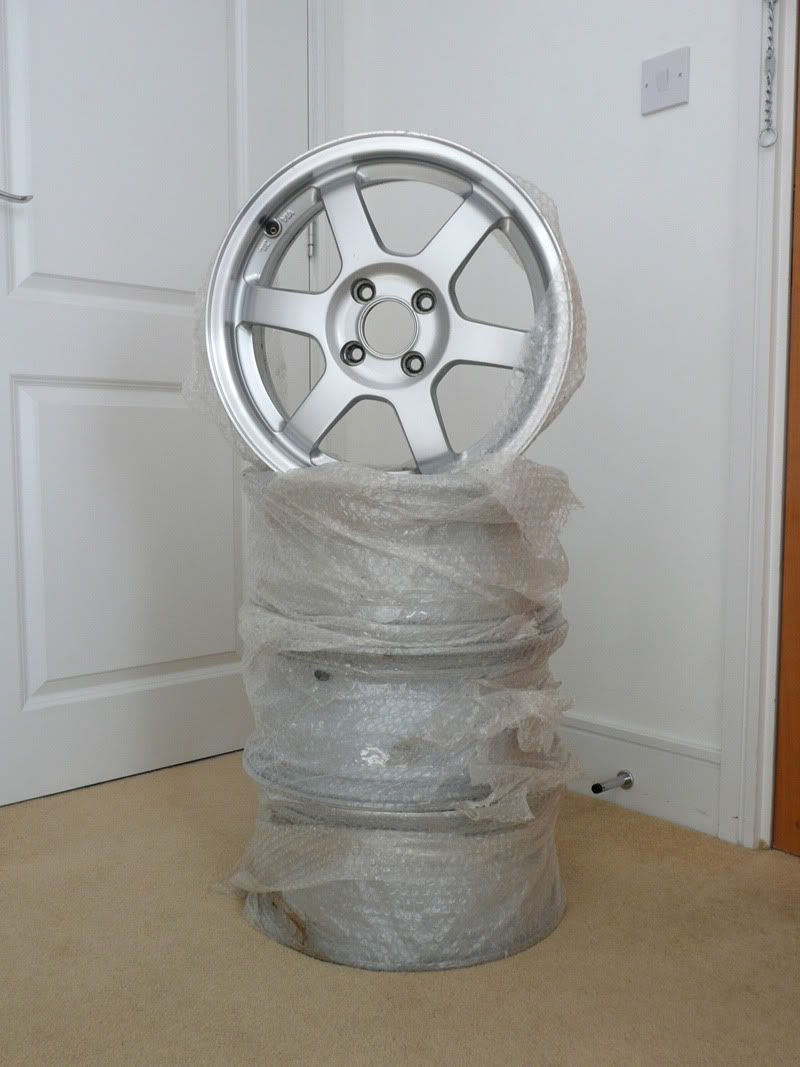
23rd June 2010: New Boots and Nuts
I've got my new boots, and some new nuts today for the impending arrival of my new wheels… roll on the weekend.
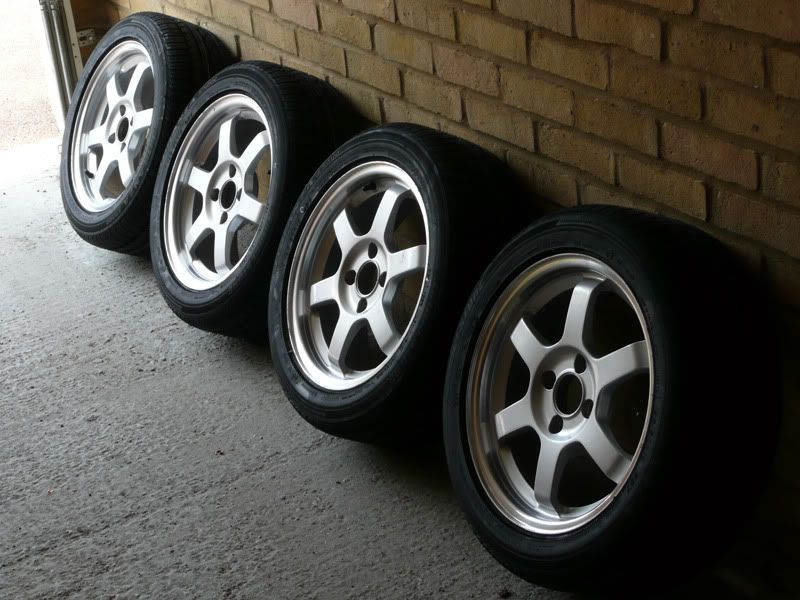
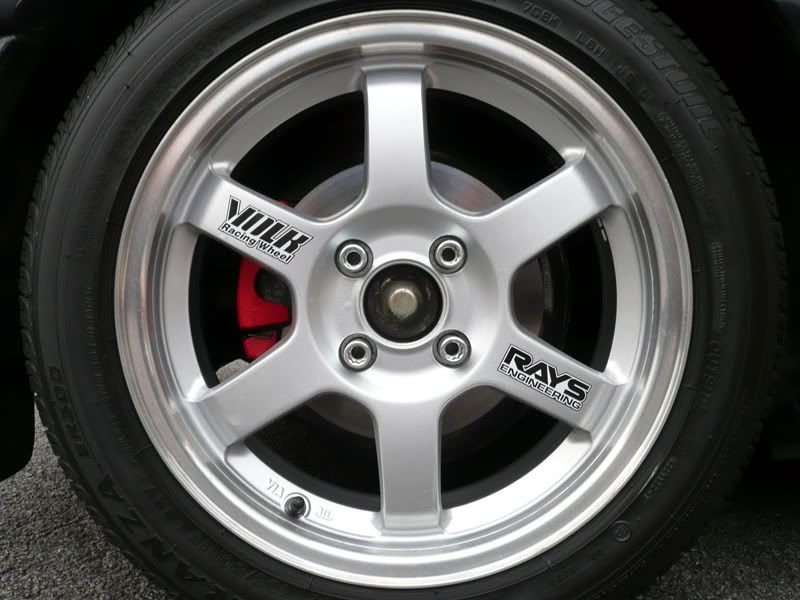
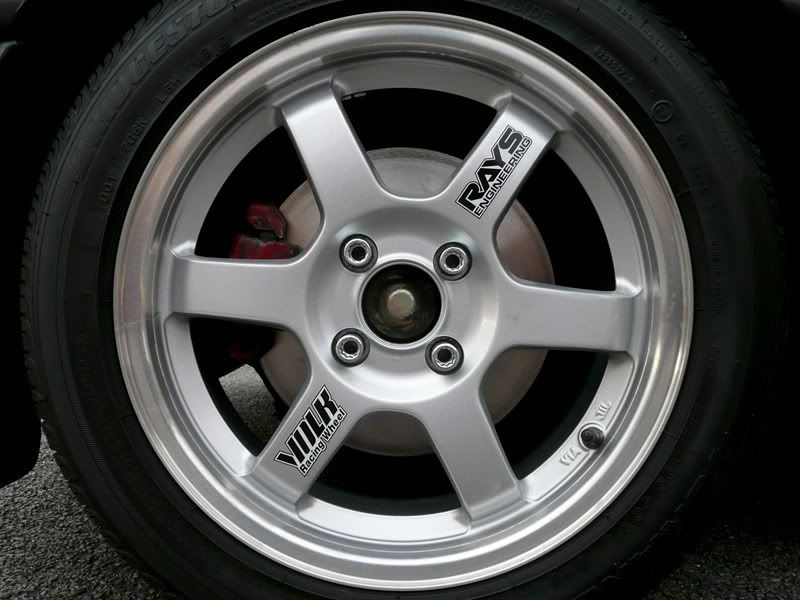
26th June 2010: My new TE37's
I can't get over how light these things are! Just put one on the scales... 4.3kg! The tyres weigh far more than the wheels! I weighed them just before I put them on with brand new tyres and they weighed 12.3kg. The fat fives with shot tyres which I removed weighed just over 15kg. That's a nice 11 kg of unsprung weight gone.
28th June 2010: Radiator exploded
The radiator decided to explode on me. I've manage to patch it up for now, but have ordered a large Aluminium rad from Tegiwa. I intend TGM to fit it on my next visit.
4th July 2010: Indicator refurb
I decided they looked a little flat, so broke out the sand paper and polish again.
4th July 2010: Mini Photoshoot
I gave her a bit of a clean yesterday and did a little photoshoot.
7th July 2010: New bits
I picked up and couple of bits on the way to TGM this morning, a Scorpion exhaust and a DC2 gearknob.
Despite going down to get my brakes fitted, TGM had a few problems fitting the Meister R upgrade today, so we had to leave it for another day. They managed to put the exhaust on, I'm not 100% happy how it sits, but I'll be looking at that at a later date. Performance feels down slightly, but the noise (or shall I say lack of it) is much better. Makes a lovely roar in VTEC, much deeper than the Tanabe system. In appearance it looks 10,000% better IMO and overall I'm very happy.
Scorpion Exhaust and OEM centre section
DC2 Knob
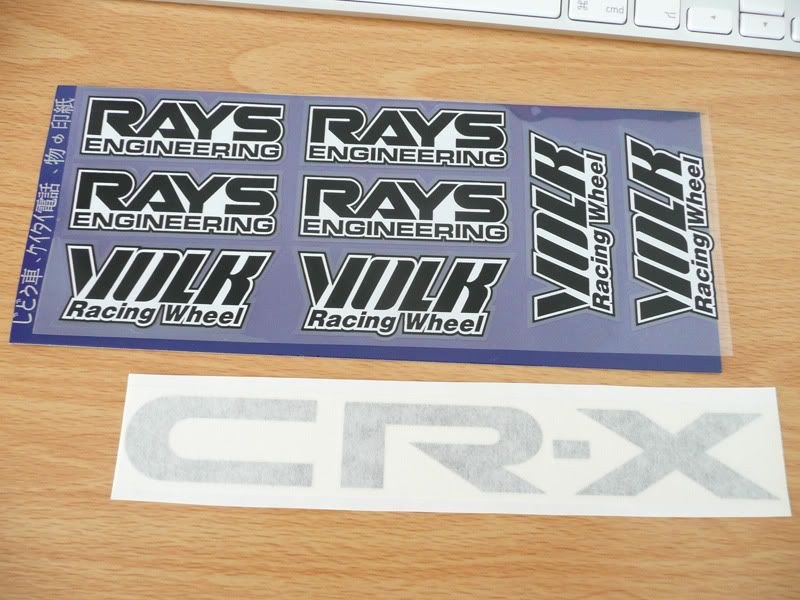
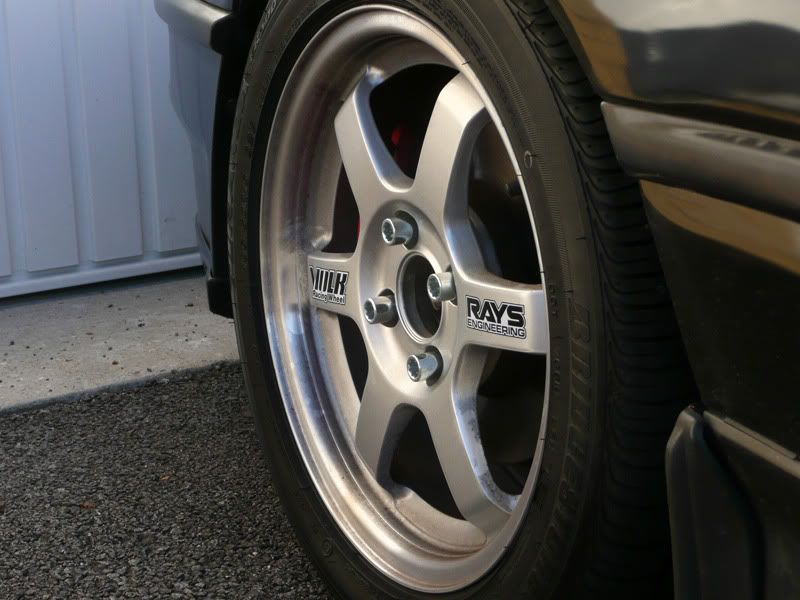
15th July 2010: New decals
I got hold of a CR-X vinyl for the rear light, which will do for now, but I have something much better in the pipeline... I also got some Volk Rays decals for the wheels, they're only replicas, but again will do until I get my wheels refurbed come springtime.
Pics, please excuse the dirt.
25th July 2010: Big brake kit(s) fitted
The last time TGM attempted to fit the MeisterR big brake kit to my car, they run into problems with differences in parts between the CR-X and the Civic (which the kit was designed to fit). Jerrick from MeisterR bought some Civic calipers and dropped them down to TGM, this allowed them to rob the parts they needed from the Civic calipers.
During the run up to getting my car to TGM, my rear brakes seized up again. It was suffering with a seized rear caliper. So with a brand new disc turning black on the outside from the heat, I decided to bite the bullet AGAIN and bought the MG rear brake setup. This consisted of secondhand calipers, carriers and some brand new discs and pads. Time will tell how suited they are to the MeisterR front brake kit...
Everything was fitted at TGM on Saturday, it's too early to review them yet as I've only driven it back from TGM and used them a handful of times. But if looks are anything to go by, then they should be excellent.
I can review the handbrake now though, it's amazing...
Some pictures (and yes my car is actually dirty):
Front brakes before
Front brakes after
Rear brakes before
Rear brakes after
And dragging an old photo out... before
And after.
The calipers need a bit of TLC, but with help from a Welsh friend, hopefully this will be sorted soon.
Got this on too.
4th August 2010: 2 days of detailing for Japfest 2
Just a couple pics...
Firstly I enlisted the help of my housemate for the second day to help me prepare the car, here he is at work.
Shiny wheels
Shiny exhaust
Shiny car
And a few stickers applied for tomorrow
5th August 2010: Pictures from Japfest
23rd November 2010: General Update
The car has been pretty well behaved lately and sailed through it's MOT last month without any problems. Inevitably though the car has a new problem, the speedo has stopped working and I've got the CEL up on the dash (fault code 17 - Vehicle Speed Sensor). I haven't got round to having a proper look at it yet, however I'm hoping it's just going to be a loose connection, rather than a faulty VSS. So for the time being, I have no VTEC..!
On a more positive note, I managed to install my iPod adapter and rewire my aerial at the weekend, so at least my journeys aren't totally boring.
Back on a more negative note, my boot is still getting a bit of water in it, it's definitely getting in through the rear lights. My offside light has had half the fixings snapped off it, so I've purchased another. I've also bought some new rear light seals which I hope will solve the problem once and for all (well for a few years anyway).
Now the days are silly short, I find myself driving round in the dark a lot, with candles for headlights, so thought I get hold of some better bulbs. Unfortunately my trip to Halfrauds yielded no results as the bulbs are pretty unusual (H4H fitment), so had to splash out and buy some PIAA 'JDM YO' bulbs. After successfully fitting the first one, I moved onto the second one, only to find an ordinary H4 bulb in there, FFS. Someone has obviously modified the headlight to accept a H4 bulb, so I'm now left with the dilemma of either, leaving it bodged and buying a uprated H4 bulb, try to revert the modification or replace the headlight unit altogether.
I got a new spangly key, as I've only ever had one key since I bought it, which was pushing my luck should I of lost it.
Finally, a little birdy told me my J's Racing replica lip is ready for delivery.
I can't wait to get this on, it's one of only a few external modifications I want to make. Here's a shamelessly stolen picture of a J's lip fitted to another car. *EDIT fitted on my car***
29th December 2010: New Windscreen fitted
Not the most exciting of updates, but little things please me. My car originally had a green/blue windscreen fitted, however it stood out like a sore thumb against the rest of the bronze glass.
I picked up a couple of stone chips back in the summer, but during this recent cold spell, one of them decided to crack wide open. I was happy to swallow the £70 excess and wait 3 weeks for a bronze one to arrive off the boat.
The Crack
Green/Blue
Autoglass also fitted the trim surround, which I was previously missing altogether, looks a lot cleaner now.
Bronze
UPDATE: Bits and Bobs 01/04/11
Not really an update of sorts, I just wanted to reassure people I was still throwing money away. I've been collecting quite a few bits and pieces over the last few months and most of them should be on the car in the next few days.
I have it booked in for a service on Monday, just having the general routine bits fitted.
Motul 8100 Engine Oil
Hamp Filter + sump washer
NGK Plugs
Splitfire Leads (though I'm 99% sure I've been supplied the wrong ones)
Honda Fuel Filter
Secondly, it looks a state under the bonnet, so here's a few items to begin to remedy that, including a few to stop some minor oil leaks
Refurbed Cam Cover (From Bren)
Replacement Plug Cover
Rocker Cover Washers
Plug Seals
Cam End Seal
VTEC Solenoid Gasket
A few nuts and bolts
Exhaust Manifold Shield
Black Conduit to dress the wiring up a little
Spoon Socks
Gunk Degreasant
I bought a secondhand centre console from Ebay to replace a bodged double DIN to single DIN conversion. Trouble is when it turned up the plastic was badly damaged where someone had obviously removed a hifi when a large screwdriver. But with a lot of perseverance I got it looking 100 times better.
Thanks to the 90's Honda/Rover collaboration lockless handles are available (rear Rover door handles), I don't intend to fit these particularly soon, as they need to be sprayed, but I'm looking forward to getting them on.
JDM rear light cluster, twin reverse lamps and original raised lettering.
It needs a good buff to remove the surface scratches, but it's in great condition.
Finally some new Goodridge braided brake hoses, these will be fitted next time I'm down at TGM. :smt047
UPDATE: Santa Pod Efforts 09/04/11
I had 5 runs in total, here's a quick video I knocked up of my runs.
[video=youtube;-57WT1KQ8rc]http://www.youtube.com/watch?v=-57WT1KQ8rc[/video]
Update: 01/05/2011 - New 5zigen 4-2-1 Manifold
Update: 14/05/2011 - New Yokohama ADVAN Neova AD08's
I had them put on this morning and wow they're burly looking. Looks as though the width is just about OK, the rears sit inline with the arch and the fronts just tuck a little in, and will probably sit inline after a bit of camber adjustment.
I look forward to scrubbing them in seeing what they're like.
Update: 17/05/2011 - 5zigen 4-2-1 manifold fitted + Full Geometry setup
I went down to TGM yesterday to get my manifold fitted and to get rid of my tyre destroying camber. After a 4.5 hour journey down (car parked on roof on M3 :evil
, my Eibach front adjustable ball joints and rear camber arms were fitted without a drama. Ken set the car up with front camber reduced to -0.9° and rear to -1° and a slight toe in at the rear to help stability. The tyres now sit perfectly in line with the outer face of the arch and there's no scrubbing. Fitting of the manifold didn't quite go as smoothly, one of the manifold studs in the head was already sheared off causing it to blow slightly. It was always a possibility more were going to break when the old manifold was removed. Which is exactly what happened, Tom then spent what seemed like the next two hours carefully drilling the remnants of a few snapped studs from within the head.
Once the old manifold was off and the studs replaced (now 6pm) it was just a case of fitting the new manifold, well not quite. As I have a large ali radiator, air con pipes running in every direction and two fans, the new manifold with long slow bends meant it wouldn't fit. Anyway to cut a long story short, I left at 9:15pm after Tom having to unbolt the rad, dumping the coolant and removing/*******ising the air conditioning system to get it fitted.
At a later date, I'll either to source a super slim air con fan or remove the system all together (it doesn't really work anyway).The result of the AD08's and geo setup is it has given me comical levels of grip and turn in. :twisted: After the geo setup I also got an unexpected but welcome heavier 'on centre' steering feel which makes it a lot less fidgety to drive.
The manifold helps the car make a savage sound in vtec, whilst the tone and noise during normal driving is unaffected (video and pictures coming soon). As for increase in power, I'm not sure, it certainly sounds faster and is a good 10kg lighter than the original system. I will really need to get it tuned to make the most of the mods I now have on the car...
I should really say a huge thanks to Tom at TGM for persevering with it and giving up his evening for me. :smt023
UPDATE: Grandad's Drawing 19/05/11
I've been pestering my grandad lately to draw my car and he's finally come up trumps...
The Future
Parts on order/will be fitted in the next few weeks
-
Immediate future
JDM front plate, get rid of the tiny bike plate
Long term plan
Respray remainder of car
Refurb alloys in bronze
Wind deflectors
Recaro or Bride seats
Raxxles
LSD
Long long term plan
B18C engine swap
Last edited by a moderator: