
Mark43
Honorary Member
- Messages
- 3,677
The below steps are intended to help you through the installation of the genuine Honda fog lights P/N: 08V31-S5S-611. You will be supplied with definative instructions with the part, therefore the instructions and pictures below are there to supplement those supplied with the part.
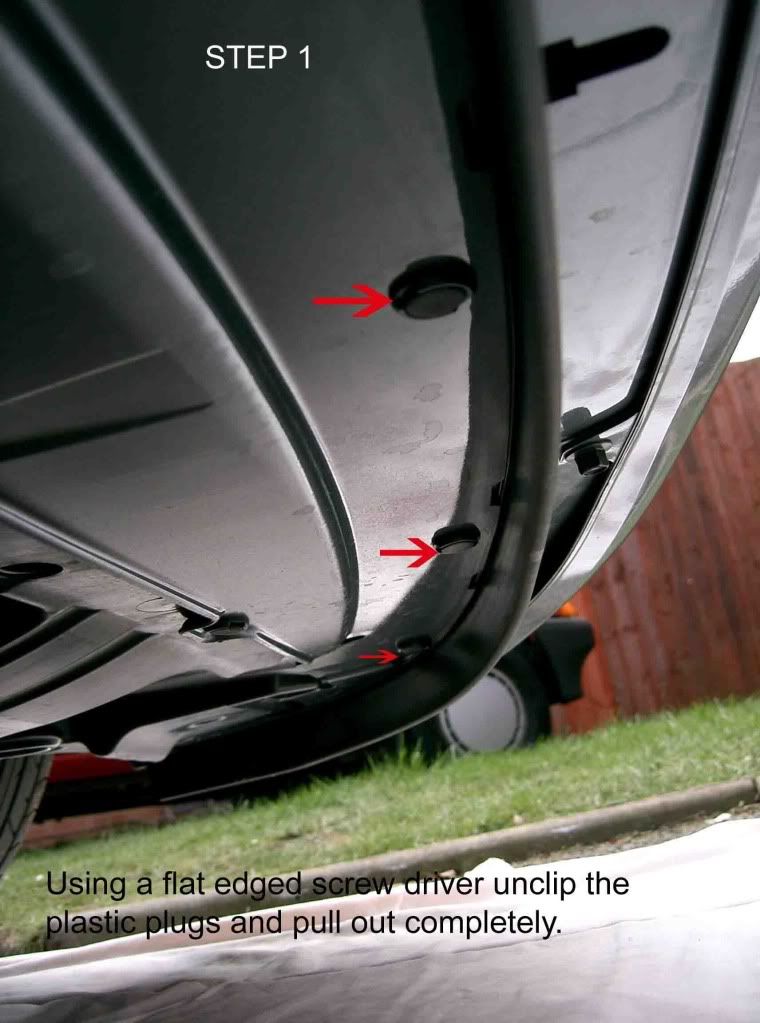
Step 1.
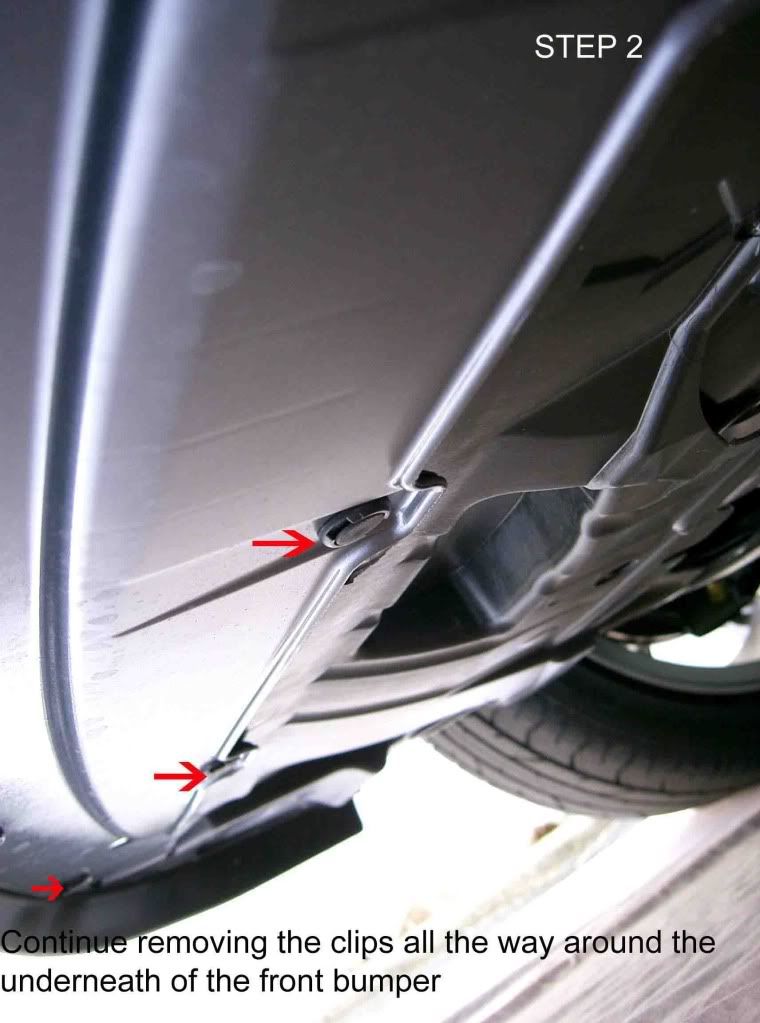
Step2.
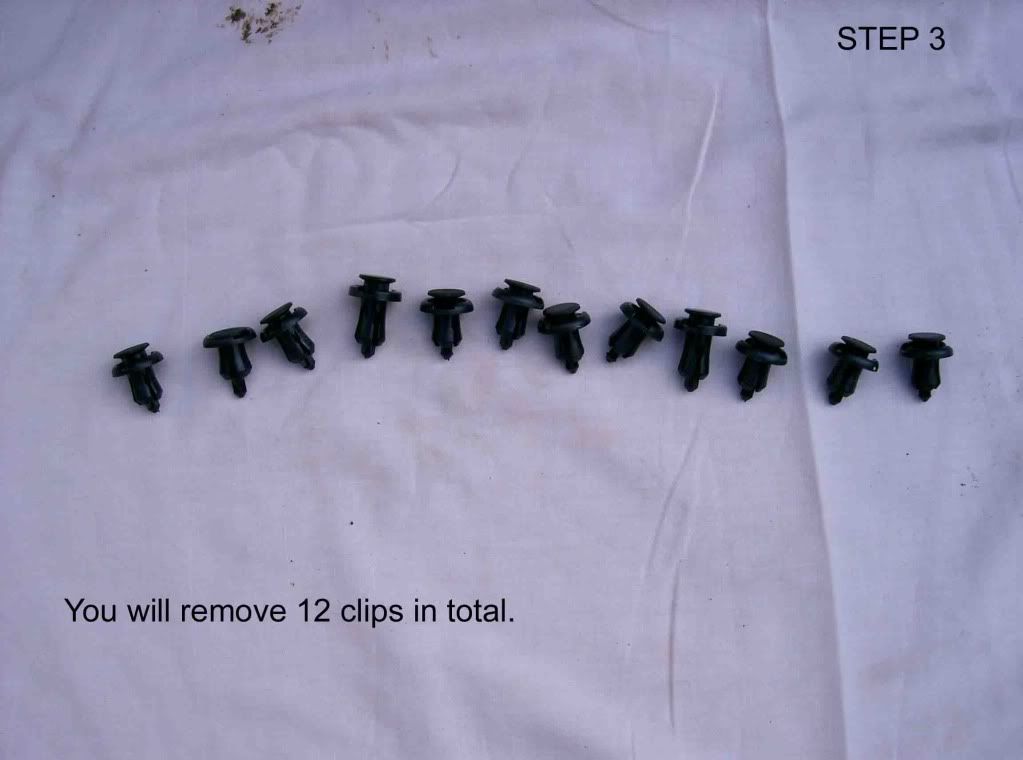
Step 3.
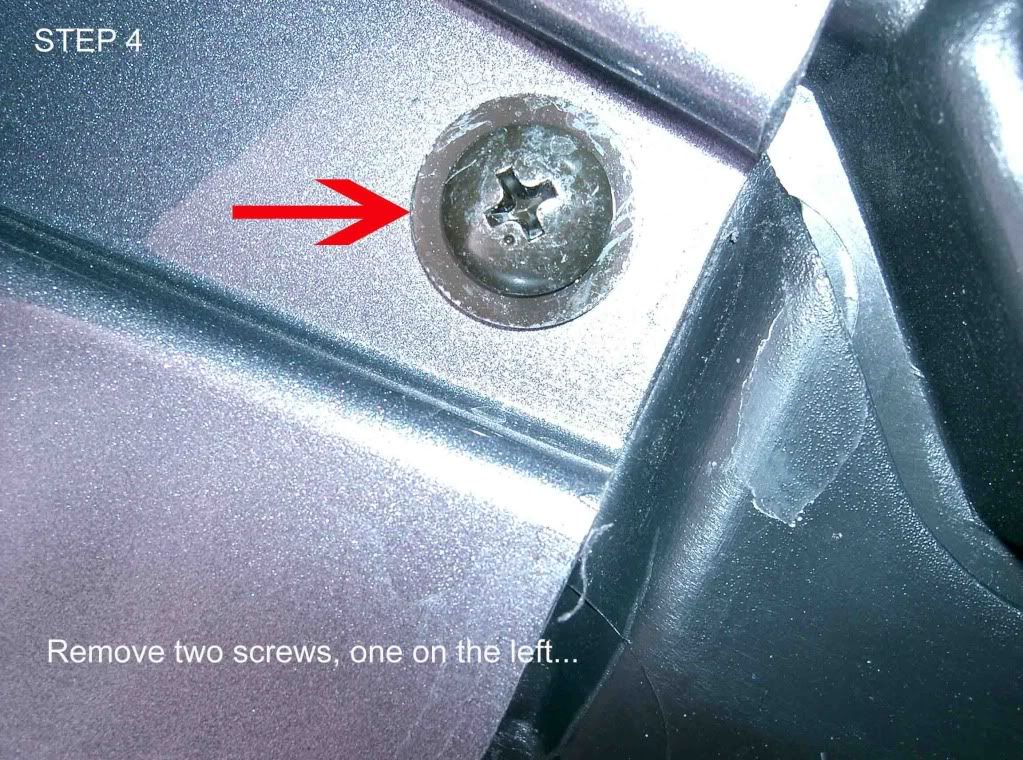
Step 4.
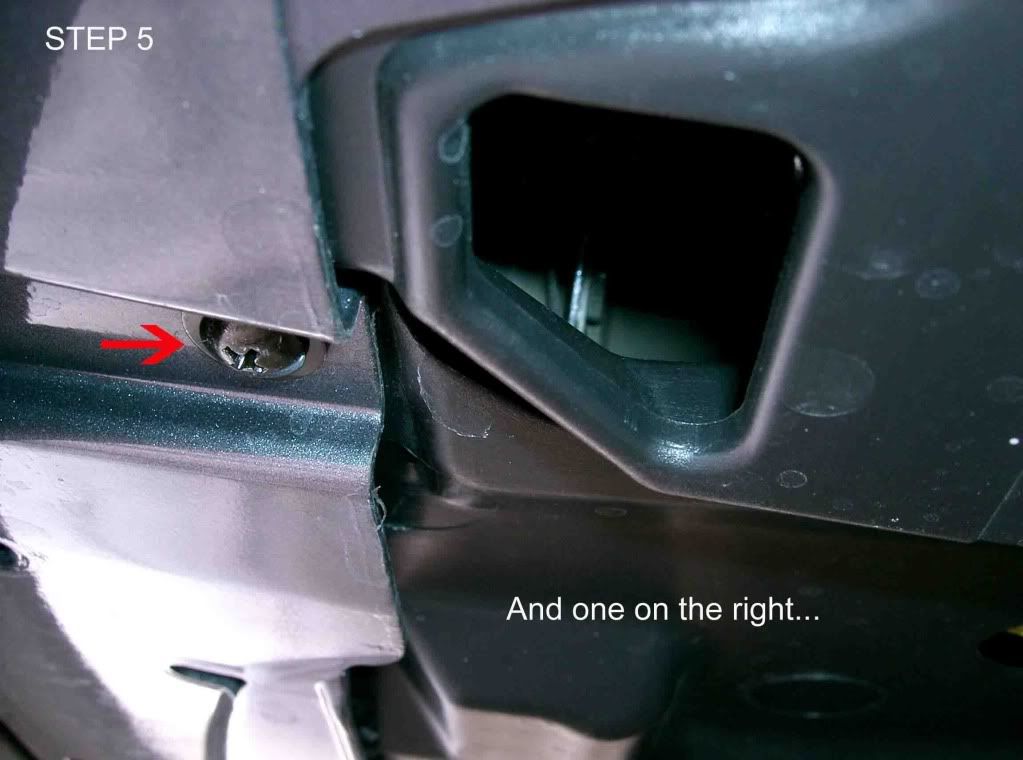
Step 5.
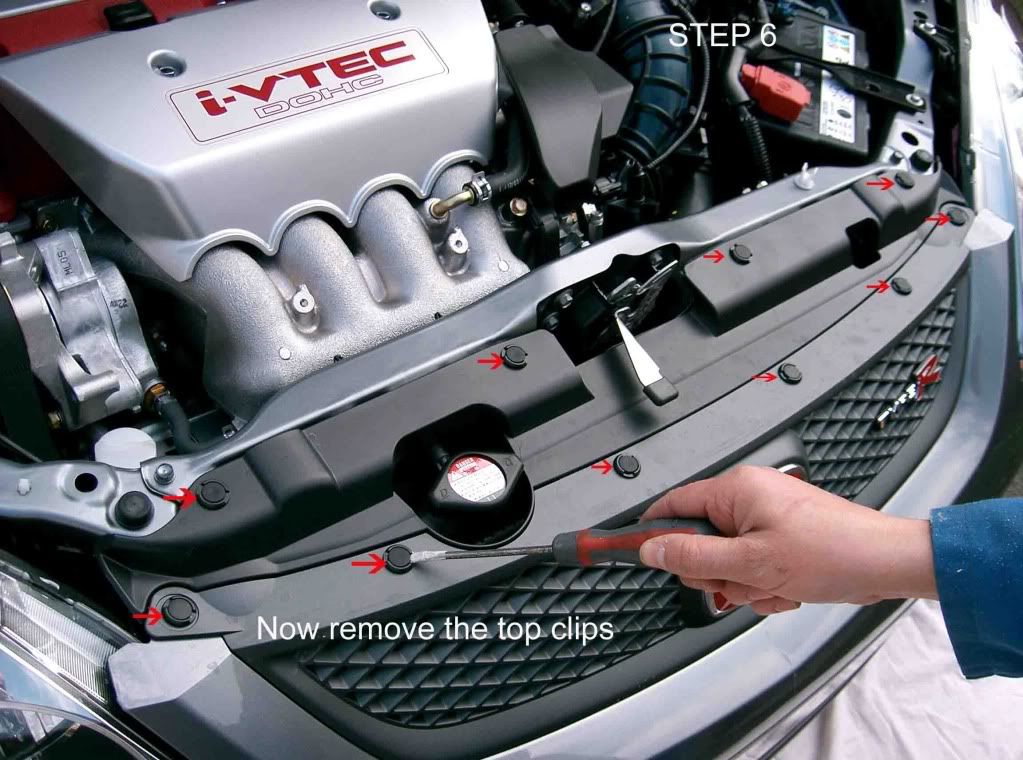
Step 6.
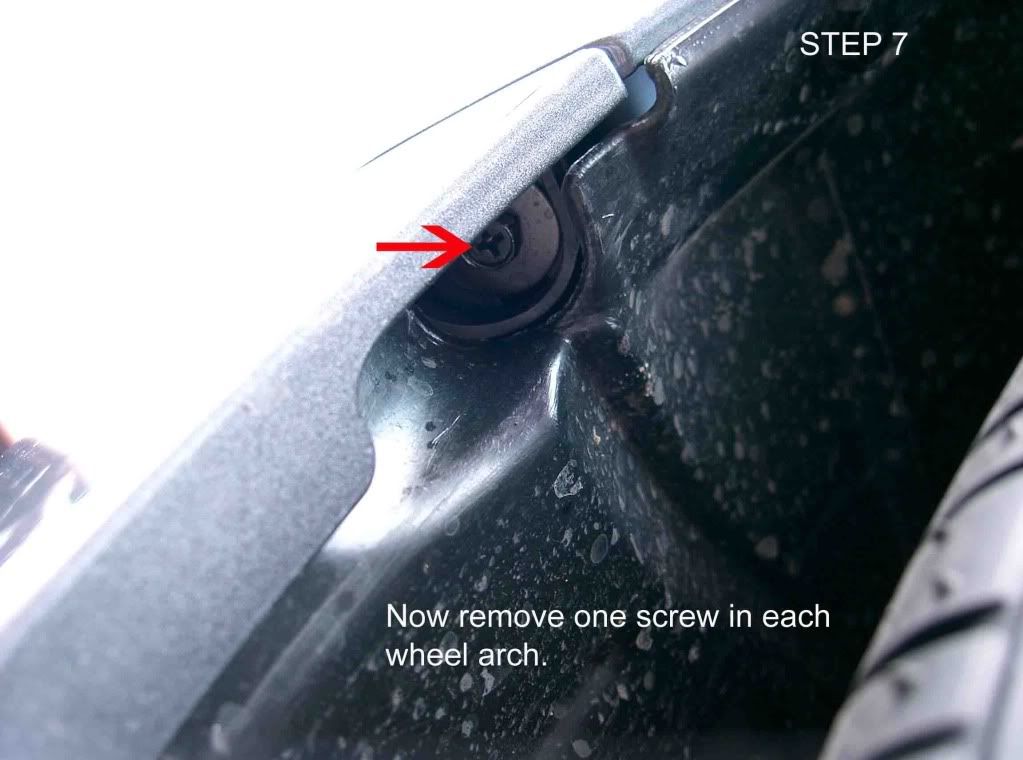
Step 7.
Step 7.1 Removing the bumper.
Pull the plastic arch liner clear of the bumper. Then start at the arch end of the bumper and pull firmly. The bumper will start to come out of its clips. It will take a little bit of force so donÂ’t worry!!! Work your way around to the other side. (Note: once the side edges of the bumper are free you can get your arm behind to help push the front out of its clips. The clips are below the lights). The bumper will now be free to move to where you want.
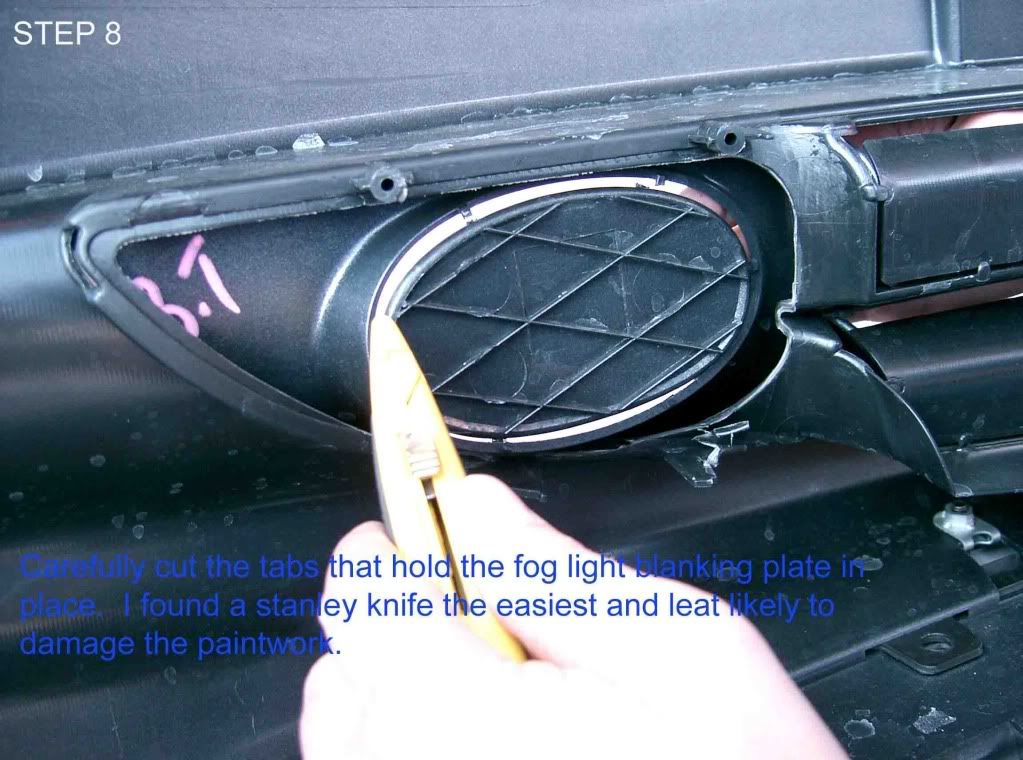
Step 8.
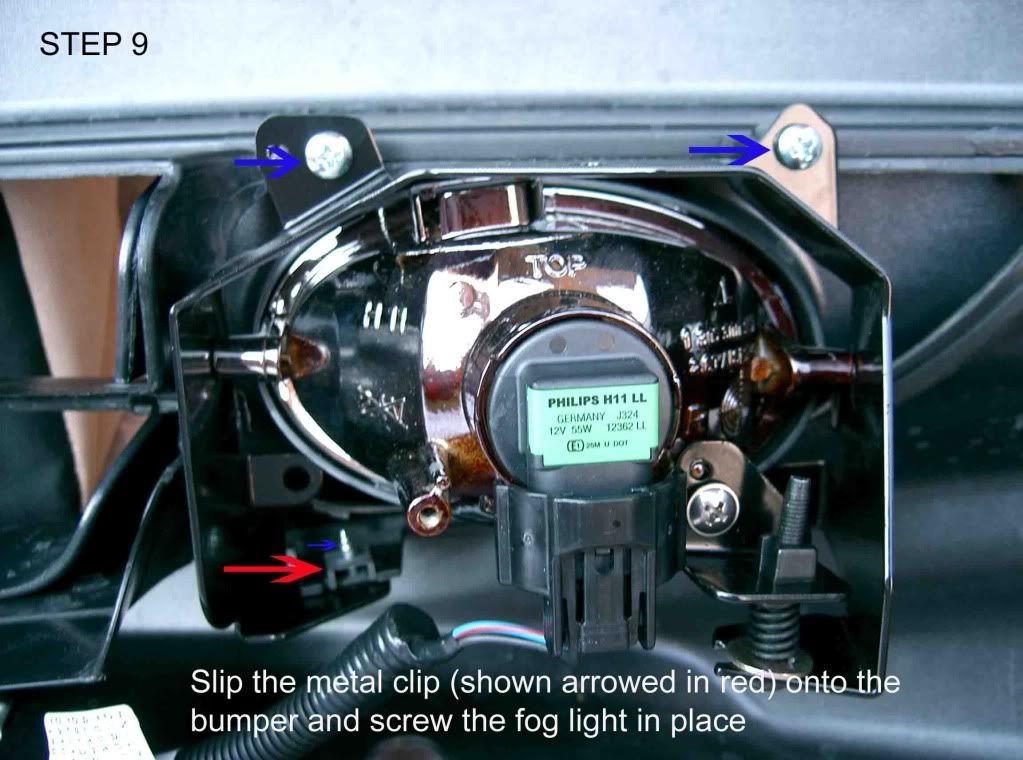
Step 9.
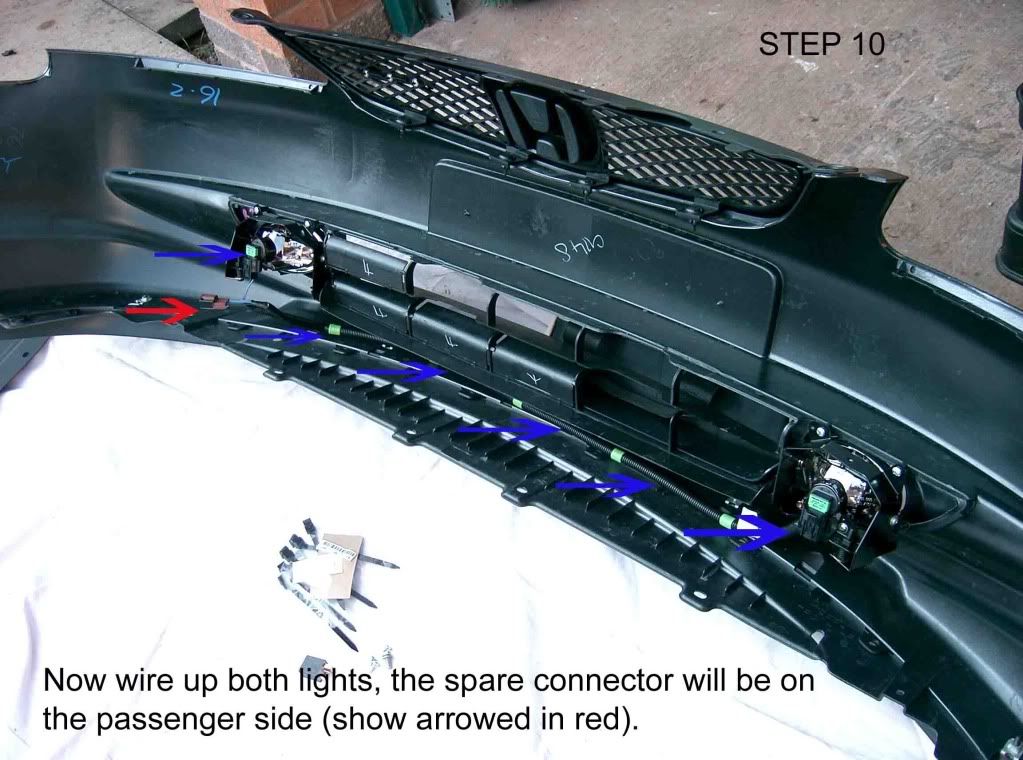
Step 10.
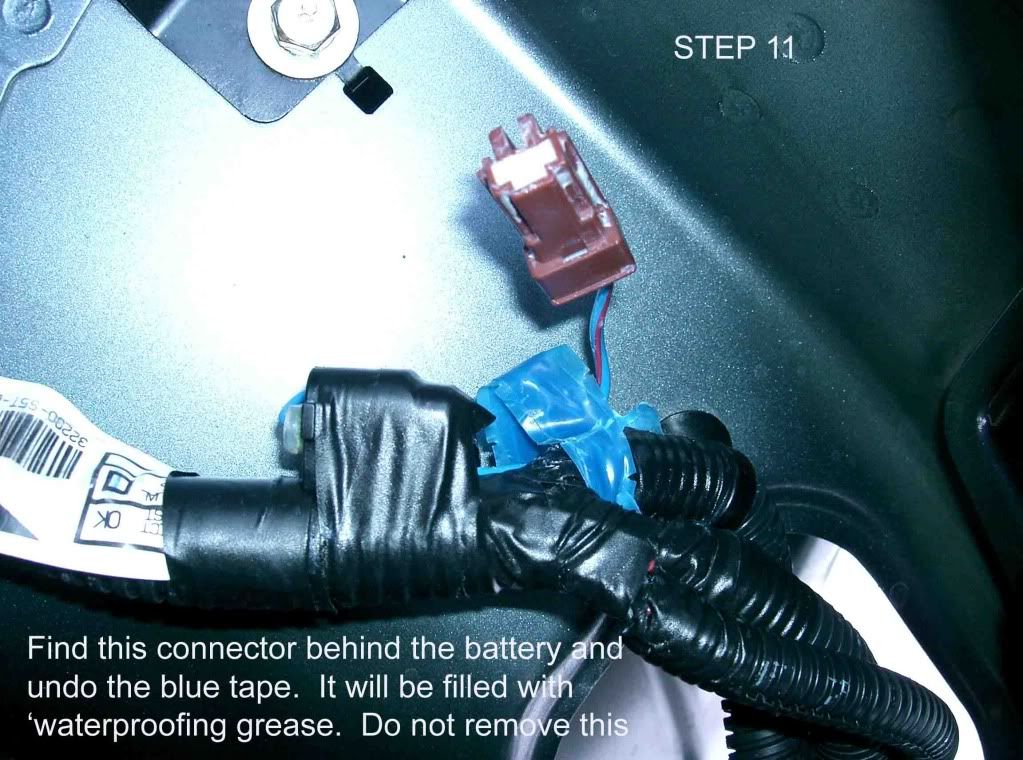
Step 11.
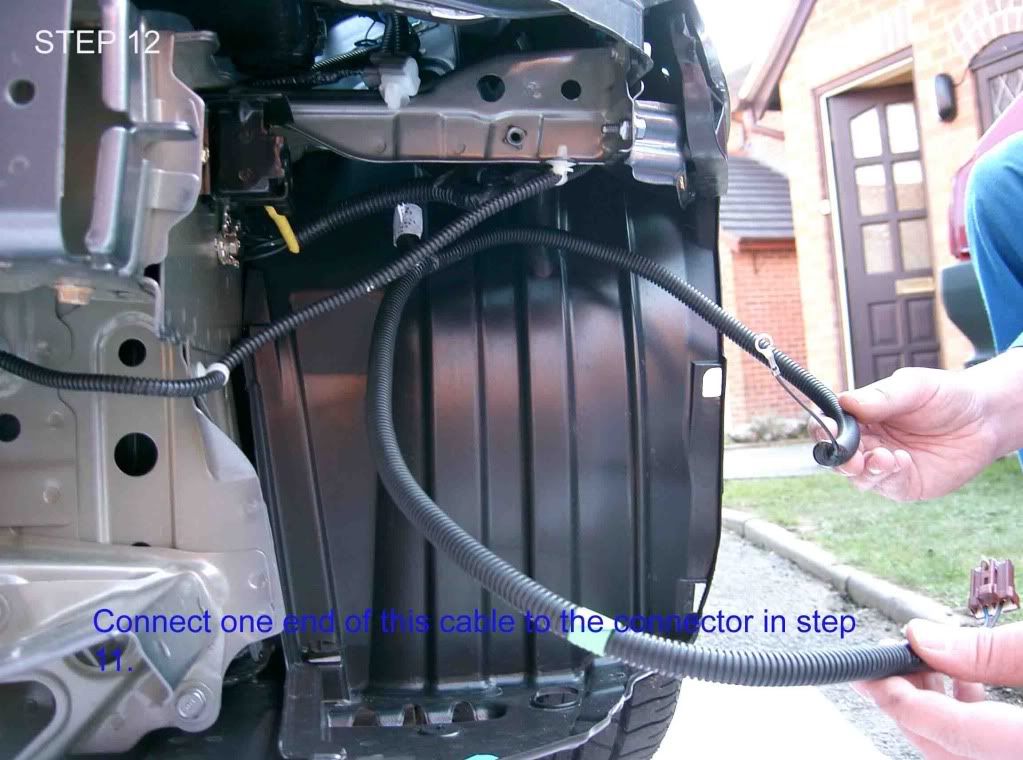
Step 12.
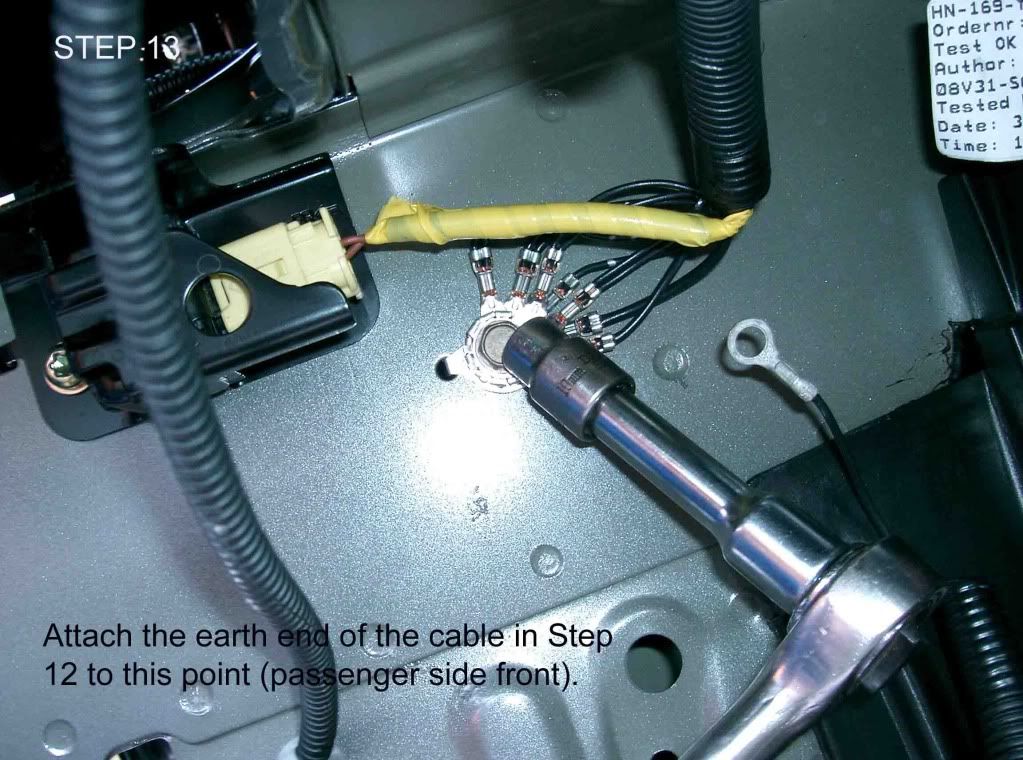
Step 13.
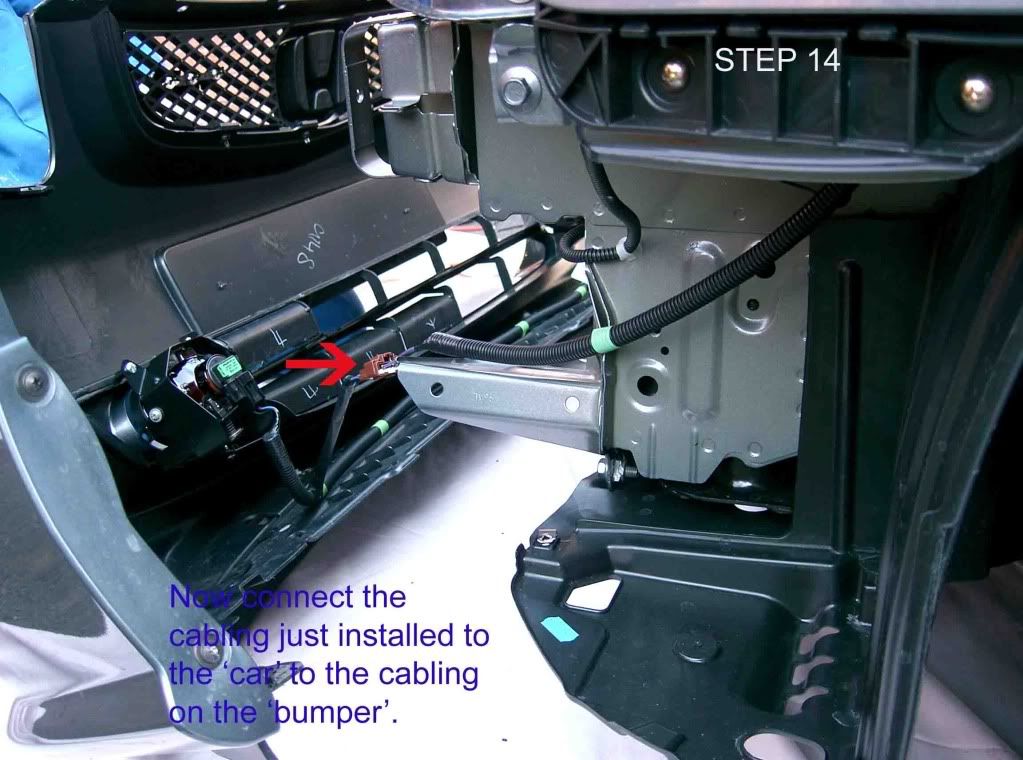
Step 14.
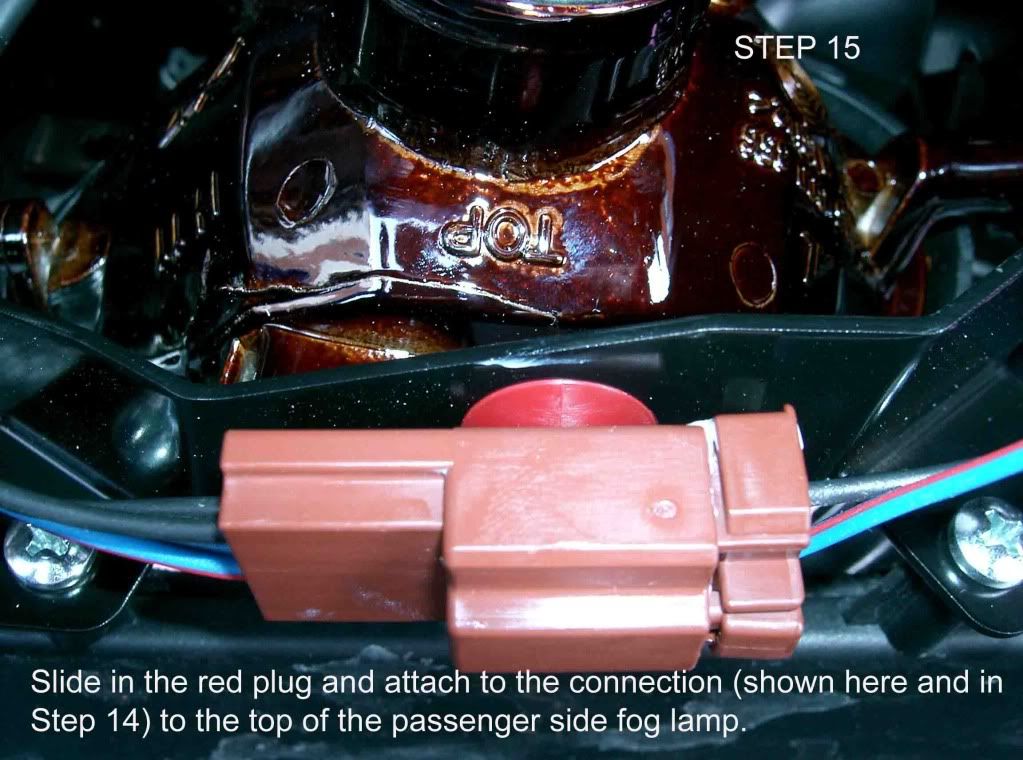
Step 15.
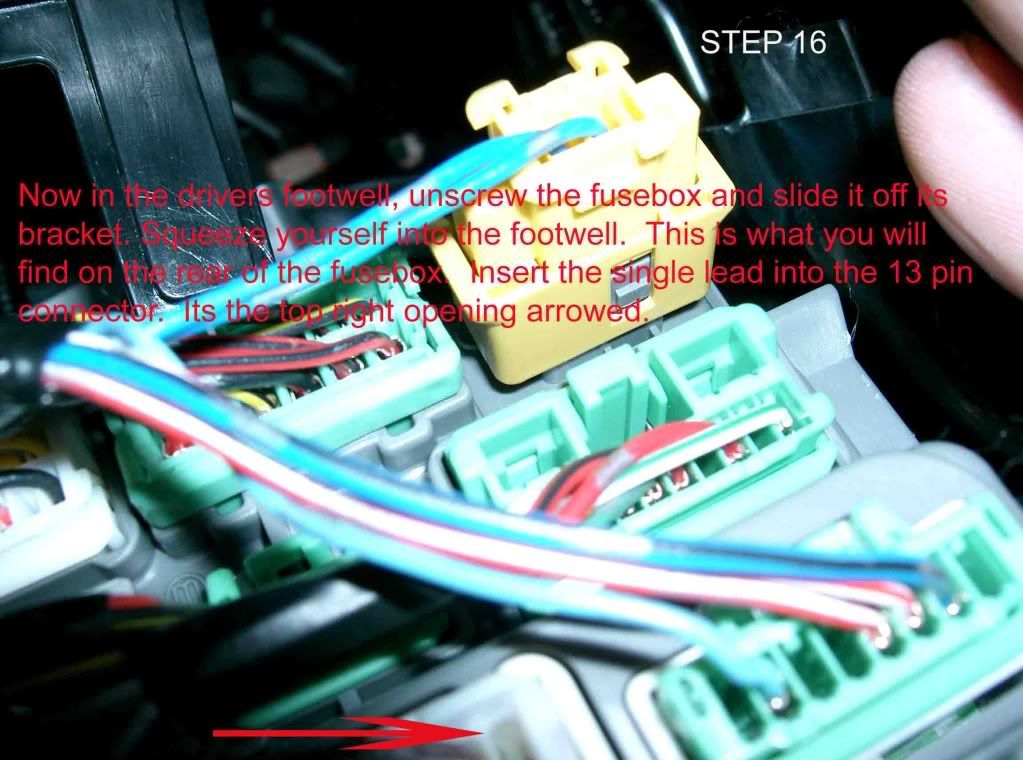
Step 16.
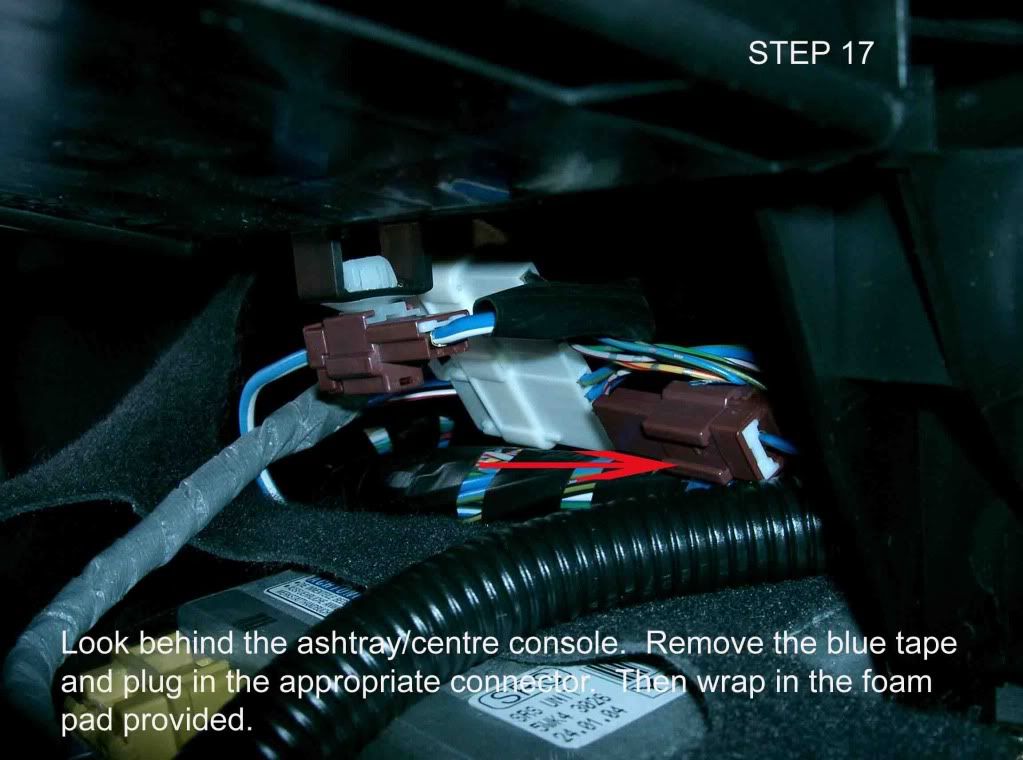
Step 17.
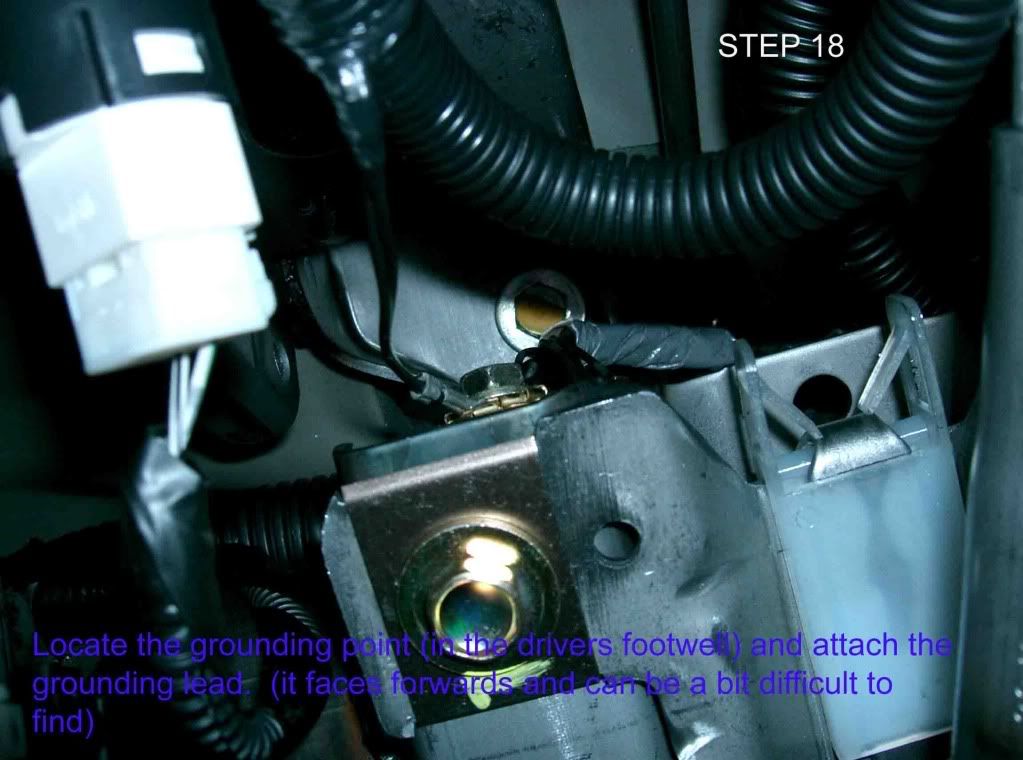
Step 18.
Step 19. Installing the switch.
Remove the furry cubby hole. It is fixed using two screws in the top and two clips (squeeze from the back to remove) at the bottom. Using your fingers push out the blanking plate. Push the switch into place and plug in the last remaining connector.
Now check that your window winds up and down.
Now turn on your ignition, your lights and press the fog light switch, jump outside and see the fog lights working
Now you have checked that all is working refix the panels in the drivers footwell and replace the bumper.
With thanks to mathew.lewis2 8)
Step 1.
Step2.
Step 3.
Step 4.
Step 5.
Step 6.
Step 7.
Step 7.1 Removing the bumper.
Pull the plastic arch liner clear of the bumper. Then start at the arch end of the bumper and pull firmly. The bumper will start to come out of its clips. It will take a little bit of force so donÂ’t worry!!! Work your way around to the other side. (Note: once the side edges of the bumper are free you can get your arm behind to help push the front out of its clips. The clips are below the lights). The bumper will now be free to move to where you want.
Step 8.
Step 9.
Step 10.
Step 11.
Step 12.
Step 13.
Step 14.
Step 15.
Step 16.
Step 17.
Step 18.
Step 19. Installing the switch.
Remove the furry cubby hole. It is fixed using two screws in the top and two clips (squeeze from the back to remove) at the bottom. Using your fingers push out the blanking plate. Push the switch into place and plug in the last remaining connector.
Now check that your window winds up and down.
Now turn on your ignition, your lights and press the fog light switch, jump outside and see the fog lights working
Now you have checked that all is working refix the panels in the drivers footwell and replace the bumper.
With thanks to mathew.lewis2 8)