- Messages
- 55
Hi, my first post on the forum, I've owned this for a little over a year now, I've had some ups and and downs with it, but heres quite a long progress thread for all the stuff I've done to it over the past year.
In December 2011, I decided I wanted a Type R. My mate had one, So i went out in his, and loved it. I appreciate people love or hate V-Tec, and the lack of torque, but coming from a 1.2, it felt fast enough.
I did some research and set some "simple" requirements:
Cosmic Grey.
2005 Facelift onwards.
Around 50k miles.
Premier Edition.
Now Im a bit of perfectionist (when TBH, I shouldnt be, I should realise a 6 year old hot hatch is going to have stone chips and parking dings...) This wildcard turned out to be the one I bought.
I present to you "scratch".
I call it Scratch because it has a horrble scratched bonnet which had rusted, and a cracked Red H front badge... Now this was the pic I was sent from the advert, and it looks horrible...

However, after a 100 mile drive, when I got there It didnt seem to bad. In fact, the whole thing seemed genuine. Not Perfect, but genuine!The HPI was perfect so After a while, some bartering, me walking off, then walking back in, a deal was struck and I now owned a Type R. I had the insurance set up ready so I drove home:

Its a 55 Plate Facelift Premier, so it has the tints, the Type R Embossed Calipers, the plaque on the centre console, and most importantly Recaro Trendline Seats which are lovely")


So I owned it, I was legal in it, and I had some cash in my pocket for mods.......
However, 300 miles later, the Clutch started slipping in 6th gear....I took it to get looked at, and it was confirmed it was the clutch, I would have probably got longer out of it, But I decided to get it done whilst I had the cash. Was it going when the lad I bought it from had it? Is it something I've done? TBH I dont know, all that matters is its done now. Whilst it was in I had the Oil and gearbox oil done.
I got it back yesterday, £500 lighter, but It does feel 10x the car. Im not happy about it, but its one of those things and its done....
I decided to sort the Badge out today, I ordered it from Honda with a Touch Up Stick...

Heres the badge and scratch, not too bad really...


Grill popped out with 12 pop screws,

All done

I then decided to buy a few mods:
Tegiwa M Filter
Tegiwa Red Samco
Tegiwa Carbon Fibre Inlet Cover
Tegiwa Carbon Fibre Spark Cover
Tegiwa Red Oil Cap
Geniune Mugen Radiator Cap (£35!!)
Genuine Mugen Resevoir Socks
Password JDM Battery Bar
Lowered 30mm on Eibach/ABP Springs
Uprated Bulbs all round, Silvertec'd rear lights and Festoon Number Plate Lights.


Done a fair bit more on this, First of all, lets get the boring stuff out the way:
I needed to tax it end of March and the MOT runs out April 7th, so I always MOT my car a month early just in case, So that was March the 7th. I set aside a bit of cash for tyres and brakes.... However the Tyres have around 2k on them before they would even become an advisory, and I had my Red Stuff Pads and 300mm Brembo Discs fitted prior to the MOT. The good news is it passed with flying colours, Not even an advisory! The Garage owner had a little test drive of my car (I thought there was a slight caliper drag) and he said it is honestly the best CTR he has ever driven, which filled me with confidence!
To celebrate this I had a little spend:
A Skunt 2 Heavyweight Gear Knob


I then decided to give it a decent clean!
Now Cosmic Grey gets alot of stick for been a boring colour, but the end result was:


I also painted the calipers Black, will put the red R on at some point

De Badged the Rear Civic Badge

Few pics with the Elise


I've booked it for a full alloy wheel refurb on Thursday (Tyres off etc) in the stock Hyper Silver colour.
Also got Energy Suspension Engine Mounts to fit.
Right my cars been @ Laptab most of the day. Managed to get an amazing deal on my refurb (I went for standard colour, whilst I appreciate people suggest refurbing in a different colour ot its not worth it, I think a set of spanking looking OEM wheels can look cool too!)
I also got the tyres switched round, and my 5mm Spacers fitted. The Spacers were the cheapest mod Ive ever done, and yet are so effective, Im not sure if the pics show it, but they honestly make a difference! They were trial and error, but I think Im sticking with 5mm, I think 10mm+ would be a little try hard.
The cars very dusty right now but heres some quick shots.


I decided to buy some Heko Wind Deflectors


A Filthy pic of them fitted on a council estate, a bit different to my drive

Felt bad, so gave it a quick wash, then the heavens opened!

Ordered some None GB Plates, just to freshen it up a bit. And a Genuine Mugen Badge, going to put it under the Type R one on the rear

Tiny Update....
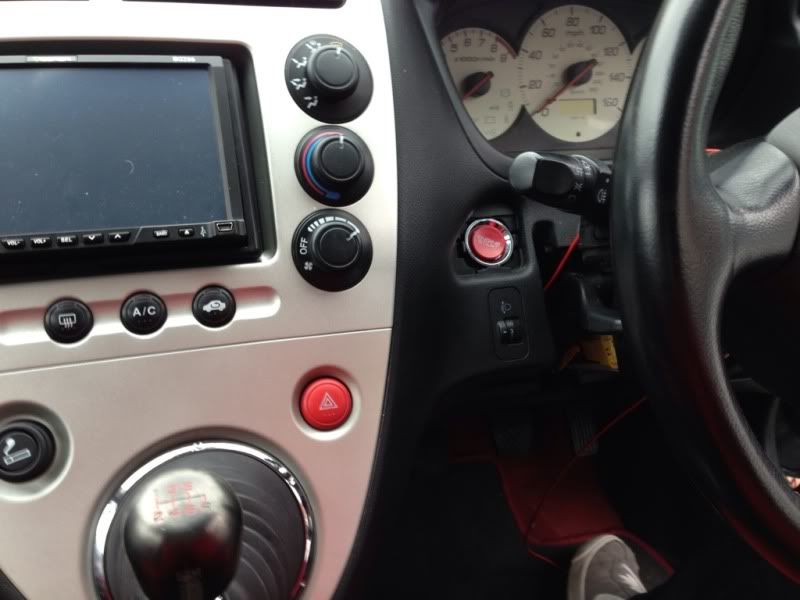
I've then been spending my money on the inevitable car bills, Tax and Insurance, which cost over a grand, so the only mods I've done lately are a HID kit (not sure if legal, but the best mod Ive ever done seriously!) and a TRS Towing Eye (Because RACECAR) lol


Been keeping it Clean:

I then decided to look at upgrading the ICE in the car, but of a Taboo Subject I'm guessing but I've ordered:
Double DIN DVD Player with Reverse Camera
2x Ground Zero Titanium Amplifiers
Ground Zero 6.5" Componants
SPL Dynamics XTR 12" Sub Woofers
Also ordered 4 Gauge Wiring, Ground Zero RCA's and some Sound Deadening, Ill fit it all slowly when Im back of my hols
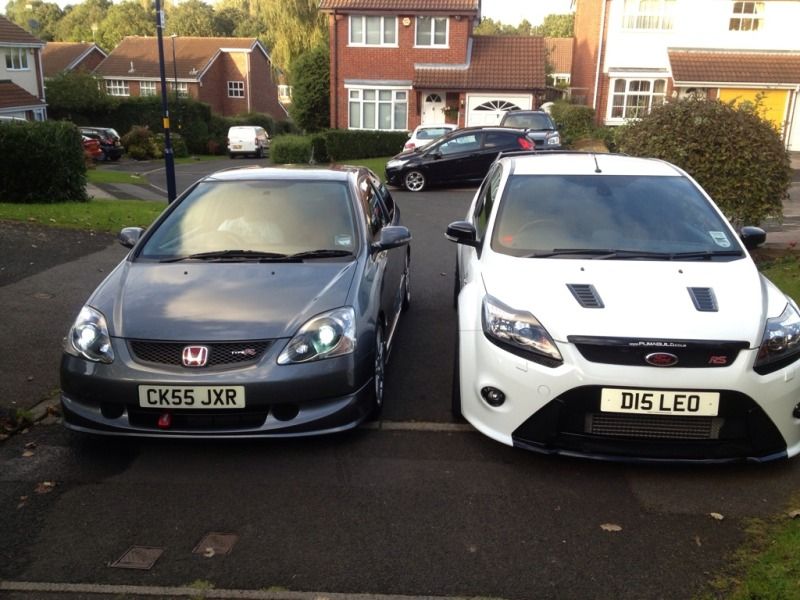
Also grabbed some pics with my mates new car (had the Orange ST) 430BHP 2010 Focus RS Mk2 with Alcon 6 Pot Brakes :|


Well, I got bored of the stock head unit. I was on a budget, so I took a risk and bought an Eonon Unit from eBay for £149....IT has a 3 month 100% money back gaurentee, so if it was poor, Id simply send it back. However, I must say Im rather impressed! The Bluetooth works perfectly in both streaming music and hands free mode. Seriously, the bluetooth on this anhilates my previous Pioneer Flip Out Screen.I'm using an iPhone 4S, my iPhone 5 comes soon so Im hoping it still works, but I'm not holding my breathe! The Internal amplifier which wont be used for long seems to have improved the sound of the stock paper speakers (Which wont be used for much longer). It plays DVD's/CD's well, and the radio picks up every station I need. The screen is pretty fluid too, its almost like an iPhone screen going between apps, you can SWIPE between pages/modes, which impressed me! It has a Reverse Camera, USB/SD Card/iPhone/iPod Mode, and you can add Nav/TV if you wish (I Probably will if it supports iPhone 5)
Only issue I have is the Angle it sits at, means its not perfect in sun light (this is down to Honda, not them however) My mate had a decent Pioneer NAv in his Type R and his was the same. Also, Im not using an adapter Fascia, so it does stick out a little bit, but Im hoping I can modify it some how.
However, I decided to get started, I only had 3 hours to do this so had to rush!

15 mins later

Fitted


I then had to go buy an ISO adapter as Honda uses a weird Pluig, £2.99 on eBay or £19 at my local audio shop, but I needed it now so I had to drive to the Shop with the dash like the above!

Watching the Dark Knight

Really Impressed for the cash, quality is awesome!
I also wired in the Reverse Camera, RCA's and Remote lead ready for the boot build
Started the door Builds today, Still waiting on my tweeter pods from Honda, So just did the deadening, trimming and MDF Baffles

Whipped the door card off:

This pony thing was there before:

Ripped all the old stuff out, and started deadedning the outer skin

Then Sealed as best I could, the inner skin,

Mounted some 24mm MDF Baffles and the Woofer:

All fits back on invisibly once the door cards on Had to trim the inner door skin with tin strips to clear the woofer magnet, and inner door card slightly with a stanley blade, but nothing too major! With the exception of the deadening should go back to stock pretty easily!
The rest of my sound deadening and my Tweeter Pods came. Some Civics came with these optional Tweeters in the mirror covers, but they were rare. People on eBay seem to think this means they are rare and expensive. Fortunately, Honda has an awesome online parts site, Called Lings Honda. Its basically a website where you can order parts online. Each car has Schemetics/Exploded Diagrams (similar to an R/C Car manual!) So I found the tweeters pods and bought them for £8.50ish each
I had football training so didnt start till 8:30pm, armed with a Xenon Lantern Light, I started, was finished by 11pm!

I finished up the right hand door, (deadening,trimmed and added MDF Baffles)

All fitted back together like new Cant really tell anythings changed!

Close up of the Tweeter Holders

Ive ordered my Amplifier now, its only a cheap 4 Channel, it will provide the following:
Channel 1 & 2 will send 90wrms to Each Door Componant
Channel 3 & 4 will be bridged sending 320wrms @ 4ohm to my Subwoofer (im used the 10x that but never mind)
Here's the sub in a generic 1.5 CUFT Sealed Box

Now the amp was ordered, I decided to start running the wiring for the amplifier. Just a 4 Gauge kit. To keep interfearence at a minimum,
Ive ran the Power wire down the left hand side, and will run the RCA's, Remote Turn on Cable & Reverse Camera wiring down the centre. This meant taking out the centre console. Been a Honda, there were plenty of guides online and it came out with 6 screws:

I simply followed some existing loom and zip tied the cables to it:

Out came the rear bench

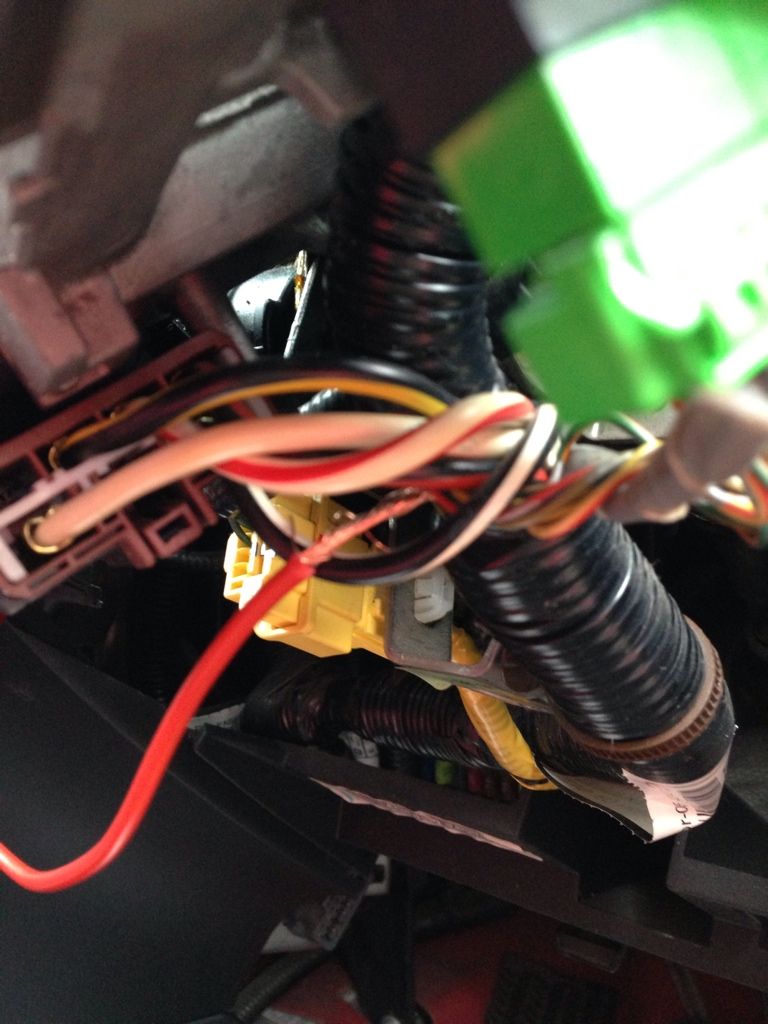
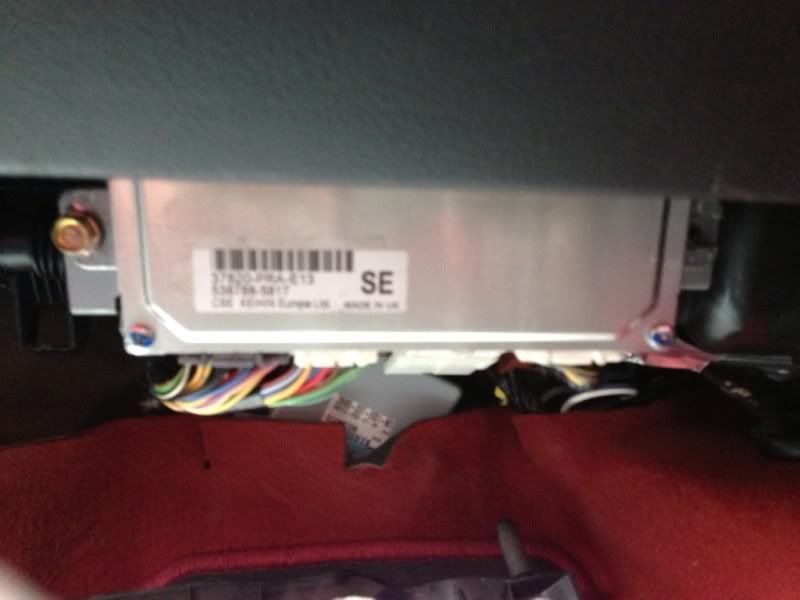
I then ran the power Cable all the way down the left hand side upto the Glove box. I didnt bother putting it through into the engine bay, as Im not ready to power up yet, so for now its stashed behind the glove box:

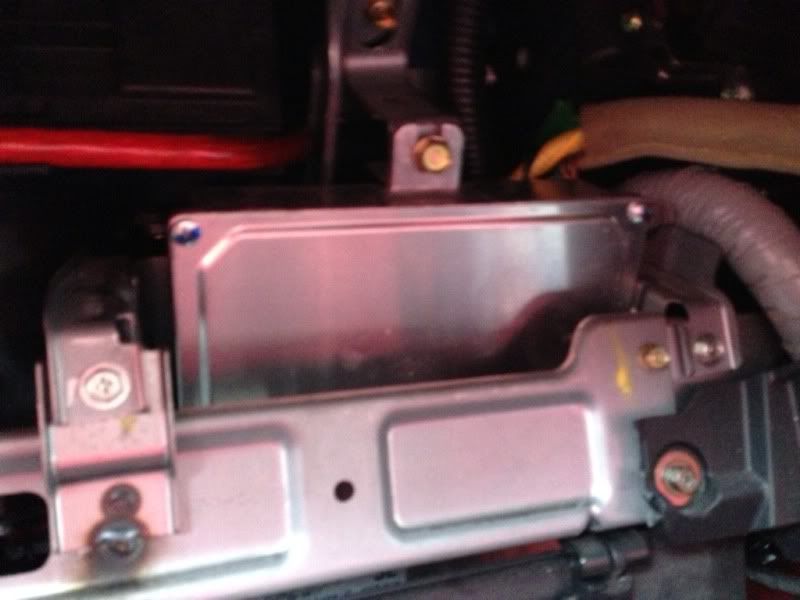
Heres the grommit I'll push through

So the Amp arrived...

Because Id gone about it the hard way, and ran the power cable from the boot to the engine bay, as opposed to the engine bay to the boot, Id made it very difficult to feed the power wire from the cabin into the engine bay! I borrowed a flexi rod off my CCTV installing pal, removed the Tegiwa M Air Intake and pushed this through into the cabin.

Flipped down the Glovebox and out it came

Taped the power wire to the rod and pulled it through

So thats that. Only issue now is I need to crimp the terminals on to the wires, but my crimps are poor, So Im gonna ask my mate to crimp my connectors on with his high end crimps.
I need to find and earth in the boot, but Im struggling, so off to do a bit of research!
Fresh rubber Went for 4x Toyo T1R's, got them for a decent price. Currently have P Zero's, but these worked out £40 a corner cheaper! Ive heard they arent the best for the winter, but 8mm of new tread vs 2mm of old tread is surely better.
Dont need them on till Xmas time, but had a decent month at work so got them whilst I had some spare cash

I was forever getting the **** ripped out of me for the pathetic Key you get with an Ep3. It looks like its from an Austin Metro. I usually type "Civic Type R EP3" into ebay when I am bored nd I came across this!
http://www.ebay.co.uk/itm/390485776577?ssPageName=STRK:MEWNX:IT&_trksid=p3984.m1497.l2649
I whacked in an offer of £12 and it arrived 2 days later....
You start with this,

And basically, transfer the innards of your stock blipper into it, then get the key cut to the plain blade. I havent yet got the Blade cut, but as you are using the stock circuit board, no re programming etc is needed, its basically a shell.
Simple Job

And you end up with (IMO much better)

Also seen a few EP3's pull off the track look really well, Im not sure I can pull it off, but This little lot cost me around £20 2nd hand, so no big loss if I dont like it


Noticed a Screw in one of my rear tyres today. They were near enough illegal anyway, and I had 4x Toyos sitting in the garage waiting to be fitted

So I loaded up the CTR Van

Took it to a local place who charged me £40 to fit and Balance all 4 Not too bad I dont think!

Also, there was a 2" Nail sticking in the other one!

So glad theyre on now, no pictures as its dark now The alloys looked filthy with hand prints from the fitters, So Ive just cleaned the wheels and added tyre gel with a Torch on my drive, bet thats got the neighbours talking!
Decided to do something Ive wanted to do for a while now. EP3's seem to suffer with faded Centre caps, pretty much everyone Ive saw has them.
I didnt get a before picture, but heres what pretty much all of mine (and everyone elses) looked like. Check out the price too, thats for a used faded one!
http://www.ebay.co.uk/itm/HONDA-CIV...ivic|Cars+Type:2.0+Type-R&hash=item4abf5f1cbc
Rather than buy new ones, I decided to have a go at refurbing mine. I bought some Plastic Primer, wet and dry, Wheel Silver Paint, clear lacquer and some Red H Honda Decals off the CTRO.

Also got some Red Wheel Nuts, but you need adapter to fit them, and they havent yet arrived!
Whilst the wheels were off, I cleaned inside the arches and the inside of the wheels. Yes I used axle stands

Cleaned the wheels

My Mate did most of the next part whilst I cleaned the wheels, so I cant take credit for the finish. We flatted the centre caps back with wet and dry, gave it a few coats of plastic primer, then a few coats of wheel silver. Once they were dry, we added the decal and put 2x thin coats of Clean Lacquer to seal them.

Colour match is spot on considering its an off the shelf paint.

Now we are up to February 2013!
WELL!!! I've not drove this since January the 12th!! Got a bit of a scuff, (long story!) and I generally got fed up of having a car I Care about!

I parked it up, put it on trickle charge and forgot about it. I've been cruising about in a Golf Diesel and generally not caring about motoring!
The Type R needed rear discs and pads, so I had them fitted today, and gave it a wash:

Put £20 petrol in and went for a blast, really enjoyed it
I've had some good news financially lately, and a few options went through my mind. I was going to sell it and buy an Evo, Sell it and buy a 2010 330D Coupe, even sell it, keep using the golf and stick 5 figures in a savings account, but In the end I've decided to keep it, So I'm Going to spend a fair amount of cash on it in the next few months. I toyed with the idea of charging, but I've lost a lot of money modding a car in the past, so Im not going anywhere near as mad! I then decided to do everything to the engine which didnt involve opening it up, which would give me around 240bhp, but in the end, this is what I've decided to do:
Front End Respray:
Cobra 2.5" Silenced Cat Back Exhaust
http://www.ebay.co.uk/itm/130591104615?ssPageName=STRK:MEWAX:IT&_trksid=p3984.m1438.l2649
K100 + Rolling Road Map
http://www.euro-spec2000.co.uk/Tuning/Honda/Civic-Type-R-EP3/
JDM ARB
http://www.tegiwaimports.com/genuine-honda-jdm-rear-anti-roll-bar-civic-type-r-ep3-3035/
Tegiwa Lower Tie Bar
http://www.tegiwaimports.com/tegiwa-civic-ep3-anodized-rear-lower-tie-bar-321/
Eibach Camber Bolts:
http://www.ebay.co.uk/itm/230889075147?ssPageName=STRK:MEWAX:IT&_trksid=p3984.m1438.l2649
Japspeed Camber Arms:
http://www.ebay.co.uk/itm/150926752242?ssPageName=STRK:MEWAX:IT&_trksid=p3984.m1438.l2649
Fast Road Set Up.
HEL Brake Lines:
http://www.tegiwaimports.com/hel-brake-lines-hoses-civic-ep3-01-06-1121/
The car should be around the 220bhp, with decent gains in the mid range and a lower V-Tec engagement point. The car already has, some upgraded Discs and Pads, new Toyo's (about 300miles old) and the ABP Sports Suspension, so with the other handling modifications I should have a decent little Hot Hatch
Not sure when Ill start it all or in what order, but I hope to be done for the Summer. Had a quote of £350 for the damage repair, there's no dents, its just flaked the paint off, do we think thats a good price or???
Well, I ordered it all. Had a decent win in the local casino, which has paid for most of this Quite a bit came today, still got to wait for the Cat Back System and the HEL Brake lines but here's what Ive got so far:
Jazz Washer Jets
JDM 22mm Anti Roll Bar
Poly Flex JDM Bushes
Tegiwa Red Lower Tie Bar
Genuine UKDM Mats - cant beat fresh genuine mats
Blackworks Upper Rear Camber Arms
Tegiwa Front Camber Bolts
AP Racing Dot 5.1 Brake Fluid
Trying to get it all fitted the weekend, then its off to A Line to do a Fast Road Set up Ill get the exhaust fitted and book it in at TDI North for the K100 Hoping for 220bhp!
Declared it all to the insurance and its gone up, but not too much so thats all good.

Blackworks Rear arms, really are a work of art compared to my D2 Racing ones!

Red Lower Tie Bar: Not sure what they do, I followed a CTR with one and wanted one

Topped up the cleaning cupboard too

Starting to look a little Cramped now =/

HEL Brake Lines came today:

Exhausts coming Wednesday, I expected less than a 6 Day turn around when I paid £18 Postage, but such is life.
Gave it a quick clean today and fitted brand new OEM Mats, which came with the Clamp, which my car never had and I always lost out on eBay:


Weather was good today, so me and a pal had a go at fitting some of my parts. First one, nice and easy Jazz washer jets. These spray a mist of water as opposed to a jet. Simple enough even for me:

Then decided to have a pop at fitting the Rear Camber Arms, JDM Anti Roll Bar, Poly Bushes and Blackworks Camber arms.
I popped to the local motor factors to buy some new Drop Links., just to make things easier and jacked the car up:

Got a bit carried away with the Camber Arms, so no pics. I've done them by Eye for now. Ill get the Fast Road Geometry Check done at a place 8 miles away, so even if Im a tad out, it wont cause catastrophic wear to my new Toyos! I'll not use the car till then!
Here's a terrible pic taken through the wheel!

Then moved on to ARB:
Tilt your heads 90 degrees

After some swearing, sawing off the old drop links, and getting filthy, here's how she stands at the moment

We had a look at the Front Camber Bolts, I'm guessing they work kinda like a Cam, but wasn't too sure so Ill let A-Line fit them when they do the Fast Road Set Up on Thursday if they can get me in!
The Fast Road Set Up is going to be as follows:
Front Camber: -1 Degree
Rear Camber: -1 Degree
Front Toe Out: 1 Degree
Rear Toe In: 1 Degree
Front Camber Bolts are on, couldnt get in today to do the FRSU, so thats getting done in the morning. However the Exhaust came today.
Cobra, 2.5" Centre Bore, 4" Rear Can. with 2 small centre silencer.
Must say I'm very Impressed with the build quality!


Just need to get it fitted now.
Oh and I think Im going for a Race Header with Decat, get paid Friday so we will see Then it will be the respray an K100 + Mapping
In December 2011, I decided I wanted a Type R. My mate had one, So i went out in his, and loved it. I appreciate people love or hate V-Tec, and the lack of torque, but coming from a 1.2, it felt fast enough.
I did some research and set some "simple" requirements:
Cosmic Grey.
2005 Facelift onwards.
Around 50k miles.
Premier Edition.
Now Im a bit of perfectionist (when TBH, I shouldnt be, I should realise a 6 year old hot hatch is going to have stone chips and parking dings...) This wildcard turned out to be the one I bought.
I present to you "scratch".
I call it Scratch because it has a horrble scratched bonnet which had rusted, and a cracked Red H front badge... Now this was the pic I was sent from the advert, and it looks horrible...
However, after a 100 mile drive, when I got there It didnt seem to bad. In fact, the whole thing seemed genuine. Not Perfect, but genuine!The HPI was perfect so After a while, some bartering, me walking off, then walking back in, a deal was struck and I now owned a Type R. I had the insurance set up ready so I drove home:
Its a 55 Plate Facelift Premier, so it has the tints, the Type R Embossed Calipers, the plaque on the centre console, and most importantly Recaro Trendline Seats which are lovely
So I owned it, I was legal in it, and I had some cash in my pocket for mods.......
However, 300 miles later, the Clutch started slipping in 6th gear....I took it to get looked at, and it was confirmed it was the clutch, I would have probably got longer out of it, But I decided to get it done whilst I had the cash. Was it going when the lad I bought it from had it? Is it something I've done? TBH I dont know, all that matters is its done now. Whilst it was in I had the Oil and gearbox oil done.
I got it back yesterday, £500 lighter, but It does feel 10x the car. Im not happy about it, but its one of those things and its done....
I decided to sort the Badge out today, I ordered it from Honda with a Touch Up Stick...
Heres the badge and scratch, not too bad really...
Grill popped out with 12 pop screws,
All done
I then decided to buy a few mods:
Tegiwa M Filter
Tegiwa Red Samco
Tegiwa Carbon Fibre Inlet Cover
Tegiwa Carbon Fibre Spark Cover
Tegiwa Red Oil Cap
Geniune Mugen Radiator Cap (£35!!)
Genuine Mugen Resevoir Socks
Password JDM Battery Bar
Lowered 30mm on Eibach/ABP Springs
Uprated Bulbs all round, Silvertec'd rear lights and Festoon Number Plate Lights.
Done a fair bit more on this, First of all, lets get the boring stuff out the way:
I needed to tax it end of March and the MOT runs out April 7th, so I always MOT my car a month early just in case, So that was March the 7th. I set aside a bit of cash for tyres and brakes.... However the Tyres have around 2k on them before they would even become an advisory, and I had my Red Stuff Pads and 300mm Brembo Discs fitted prior to the MOT. The good news is it passed with flying colours, Not even an advisory! The Garage owner had a little test drive of my car (I thought there was a slight caliper drag) and he said it is honestly the best CTR he has ever driven, which filled me with confidence!
To celebrate this I had a little spend:
A Skunt 2 Heavyweight Gear Knob
I then decided to give it a decent clean!
Now Cosmic Grey gets alot of stick for been a boring colour, but the end result was:
I also painted the calipers Black, will put the red R on at some point
De Badged the Rear Civic Badge
Few pics with the Elise
I've booked it for a full alloy wheel refurb on Thursday (Tyres off etc) in the stock Hyper Silver colour.
Also got Energy Suspension Engine Mounts to fit.
Right my cars been @ Laptab most of the day. Managed to get an amazing deal on my refurb (I went for standard colour, whilst I appreciate people suggest refurbing in a different colour ot its not worth it, I think a set of spanking looking OEM wheels can look cool too!)
I also got the tyres switched round, and my 5mm Spacers fitted. The Spacers were the cheapest mod Ive ever done, and yet are so effective, Im not sure if the pics show it, but they honestly make a difference! They were trial and error, but I think Im sticking with 5mm, I think 10mm+ would be a little try hard.
The cars very dusty right now but heres some quick shots.
I decided to buy some Heko Wind Deflectors
A Filthy pic of them fitted on a council estate, a bit different to my drive
Felt bad, so gave it a quick wash, then the heavens opened!
Ordered some None GB Plates, just to freshen it up a bit. And a Genuine Mugen Badge, going to put it under the Type R one on the rear
Tiny Update....
I've then been spending my money on the inevitable car bills, Tax and Insurance, which cost over a grand, so the only mods I've done lately are a HID kit (not sure if legal, but the best mod Ive ever done seriously!) and a TRS Towing Eye (Because RACECAR) lol
Been keeping it Clean:
I then decided to look at upgrading the ICE in the car, but of a Taboo Subject I'm guessing but I've ordered:
Double DIN DVD Player with Reverse Camera
2x Ground Zero Titanium Amplifiers
Ground Zero 6.5" Componants
SPL Dynamics XTR 12" Sub Woofers
Also ordered 4 Gauge Wiring, Ground Zero RCA's and some Sound Deadening, Ill fit it all slowly when Im back of my hols
Also grabbed some pics with my mates new car (had the Orange ST) 430BHP 2010 Focus RS Mk2 with Alcon 6 Pot Brakes :|
Well, I got bored of the stock head unit. I was on a budget, so I took a risk and bought an Eonon Unit from eBay for £149....IT has a 3 month 100% money back gaurentee, so if it was poor, Id simply send it back. However, I must say Im rather impressed! The Bluetooth works perfectly in both streaming music and hands free mode. Seriously, the bluetooth on this anhilates my previous Pioneer Flip Out Screen.I'm using an iPhone 4S, my iPhone 5 comes soon so Im hoping it still works, but I'm not holding my breathe! The Internal amplifier which wont be used for long seems to have improved the sound of the stock paper speakers (Which wont be used for much longer). It plays DVD's/CD's well, and the radio picks up every station I need. The screen is pretty fluid too, its almost like an iPhone screen going between apps, you can SWIPE between pages/modes, which impressed me! It has a Reverse Camera, USB/SD Card/iPhone/iPod Mode, and you can add Nav/TV if you wish (I Probably will if it supports iPhone 5)
Only issue I have is the Angle it sits at, means its not perfect in sun light (this is down to Honda, not them however) My mate had a decent Pioneer NAv in his Type R and his was the same. Also, Im not using an adapter Fascia, so it does stick out a little bit, but Im hoping I can modify it some how.
However, I decided to get started, I only had 3 hours to do this so had to rush!
15 mins later
Fitted
I then had to go buy an ISO adapter as Honda uses a weird Pluig, £2.99 on eBay or £19 at my local audio shop, but I needed it now so I had to drive to the Shop with the dash like the above!
Watching the Dark Knight
Really Impressed for the cash, quality is awesome!
I also wired in the Reverse Camera, RCA's and Remote lead ready for the boot build
Started the door Builds today, Still waiting on my tweeter pods from Honda, So just did the deadening, trimming and MDF Baffles
Whipped the door card off:
This pony thing was there before:
Ripped all the old stuff out, and started deadedning the outer skin
Then Sealed as best I could, the inner skin,
Mounted some 24mm MDF Baffles and the Woofer:
All fits back on invisibly once the door cards on
Had to trim the inner door skin with tin strips to clear the woofer magnet, and inner door card slightly with a stanley blade, but nothing too major! With the exception of the deadening should go back to stock pretty easily!The rest of my sound deadening and my Tweeter Pods came. Some Civics came with these optional Tweeters in the mirror covers, but they were rare. People on eBay seem to think this means they are rare and expensive. Fortunately, Honda has an awesome online parts site, Called Lings Honda. Its basically a website where you can order parts online. Each car has Schemetics/Exploded Diagrams (similar to an R/C Car manual!) So I found the tweeters pods and bought them for £8.50ish each
I had football training so didnt start till 8:30pm, armed with a Xenon Lantern Light, I started, was finished by 11pm!
I finished up the right hand door, (deadening,trimmed and added MDF Baffles)
All fitted back together like new
Cant really tell anythings changed!
Close up of the Tweeter Holders
Ive ordered my Amplifier now, its only a cheap 4 Channel, it will provide the following:
Channel 1 & 2 will send 90wrms to Each Door Componant
Channel 3 & 4 will be bridged sending 320wrms @ 4ohm to my Subwoofer (im used the 10x that but never mind)
Here's the sub in a generic 1.5 CUFT Sealed Box
Now the amp was ordered, I decided to start running the wiring for the amplifier. Just a 4 Gauge kit. To keep interfearence at a minimum,
Ive ran the Power wire down the left hand side, and will run the RCA's, Remote Turn on Cable & Reverse Camera wiring down the centre. This meant taking out the centre console. Been a Honda, there were plenty of guides online and it came out with 6 screws:
I simply followed some existing loom and zip tied the cables to it:
Out came the rear bench
I then ran the power Cable all the way down the left hand side upto the Glove box. I didnt bother putting it through into the engine bay, as Im not ready to power up yet, so for now its stashed behind the glove box:
Heres the grommit I'll push through
So the Amp arrived...
Because Id gone about it the hard way, and ran the power cable from the boot to the engine bay, as opposed to the engine bay to the boot, Id made it very difficult to feed the power wire from the cabin into the engine bay! I borrowed a flexi rod off my CCTV installing pal, removed the Tegiwa M Air Intake and pushed this through into the cabin.
Flipped down the Glovebox and out it came
Taped the power wire to the rod and pulled it through
So thats that. Only issue now is I need to crimp the terminals on to the wires, but my crimps are poor, So Im gonna ask my mate to crimp my connectors on with his high end crimps.
I need to find and earth in the boot, but Im struggling, so off to do a bit of research!
Fresh rubber
Went for 4x Toyo T1R's, got them for a decent price. Currently have P Zero's, but these worked out £40 a corner cheaper! Ive heard they arent the best for the winter, but 8mm of new tread vs 2mm of old tread is surely better.Dont need them on till Xmas time, but had a decent month at work so got them whilst I had some spare cash
I was forever getting the **** ripped out of me for the pathetic Key you get with an Ep3. It looks like its from an Austin Metro. I usually type "Civic Type R EP3" into ebay when I am bored nd I came across this!
http://www.ebay.co.uk/itm/390485776577?ssPageName=STRK:MEWNX:IT&_trksid=p3984.m1497.l2649
I whacked in an offer of £12 and it arrived 2 days later....
You start with this,
And basically, transfer the innards of your stock blipper into it, then get the key cut to the plain blade. I havent yet got the Blade cut, but as you are using the stock circuit board, no re programming etc is needed, its basically a shell.
Simple Job
And you end up with (IMO much better)
Also seen a few EP3's pull off the track look really well, Im not sure I can pull it off, but This little lot cost me around £20 2nd hand, so no big loss if I dont like it
Noticed a Screw in one of my rear tyres today. They were near enough illegal anyway, and I had 4x Toyos sitting in the garage waiting to be fitted
So I loaded up the CTR Van
Took it to a local place who charged me £40 to fit and Balance all 4
Not too bad I dont think!
Also, there was a 2" Nail sticking in the other one!
So glad theyre on now, no pictures as its dark now
The alloys looked filthy with hand prints from the fitters, So Ive just cleaned the wheels and added tyre gel with a Torch on my drive, bet thats got the neighbours talking!Decided to do something Ive wanted to do for a while now. EP3's seem to suffer with faded Centre caps, pretty much everyone Ive saw has them.
I didnt get a before picture, but heres what pretty much all of mine (and everyone elses) looked like. Check out the price too, thats for a used faded one!
http://www.ebay.co.uk/itm/HONDA-CIV...ivic|Cars+Type:2.0+Type-R&hash=item4abf5f1cbc
Rather than buy new ones, I decided to have a go at refurbing mine. I bought some Plastic Primer, wet and dry, Wheel Silver Paint, clear lacquer and some Red H Honda Decals off the CTRO.
Also got some Red Wheel Nuts, but you need adapter to fit them, and they havent yet arrived!
Whilst the wheels were off, I cleaned inside the arches and the inside of the wheels. Yes I used axle stands
Cleaned the wheels
My Mate did most of the next part whilst I cleaned the wheels, so I cant take credit for the finish. We flatted the centre caps back with wet and dry, gave it a few coats of plastic primer, then a few coats of wheel silver. Once they were dry, we added the decal and put 2x thin coats of Clean Lacquer to seal them.
Colour match is spot on considering its an off the shelf paint.
Now we are up to February 2013!
WELL!!! I've not drove this since January the 12th!! Got a bit of a scuff, (long story!) and I generally got fed up of having a car I Care about!
I parked it up, put it on trickle charge and forgot about it. I've been cruising about in a Golf Diesel and generally not caring about motoring!
The Type R needed rear discs and pads, so I had them fitted today, and gave it a wash:
Put £20 petrol in and went for a blast, really enjoyed it
I've had some good news financially lately, and a few options went through my mind. I was going to sell it and buy an Evo, Sell it and buy a 2010 330D Coupe, even sell it, keep using the golf and stick 5 figures in a savings account, but In the end I've decided to keep it, So I'm Going to spend a fair amount of cash on it in the next few months. I toyed with the idea of charging, but I've lost a lot of money modding a car in the past, so Im not going anywhere near as mad! I then decided to do everything to the engine which didnt involve opening it up, which would give me around 240bhp, but in the end, this is what I've decided to do:
Front End Respray:
Cobra 2.5" Silenced Cat Back Exhaust
http://www.ebay.co.uk/itm/130591104615?ssPageName=STRK:MEWAX:IT&_trksid=p3984.m1438.l2649
K100 + Rolling Road Map
http://www.euro-spec2000.co.uk/Tuning/Honda/Civic-Type-R-EP3/
JDM ARB
http://www.tegiwaimports.com/genuine-honda-jdm-rear-anti-roll-bar-civic-type-r-ep3-3035/
Tegiwa Lower Tie Bar
http://www.tegiwaimports.com/tegiwa-civic-ep3-anodized-rear-lower-tie-bar-321/
Eibach Camber Bolts:
http://www.ebay.co.uk/itm/230889075147?ssPageName=STRK:MEWAX:IT&_trksid=p3984.m1438.l2649
Japspeed Camber Arms:
http://www.ebay.co.uk/itm/150926752242?ssPageName=STRK:MEWAX:IT&_trksid=p3984.m1438.l2649
Fast Road Set Up.
HEL Brake Lines:
http://www.tegiwaimports.com/hel-brake-lines-hoses-civic-ep3-01-06-1121/
The car should be around the 220bhp, with decent gains in the mid range and a lower V-Tec engagement point. The car already has, some upgraded Discs and Pads, new Toyo's (about 300miles old) and the ABP Sports Suspension, so with the other handling modifications I should have a decent little Hot Hatch
Not sure when Ill start it all or in what order, but I hope to be done for the Summer. Had a quote of £350 for the damage repair, there's no dents, its just flaked the paint off, do we think thats a good price or???
Well, I ordered it all. Had a decent win in the local casino, which has paid for most of this
Quite a bit came today, still got to wait for the Cat Back System and the HEL Brake lines but here's what Ive got so far:Jazz Washer Jets
JDM 22mm Anti Roll Bar
Poly Flex JDM Bushes
Tegiwa Red Lower Tie Bar
Genuine UKDM Mats - cant beat fresh genuine mats
Blackworks Upper Rear Camber Arms
Tegiwa Front Camber Bolts
AP Racing Dot 5.1 Brake Fluid
Trying to get it all fitted the weekend, then its off to A Line to do a Fast Road Set up
Ill get the exhaust fitted and book it in at TDI North for the K100 Hoping for 220bhp!Declared it all to the insurance and its gone up, but not too much so thats all good.
Blackworks Rear arms, really are a work of art compared to my D2 Racing ones!
Red Lower Tie Bar: Not sure what they do, I followed a CTR with one and wanted one
Topped up the cleaning cupboard too
Starting to look a little Cramped now =/
HEL Brake Lines came today:
Exhausts coming Wednesday, I expected less than a 6 Day turn around when I paid £18 Postage, but such is life.
Gave it a quick clean today and fitted brand new OEM Mats, which came with the Clamp, which my car never had and I always lost out on eBay:
Weather was good today, so me and a pal had a go at fitting some of my parts. First one, nice and easy Jazz washer jets. These spray a mist of water as opposed to a jet. Simple enough even for me:
Then decided to have a pop at fitting the Rear Camber Arms, JDM Anti Roll Bar, Poly Bushes and Blackworks Camber arms.
I popped to the local motor factors to buy some new Drop Links., just to make things easier and jacked the car up:
Got a bit carried away with the Camber Arms, so no pics. I've done them by Eye for now. Ill get the Fast Road Geometry Check done at a place 8 miles away, so even if Im a tad out, it wont cause catastrophic wear to my new Toyos! I'll not use the car till then!
Here's a terrible pic taken through the wheel!
Then moved on to ARB:
Tilt your heads 90 degrees
After some swearing, sawing off the old drop links, and getting filthy, here's how she stands at the moment
We had a look at the Front Camber Bolts, I'm guessing they work kinda like a Cam, but wasn't too sure so Ill let A-Line fit them when they do the Fast Road Set Up on Thursday if they can get me in!
The Fast Road Set Up is going to be as follows:
Front Camber: -1 Degree
Rear Camber: -1 Degree
Front Toe Out: 1 Degree
Rear Toe In: 1 Degree
Front Camber Bolts are on, couldnt get in today to do the FRSU, so thats getting done in the morning. However the Exhaust came today.
Cobra, 2.5" Centre Bore, 4" Rear Can. with 2 small centre silencer.
Must say I'm very Impressed with the build quality!
Just need to get it fitted now.
Oh and I think Im going for a Race Header with Decat, get paid Friday so we will see
Then it will be the respray an K100 + Mapping
Last edited by a moderator: