
RickHondaR
R-32840
- Messages
- 1,903
Cleaned my Cosmic CTR approx 7 weeks ago with the Autoglm products in the order below
1. Super Resin Polish http://www.autoglym.com/enGB/product-proddetail.asp?v06VQ=HD&Range=1
2. Ultra Deep Shine http://www.autoglym.com/enGB/product-proddetail.asp?v06VQ=HF&Range=1
3. Extra Gloss Protection http://www.autoglym.com/enGB/product-proddetail.asp?v06VQ=FH&Range=1
4. Alloy Wheel Seal on the wheels http://www.autoglym.com/enGB/product-proddetail.asp?v06VQ=IJ&Range=1
5. Instant Tyre Dressing on the tyre's http://www.autoglym.com/enGB/product-proddetail.asp?v06VQ=FM&Range=1
6. Fast Glass on the windows http://www.autoglym.com/enGB/product-proddetail.asp?v06VQ=FI&Range=1
I do really rate the Autoglym range as its easy to use and give good results some people say the finish does not last as long as Meguiar's http://www.meguiars.co.uk/ which by most is rated as the best, but the Autoglym finish is as good and does cost half the price
I took these pictures approx 7 weeks after i had waxed with all of the above, so as you can see still looks nice and for just over 4years old I think she looks great

Genuine Honda front fogs i fitted myself and genuine JDM wind deflectors


Bosch aero twin wipers

Can you see the scuff on the tyre? This never marked the rim thats why i prefer 215 tyre's

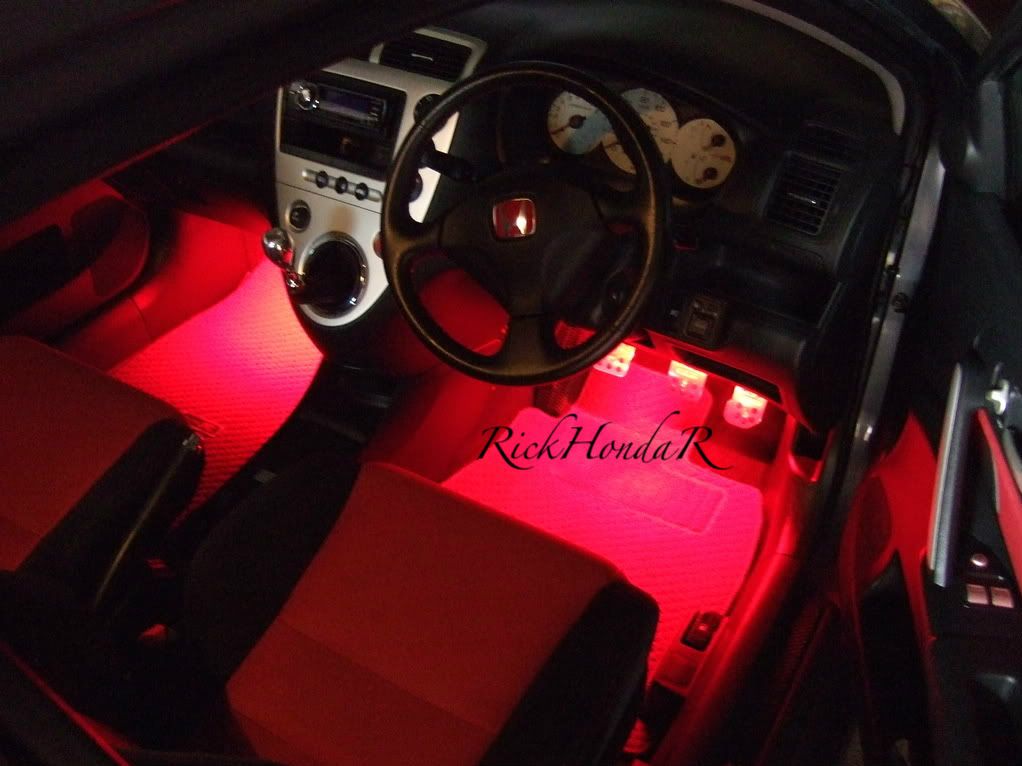
RickHondaR footwell lights / LED's

RickHondaR footwell lights (photo taken at dusk) I SELL THESE FOR £20
Sony 8" sub with built in amp, i have had this about 3 years kicks a bigger punch than you would think and is nice and compact in the boot

E-tech strut brace, i rate this a lot and fits with no problems unlike some

JDM carbon fibre door sill

Sparco pedals £26 from Halfords

Carbing tie bar painted in black

Sub fuse

Polished gear knob, i can do yours for £15

Vtec indicator

Thanks for looking comments welcome
1. Super Resin Polish http://www.autoglym.com/enGB/product-proddetail.asp?v06VQ=HD&Range=1
2. Ultra Deep Shine http://www.autoglym.com/enGB/product-proddetail.asp?v06VQ=HF&Range=1
3. Extra Gloss Protection http://www.autoglym.com/enGB/product-proddetail.asp?v06VQ=FH&Range=1
4. Alloy Wheel Seal on the wheels http://www.autoglym.com/enGB/product-proddetail.asp?v06VQ=IJ&Range=1
5. Instant Tyre Dressing on the tyre's http://www.autoglym.com/enGB/product-proddetail.asp?v06VQ=FM&Range=1
6. Fast Glass on the windows http://www.autoglym.com/enGB/product-proddetail.asp?v06VQ=FI&Range=1
I do really rate the Autoglym range as its easy to use and give good results some people say the finish does not last as long as Meguiar's http://www.meguiars.co.uk/ which by most is rated as the best, but the Autoglym finish is as good and does cost half the price
I took these pictures approx 7 weeks after i had waxed with all of the above, so as you can see still looks nice and for just over 4years old I think she looks great
Genuine Honda front fogs i fitted myself and genuine JDM wind deflectors
Bosch aero twin wipers
Can you see the scuff on the tyre? This never marked the rim thats why i prefer 215 tyre's
RickHondaR footwell lights / LED's
RickHondaR footwell lights (photo taken at dusk) I SELL THESE FOR £20
Sony 8" sub with built in amp, i have had this about 3 years kicks a bigger punch than you would think and is nice and compact in the boot
E-tech strut brace, i rate this a lot and fits with no problems unlike some
JDM carbon fibre door sill
Sparco pedals £26 from Halfords
Carbing tie bar painted in black
Sub fuse
Polished gear knob, i can do yours for £15
Vtec indicator
Thanks for looking comments welcome
Last edited by a moderator:
")