- Messages
- 29,212
My first How-To so here we go!
You will need
10mm socket
14mm socket
Ratchet driver for the above
Phillips screwdriver
Small flat head screwdriver
Scissors
About two hours if you are being careful
I would recommend doing this on a nice dry day as you don't want the carpet to be wet when you put it in. I also took a towel with me because personally when I'm jumping about in a car for a couple of hours I get a bit leaky... even with the windows open!
I also bagged up all of the bolts and screws with a note of where they came from, that way you won't be left with a couple of screws and thinking, where the @^%& did these come from!
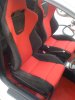
First up a few pics of the car as it used to be:


I have not photographed everything, simple things I just did before getting the camera out so will try to remember to include these bits!! I'm not going to tell you how to put it all back in because it is the reverse of taking it out!:lol: If there are any sticky bits going back in, I will mention them as I go. Also my car is a facelift so there may be slight differences in screw types but I would expect it will probably be the same.
First thing to do is whip out the passenger seat. It's the easiest and will give you some more room to work in. There is no sensor on this seat so just four bolts.
The first two to do are at the back. So slide the seat all the way forward and get in the back. Now only loosen these for now using the 14mm socket.

Next get out of the car and slide the seat all the way back. This is why we only loosened the back ones so the seat doesn't move about and bend the rails. You should now be able to see and take out the front two, again with the 14mm.


You should be able to undo the rear ones by hand and now lift the seat out. Be careful with the rails so that you do not scratch your paint or door cards on the way out!
It should now look like this:

Next slide the driver's seat all the way back and unscrew with the phillips screwdriver the mat stay.

Next disconnect the seatbelt sensor under the driver's seat.
Here's a few pics.


To undo the plug you just squeeze on the tab and pull, easy. The cable is held on with two lugged zip ties. Use the small flat head screw driver to poke the tab inside the zip tie head up and pull the tie out from the back. This avoids the need to pull the lug out from underneath the seat and risk damaging it.
Now the sensor is off you can take the driver's seat out exactly the same way as the passenger's.
Look, now much more room to work!! :lol:

At this point it might be worth hoovering out the car so that you don't end up with a load of stones under your new carpet later on!!
Remove the foot-rest. It just pulls off.

Now we need to remove the centre console that houses the handbrake, cubby and ashtray etc.
Undo the two screws at the back of the handbrake console, one at either side behind the handbrake, under the cup holder here:

Undo these two screws in the middle centre section with the phillips screwdriver. There is one at each side.

Once you've done that the rear section will unclip from the front and you can get that out of the way for now.
Next take out the two plugs one at either side at the front in the footwell. These are funny little blighters. To get them out you need to get your hand round the back push the pin in the middle. The little pin comes out and the four prongs narrow and the plug will come out. To put these back in it take the pin out completely and push the plug in and then the pin to fix into position.
They look like this.

Now open the cubby hole under the Type R serial plate and take out the rubber mat. Here you will find two bolts that you take out using a 10mm socket.

You need a fairly small ratchet driver to be able to fit into the cubby and this takes forever as you can only swing it a couple of clicks. At this point, I also made a big boo boo. See next pic.

These bolts go through the car floor to the under-belly of the car. Consequently they will be rusted up at the end. I would therefore recommend spraying them from below with WD40 before undoing them to avoid a snapped bolt like me.

Doh! :evil: Anyhow, drilled it out and a trip to Halfords later and all is fine!
Next take out the ashtray, pull down the chrome plate at the top and it slides out. Remove these couple of beauties hiding away in there with the phillips screwdriver, being careful not to drop them in the void at the back. If you do don't worry, because all the surrounding plastic is coming out shortly!!

Now with a bit of manouvering the whole remaining middle section should lift out.
Next you can undo the rails that hold the seat belts. Two bolts on each rail. I didn't photograph this as it was a bit obvious. These are a 14mm socket.
Next you will need to lift the front of the back seats up. Just give them a tug at either side straight up and they will lift up like this.

When you put these back, just lean on the seat and they will click back into place.
Right, you should be able to start pulling the carpet out from the back now!! :twisted: It will be tucked into all of the side panels so be careful not to put too much upwards pressure on them and try to pull the carpet from the middle in. That way you won't risk breaking the side panels.
The next bit bothered me at first but there is not really any way round it without making a shed load of work for yourself. I didn't get any pics because I was having a dilema about whether I was doing the right thing...
The carpet must be one of the first things that they put in the car because a piece of carpet runs through the handbarke housing. Without taking the handbrake assembly off there is no other way but to get the scissors and snip it, just in the middle so you can then get this round the handbrake. It is the same at the front at the bottom of the dash in the foot-well. The section where the dash mounts to the floor also has two bits that run through the mount, so no alternative but to snip away!!
Now be careful to pull the seatbelt sensor from the diver's seat through the hole in the carpet before you start tugging the carpet out of the car!!
And Robert is your mother's brother, your car looks like it's just been vandalised by Pimp My Ride....

I then took my old carpet and laid it on top of my new carpet and made the same but neater cuts on the new one. This is why I was slightly bothered, because I had paid extra for an 'un-cut' carpet. In my opinion, do not bother because you need to cut it to fit it!! Obviously check that it isn't ripped or torn.
Next put your new carpet in the car. I started by putting the back on first and anchoring it with the back seat where it pushes back in. Then lay the carpet flat out and start tucking it into the side panels. The second major reference point is the ridge where the front of the seat rails mount. Check the holes line up and that you have fed the seat belt sensor back through the carpet. Tuck it all in on both footwells and it should look like this!

Work backwards to mount the centre console section and put the footrest and mat stay back on , refix the seatbelt rails and put the seats back in, making sure you connect the seatbelt sensor plug and you're done!!
It took me 1 1/2 hours from the start to get the carpet out and half an hour to put the new one in and all the bits back in.
End result....

You will need
10mm socket
14mm socket
Ratchet driver for the above
Phillips screwdriver
Small flat head screwdriver
Scissors
About two hours if you are being careful
I would recommend doing this on a nice dry day as you don't want the carpet to be wet when you put it in. I also took a towel with me because personally when I'm jumping about in a car for a couple of hours I get a bit leaky...
even with the windows open!I also bagged up all of the bolts and screws with a note of where they came from, that way you won't be left with a couple of screws and thinking, where the @^%& did these come from!
First up a few pics of the car as it used to be:
I have not photographed everything, simple things I just did before getting the camera out so will try to remember to include these bits!! I'm not going to tell you how to put it all back in because it is the reverse of taking it out!:lol: If there are any sticky bits going back in, I will mention them as I go. Also my car is a facelift so there may be slight differences in screw types but I would expect it will probably be the same.
First thing to do is whip out the passenger seat. It's the easiest and will give you some more room to work in. There is no sensor on this seat so just four bolts.
The first two to do are at the back. So slide the seat all the way forward and get in the back. Now only loosen these for now using the 14mm socket.
Next get out of the car and slide the seat all the way back. This is why we only loosened the back ones so the seat doesn't move about and bend the rails. You should now be able to see and take out the front two, again with the 14mm.
You should be able to undo the rear ones by hand and now lift the seat out. Be careful with the rails so that you do not scratch your paint or door cards on the way out!
It should now look like this:
Next slide the driver's seat all the way back and unscrew with the phillips screwdriver the mat stay.
Next disconnect the seatbelt sensor under the driver's seat.
Here's a few pics.
To undo the plug you just squeeze on the tab and pull, easy. The cable is held on with two lugged zip ties. Use the small flat head screw driver to poke the tab inside the zip tie head up and pull the tie out from the back. This avoids the need to pull the lug out from underneath the seat and risk damaging it.
Now the sensor is off you can take the driver's seat out exactly the same way as the passenger's.
Look, now much more room to work!! :lol:
At this point it might be worth hoovering out the car so that you don't end up with a load of stones under your new carpet later on!!
Remove the foot-rest. It just pulls off.
Now we need to remove the centre console that houses the handbrake, cubby and ashtray etc.
Undo the two screws at the back of the handbrake console, one at either side behind the handbrake, under the cup holder here:
Undo these two screws in the middle centre section with the phillips screwdriver. There is one at each side.
Once you've done that the rear section will unclip from the front and you can get that out of the way for now.
Next take out the two plugs one at either side at the front in the footwell. These are funny little blighters. To get them out you need to get your hand round the back push the pin in the middle. The little pin comes out and the four prongs narrow and the plug will come out. To put these back in it take the pin out completely and push the plug in and then the pin to fix into position.
They look like this.
Now open the cubby hole under the Type R serial plate and take out the rubber mat. Here you will find two bolts that you take out using a 10mm socket.
You need a fairly small ratchet driver to be able to fit into the cubby and this takes forever as you can only swing it a couple of clicks. At this point, I also made a big boo boo. See next pic.
These bolts go through the car floor to the under-belly of the car. Consequently they will be rusted up at the end. I would therefore recommend spraying them from below with WD40 before undoing them to avoid a snapped bolt like me.
Doh! :evil: Anyhow, drilled it out and a trip to Halfords later and all is fine!
Next take out the ashtray, pull down the chrome plate at the top and it slides out. Remove these couple of beauties hiding away in there with the phillips screwdriver, being careful not to drop them in the void at the back. If you do don't worry, because all the surrounding plastic is coming out shortly!!
Now with a bit of manouvering the whole remaining middle section should lift out.
Next you can undo the rails that hold the seat belts. Two bolts on each rail. I didn't photograph this as it was a bit obvious. These are a 14mm socket.
Next you will need to lift the front of the back seats up. Just give them a tug at either side straight up and they will lift up like this.
When you put these back, just lean on the seat and they will click back into place.
Right, you should be able to start pulling the carpet out from the back now!! :twisted: It will be tucked into all of the side panels so be careful not to put too much upwards pressure on them and try to pull the carpet from the middle in. That way you won't risk breaking the side panels.
The next bit bothered me at first but there is not really any way round it without making a shed load of work for yourself. I didn't get any pics because I was having a dilema about whether I was doing the right thing...
The carpet must be one of the first things that they put in the car because a piece of carpet runs through the handbarke housing. Without taking the handbrake assembly off there is no other way but to get the scissors and snip it, just in the middle so you can then get this round the handbrake. It is the same at the front at the bottom of the dash in the foot-well. The section where the dash mounts to the floor also has two bits that run through the mount, so no alternative but to snip away!!
Now be careful to pull the seatbelt sensor from the diver's seat through the hole in the carpet before you start tugging the carpet out of the car!!
And Robert is your mother's brother, your car looks like it's just been vandalised by Pimp My Ride....
I then took my old carpet and laid it on top of my new carpet and made the same but neater cuts on the new one. This is why I was slightly bothered, because I had paid extra for an 'un-cut' carpet. In my opinion, do not bother because you need to cut it to fit it!! Obviously check that it isn't ripped or torn.
Next put your new carpet in the car. I started by putting the back on first and anchoring it with the back seat where it pushes back in. Then lay the carpet flat out and start tucking it into the side panels. The second major reference point is the ridge where the front of the seat rails mount. Check the holes line up and that you have fed the seat belt sensor back through the carpet. Tuck it all in on both footwells and it should look like this!
Work backwards to mount the centre console section and put the footrest and mat stay back on , refix the seatbelt rails and put the seats back in, making sure you connect the seatbelt sensor plug and you're done!!
It took me 1 1/2 hours from the start to get the carpet out and half an hour to put the new one in and all the bits back in.
End result....
Last edited by a moderator: