Well last week I started my project with a good clean using some new products. The process was as followed:
- Wash using elite car sare snow foam lance
- Clay using poor boys XL clay bar and meg quick detailer
- Wash again and dry
Then using the new kit (http://www.polishedbliss.co.uk/acatalog/werkstat-acrylic-kit-kits.html) I applied the following:
- Werkstat Prime Acrylic
- Werkstat Acrylic Jett Trigger
- Werkstat Acrylic Glos
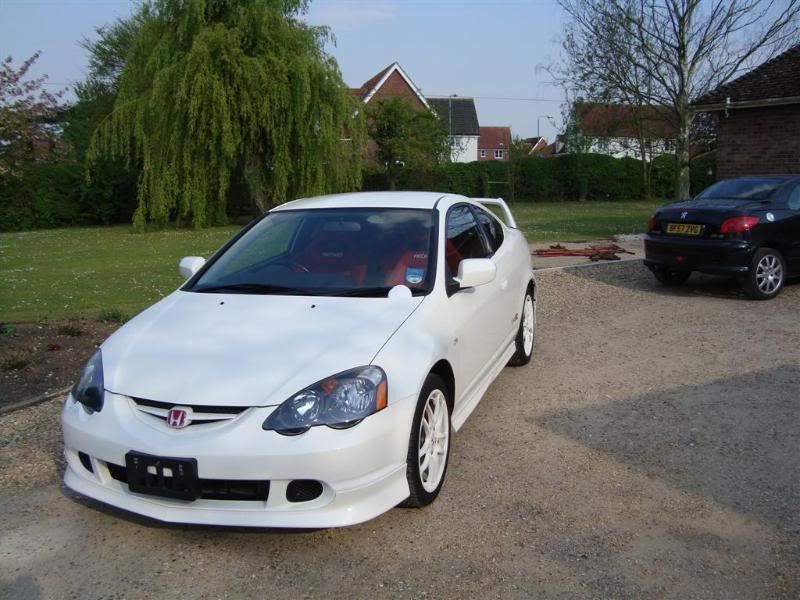
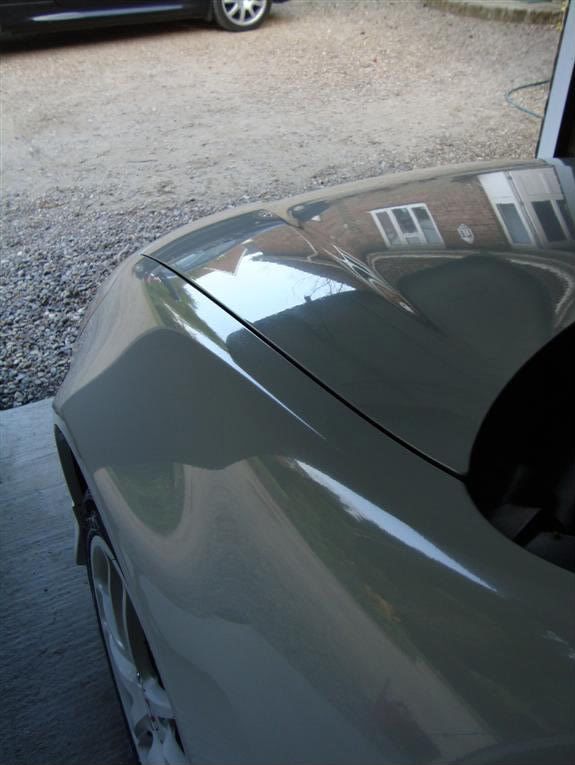
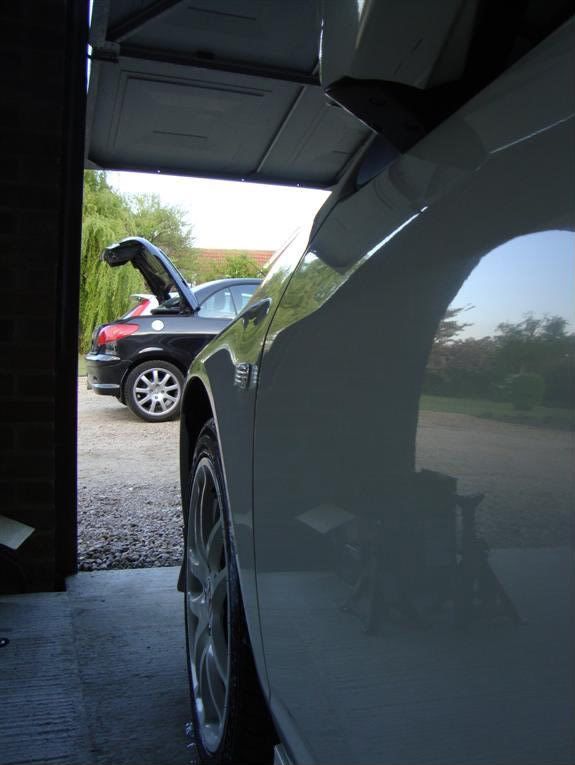
I found the Werkstat stuff to work really well on the CW as did the poorboys clay bar as the panels now feel really smooth, here are the results:
So, back to today and I had the following on the agenda:
- Mesh the gap in the bumber to protect the radiator
- Re site fog light (currently in reverse light)
- Re-lacquer brembo calipers
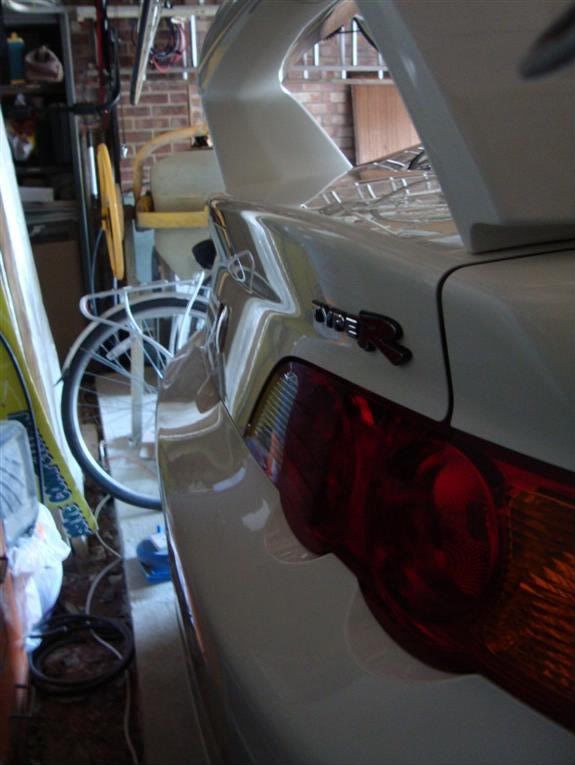
I started with the re-siting of the fog light. It was currently in one of the revese lights and looked like this:
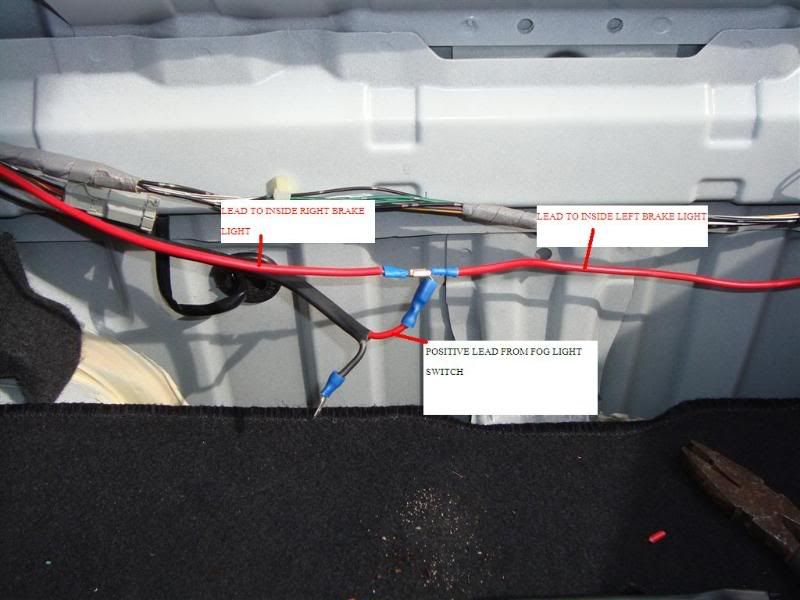
So, as the teg has 4 main brake lights (also one in the middle below spoiler) I decided to use the two inside brake lights as the fog lights. After testing the bulb I found out which one was the brakelight and spliced the wire:
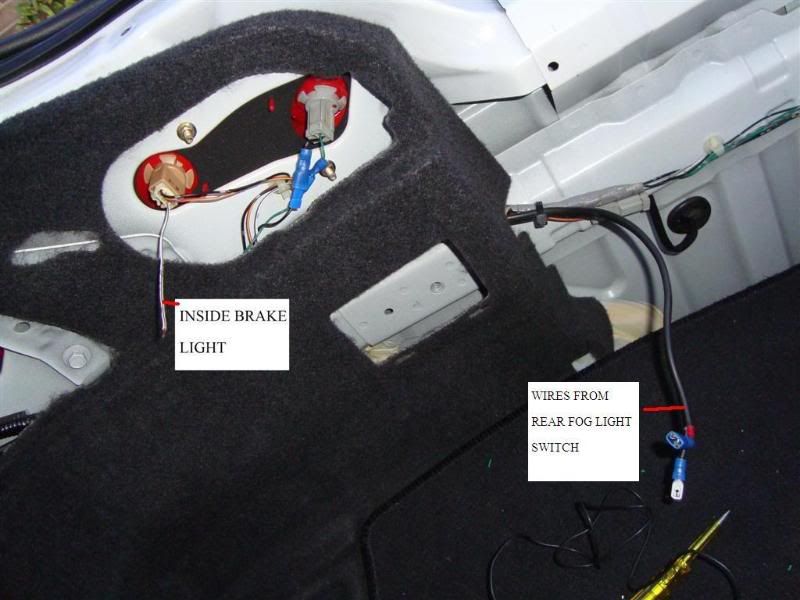
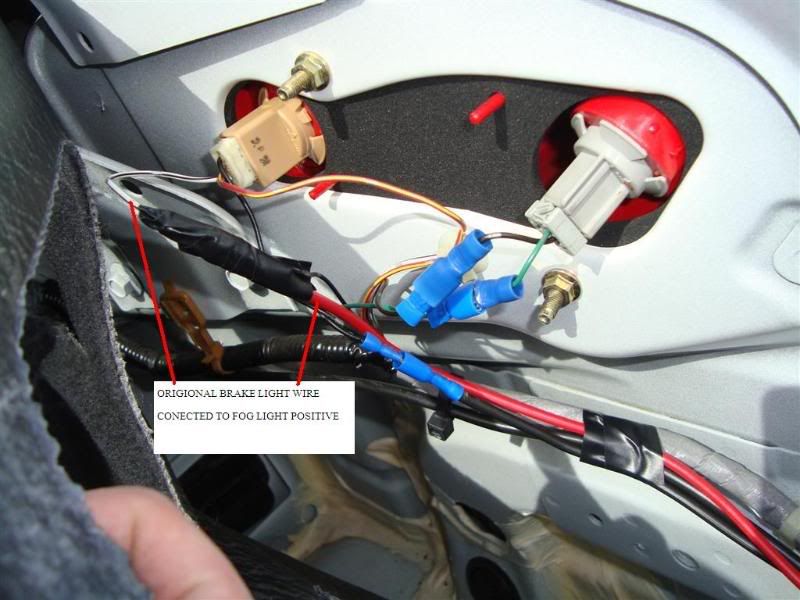
I then connected the origional fog light wire to the brake light and also reconnected the origional reverse light:
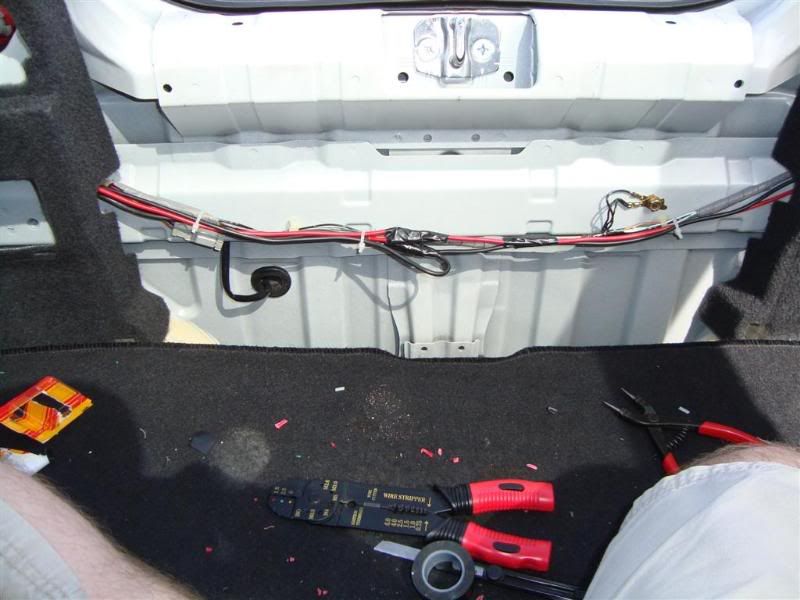
Wires tidyed up
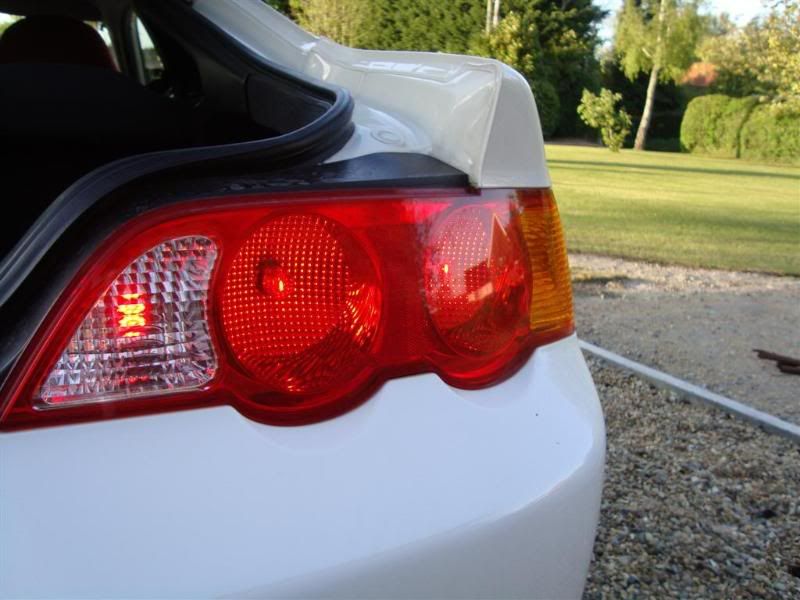
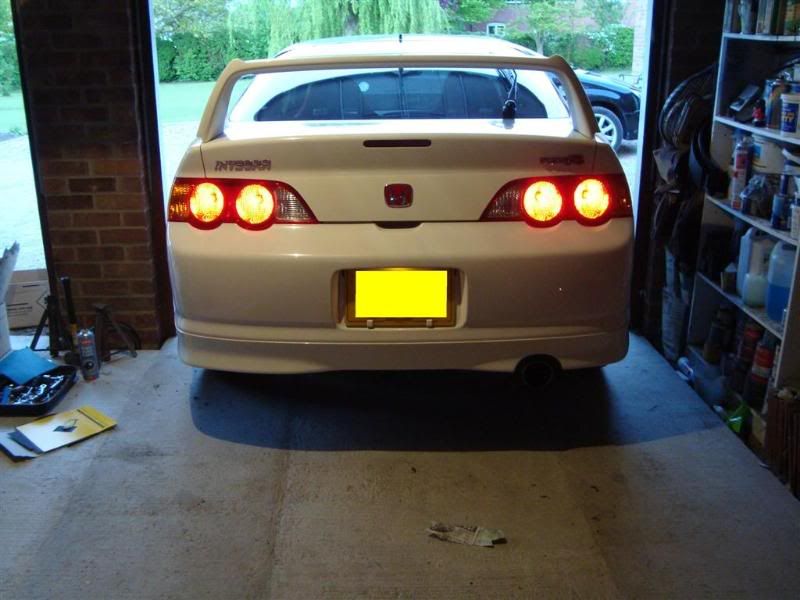
So this is the results.
Normal lights:
Revers lights:
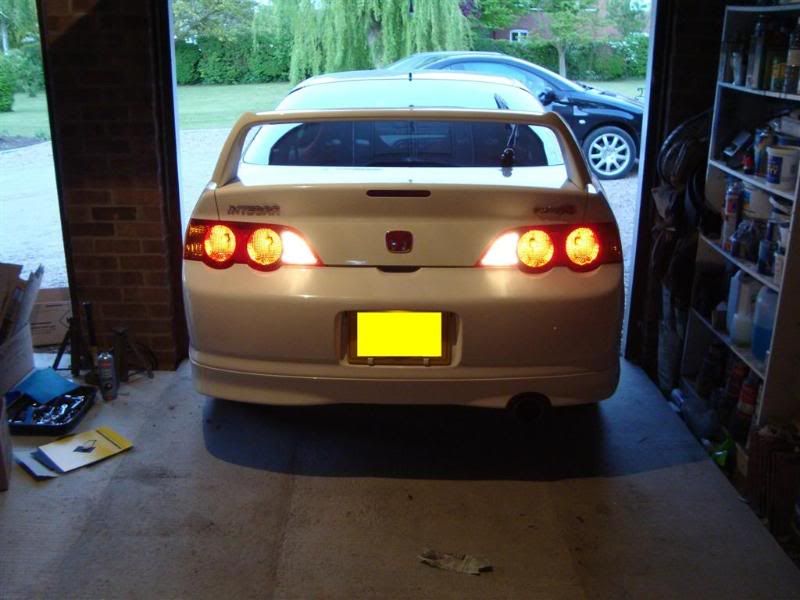
Brake lights:
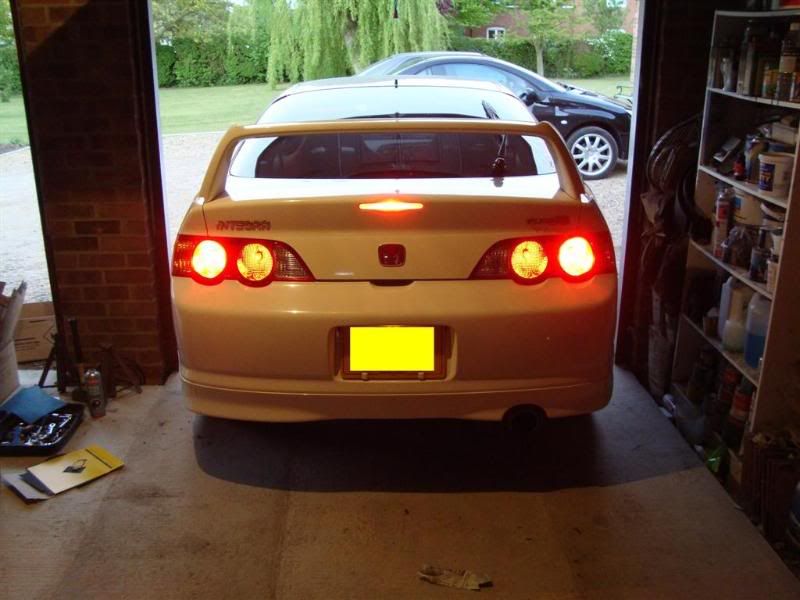
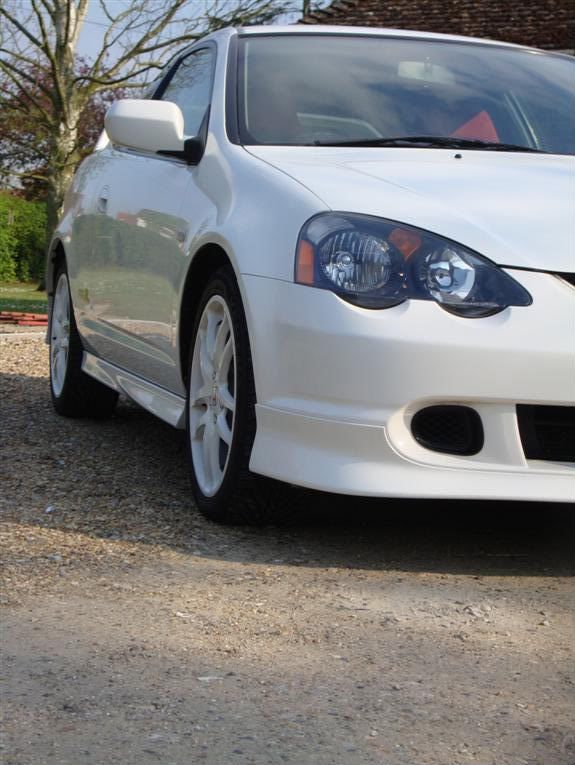
Newly situated fog lights:
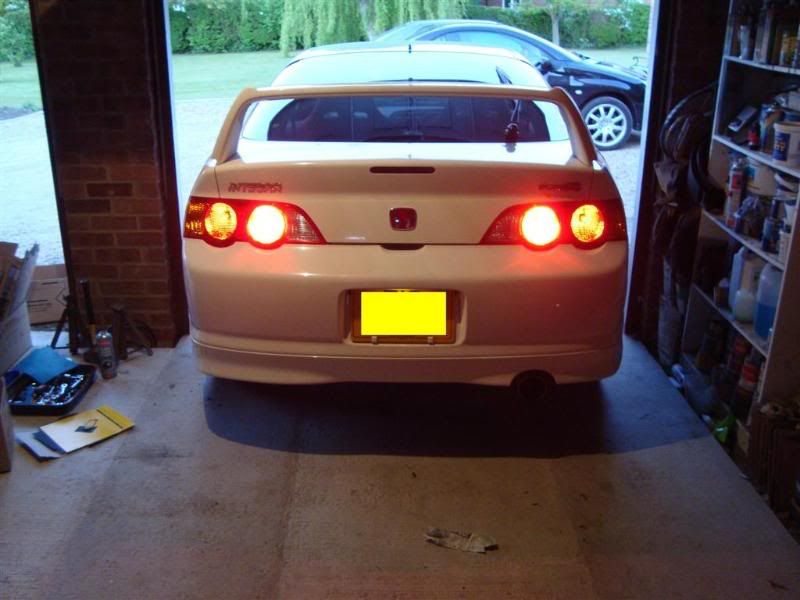
This I feel looks much better J
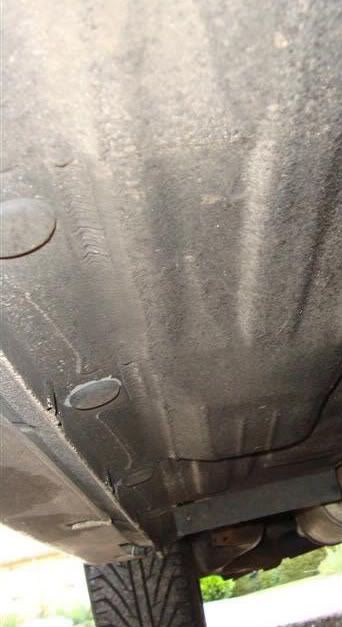
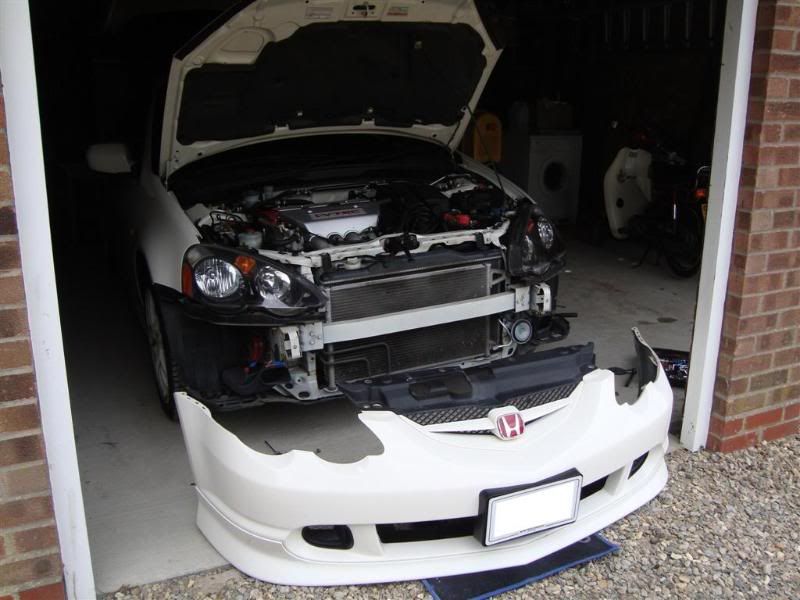
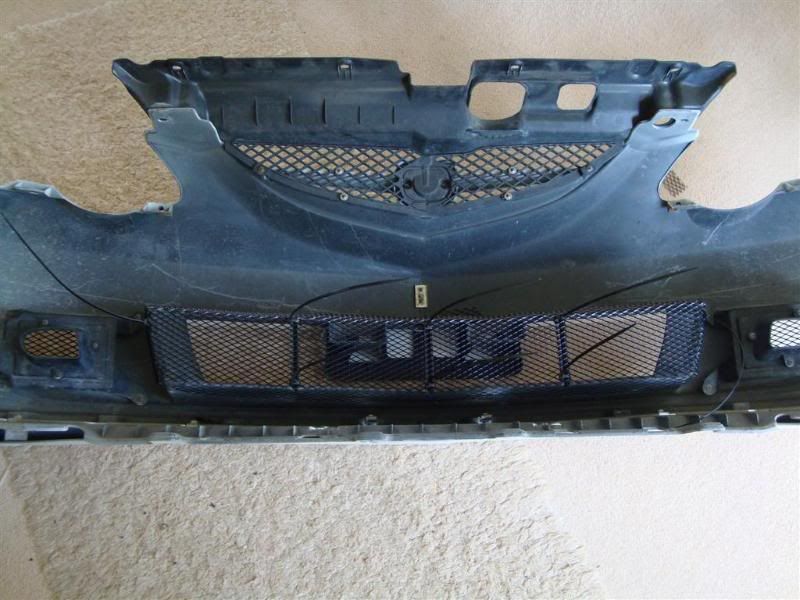
Next I started on the mesh. First I had to remove the front bumper which was actually quite easy and only took about 20 mins:
I used some mesh brought from halfrauds and attached it using cable ties:
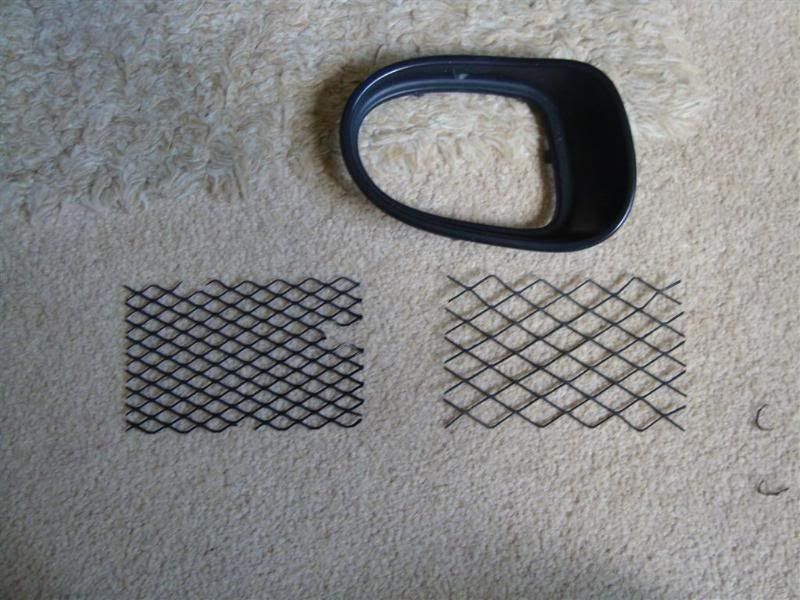
As I had some left over I also decided to re-do the brake inlets so as to match up the mesh (old mesh on right, new on left):
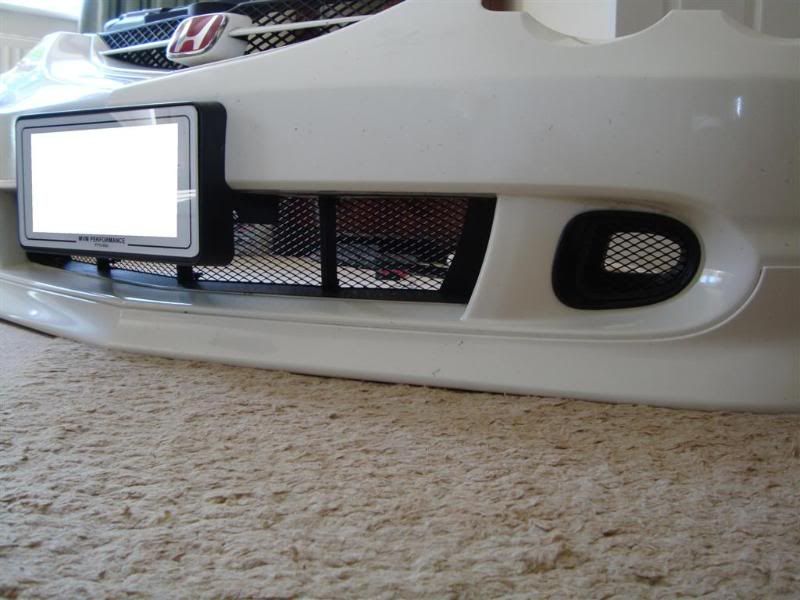
Pleased with the result J
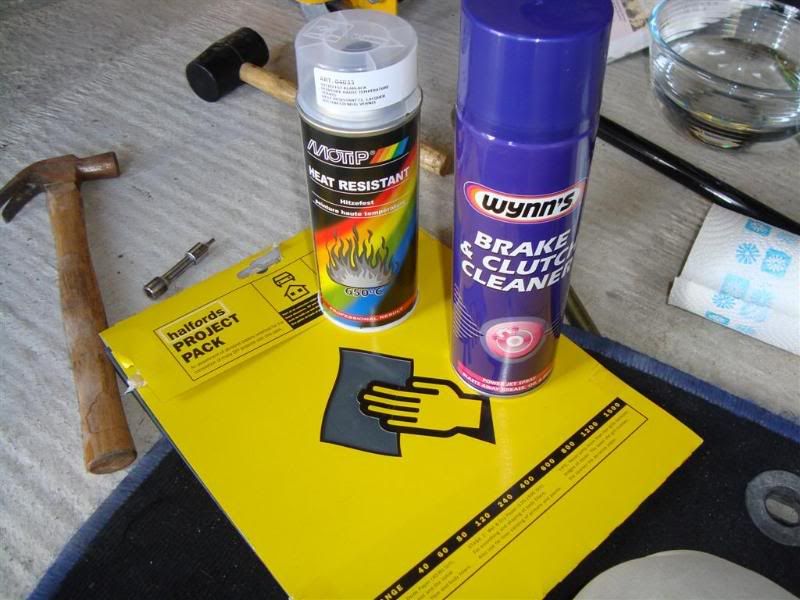
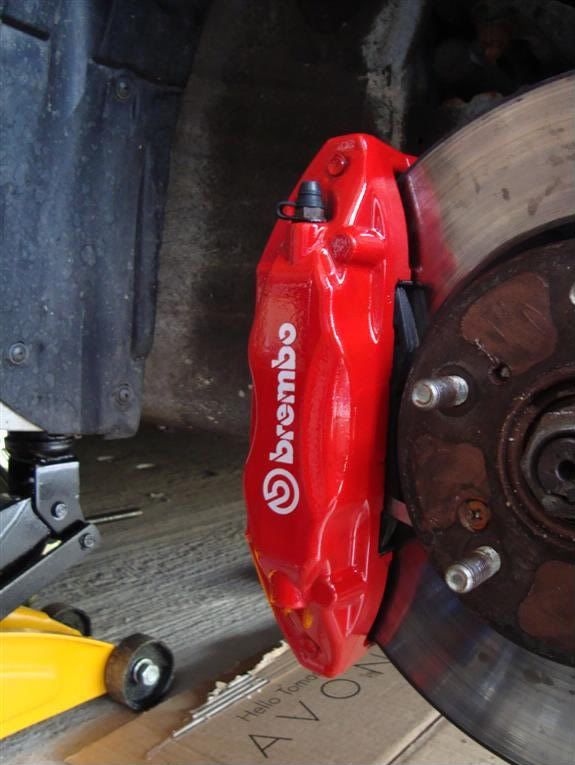
Finally it was on to re-laquering the calipers. Products needed were Motip high Tempreture Clear Laquer, Brake cleaner and wet and dry sand paper.
After removing the wheels I found the calipers looking a nice shade of pink!
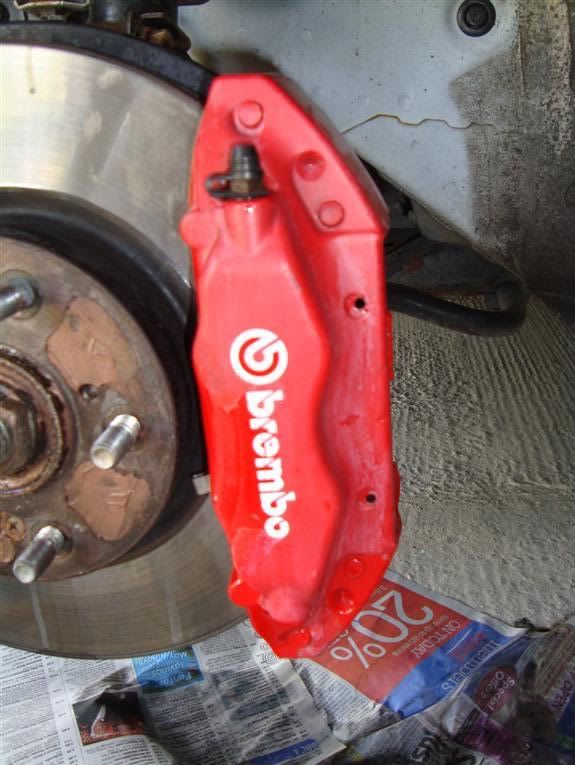
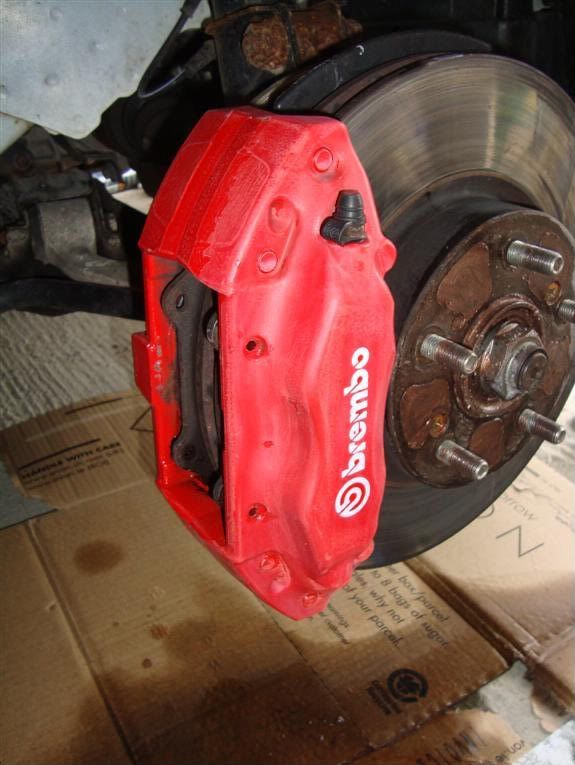
Last week I touched up a few chips on the calipers using hammerite smooth red in preperation for today. I started today by cleaning the calipers with the brake cleaner and also with some wheel cleaner. I thin chipped away as much of the old laquer as I could with my finger nail. I then wet sanded using the 800 sheet being carfull not to sand too hard as the paint isnt that thick, also bein careful not to sand the brembo logo. After all was clean and dry I made sure the surrounding area was covered:
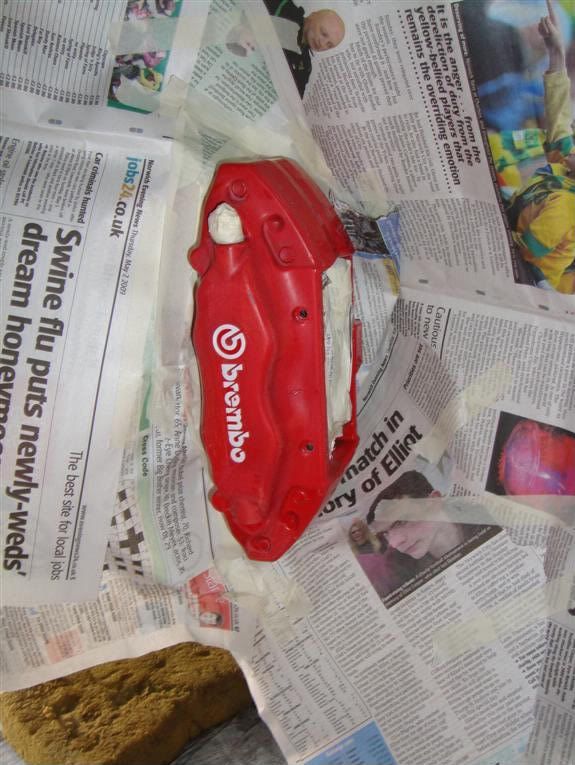
I then applied 4 coats of the laquer with 15-20mins between each coat. I then used a hairdryer on each caliper for about 10 mins just to help it dry.
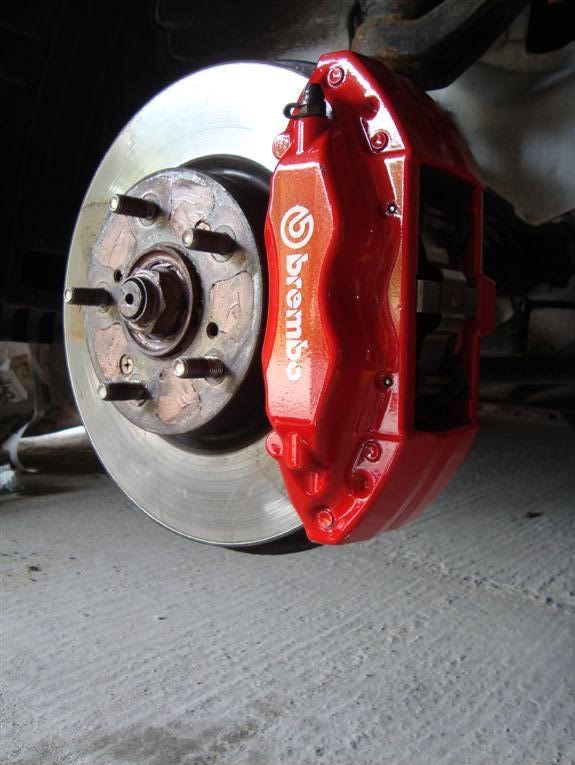
The reults came out really well J
Now that these bits are done, thinking next on the list may be some new lug nuts and a possible wheel refurb J
- Wash using elite car sare snow foam lance
- Clay using poor boys XL clay bar and meg quick detailer
- Wash again and dry
Then using the new kit (http://www.polishedbliss.co.uk/acatalog/werkstat-acrylic-kit-kits.html) I applied the following:
- Werkstat Prime Acrylic
- Werkstat Acrylic Jett Trigger
- Werkstat Acrylic Glos
I found the Werkstat stuff to work really well on the CW as did the poorboys clay bar as the panels now feel really smooth, here are the results:
So, back to today and I had the following on the agenda:
- Mesh the gap in the bumber to protect the radiator
- Re site fog light (currently in reverse light)
- Re-lacquer brembo calipers
I started with the re-siting of the fog light. It was currently in one of the revese lights and looked like this:
So, as the teg has 4 main brake lights (also one in the middle below spoiler) I decided to use the two inside brake lights as the fog lights. After testing the bulb I found out which one was the brakelight and spliced the wire:
I then connected the origional fog light wire to the brake light and also reconnected the origional reverse light:
Wires tidyed up
So this is the results.
Normal lights:
Revers lights:
Brake lights:
Newly situated fog lights:
This I feel looks much better J
Next I started on the mesh. First I had to remove the front bumper which was actually quite easy and only took about 20 mins:
I used some mesh brought from halfrauds and attached it using cable ties:
As I had some left over I also decided to re-do the brake inlets so as to match up the mesh (old mesh on right, new on left):
Pleased with the result J
Finally it was on to re-laquering the calipers. Products needed were Motip high Tempreture Clear Laquer, Brake cleaner and wet and dry sand paper.
After removing the wheels I found the calipers looking a nice shade of pink!
Last week I touched up a few chips on the calipers using hammerite smooth red in preperation for today. I started today by cleaning the calipers with the brake cleaner and also with some wheel cleaner. I thin chipped away as much of the old laquer as I could with my finger nail. I then wet sanded using the 800 sheet being carfull not to sand too hard as the paint isnt that thick, also bein careful not to sand the brembo logo. After all was clean and dry I made sure the surrounding area was covered:
I then applied 4 coats of the laquer with 15-20mins between each coat. I then used a hairdryer on each caliper for about 10 mins just to help it dry.
The reults came out really well J
Now that these bits are done, thinking next on the list may be some new lug nuts and a possible wheel refurb J
Last edited by a moderator:
")