• Registered users are encouraged to enable MFA/2FA to add an aditional layer of security to their account. More information can be found here: https://www.ncsc.gov.uk/collection/top-tips-for-staying-secure-online/activate-2-step-verification-on-your-email

Help/Advice please, repairing paint/decal to brembo brakes

TypeGRRR

Administrator
Administrator
Messages
4,434
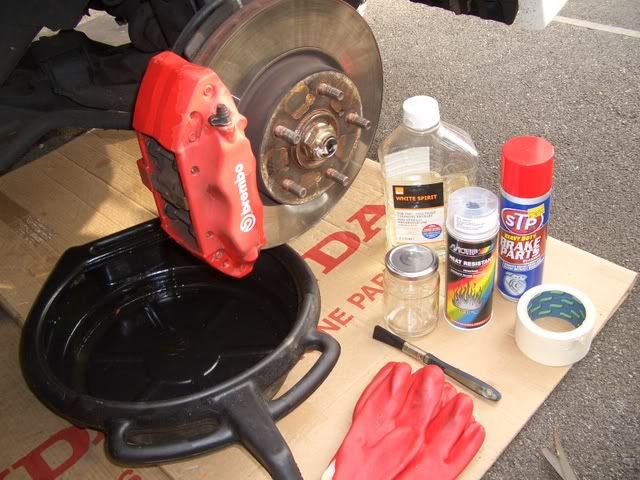
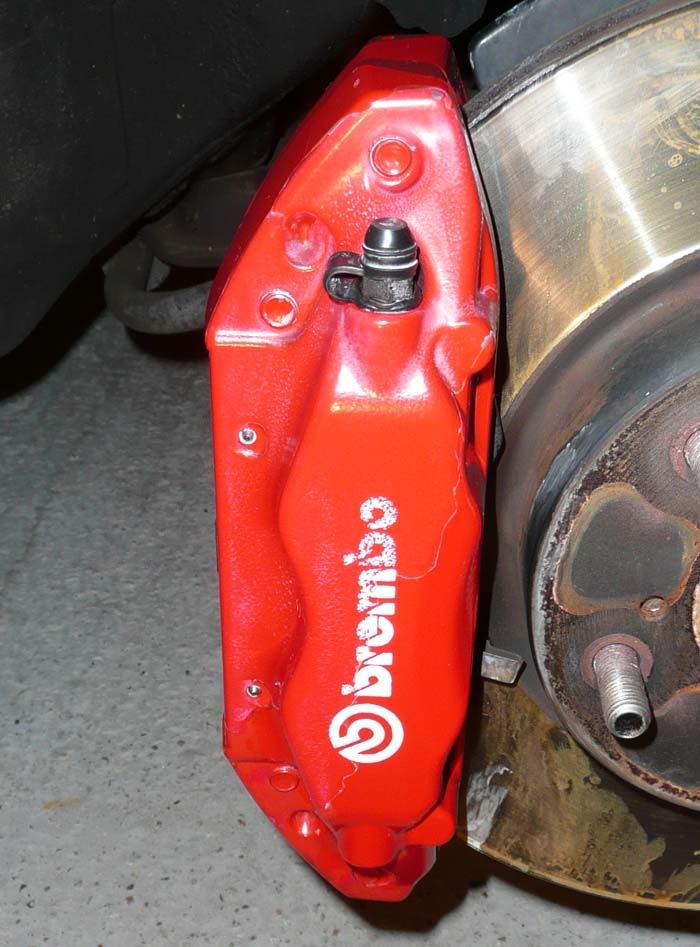
I've been planning to repair my brembo calipers for some time, as the lacquer has started to fall off and they're going a bit matte and pinky.

I thought I could get away with waiting until fairer weather came. I just took the wheel off to give them a good polish and a bit of wax. But in my eagerness, it has taken it's toll on the brembo decal. :(

Has anyone ever repaired a caliper decal?

I have a few options, I can either get a new decal (there's loads on ebay, but I don't know if they will be any good...) or it looks as though stencils are also available, whereby I can spray on white high temp paint...

Either method I guess will need the current remnants to be removed first..? I'm a little worried about going through the base colour (red) as previous threads I've read have highlighted that brembo paint is hard to find!

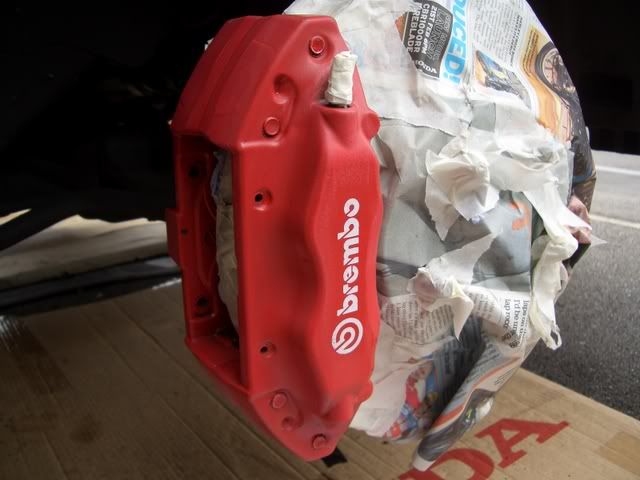
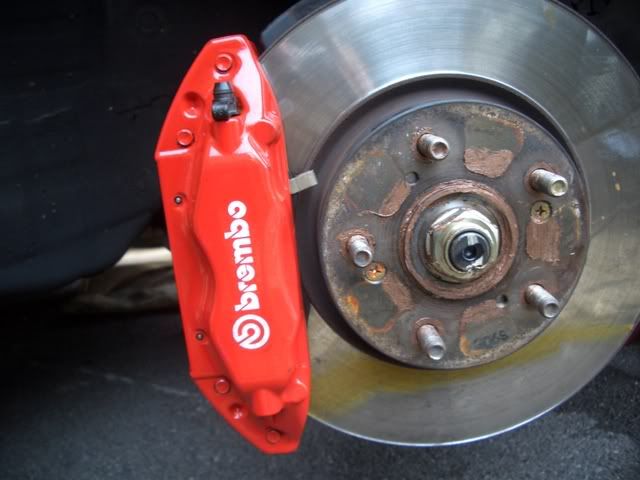
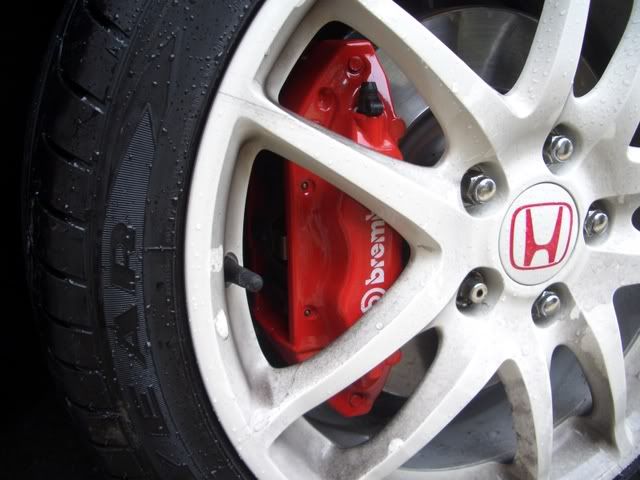
EDIT: Here's the offending item...

brembo_damage.jpg


Or of course I can accept that it doesn't look too bad and just lacquer them, ignoring the decal all together...

What are your thoughts people?
 
Last edited by a moderator:
Hi mate, I did mine..........

You can do them in place just by cleaning them VERY thorougly and rubbing them down with 'wet and dry'

Then painting them and buying some decals of eBay. There is a guy who does heat proof ones.

OR

Like I did, which was a full strip down jobbie, bead blast and a few layers of paint in the shed which I got mixed at Halfords. It was Aston Martin met Blue.

So, clean, rub down, dry, prime, paint, laquer, decals, laquer....easy.

From ITRO.....

Well, the powder coating place will not do them due to the heat they bake them at. They didn't want to risk damaging the seals......bugger :(

BUT, now I have to paint them I can do them whatever colour I want and have a practice too.

I found this one flicking through the book at Halfords. They mix there own now and its a really good Holts paint with a cracking new nozzle type.

I put them in the blast cabinet at work and they came up OK considering its only a micky mouse one from Machine Mart :lol:


What do you think?


I had a few hours this evening after work so I finished painting the calipers. All I have to do is to rub them down with some 1200 grit and then a few coats of laquer.

In between coats of paint I managed to fit the Dixcel disc(backwards :roll: ) and Goodridge hoses 8) I'll change the disc round tomorrow.....


Blue Brembos!!


Thanks Lee. :D

Few questions though, am I better off trying to rub the brembo remnants off first, or do you think I can get away with overlaying a new decal on top of the old one, I really don't want to go through the red, as I have no intention of spraying anything other than lacquer... Secondly, on that basis, do you think I should
A) Clean, rub down, dry, laquer, decals, laquer or
B) Clean, rub down, dry, decals, lacquer

I intend to do this without taking them off the car, as I'm a bit of an amateur when it comes taking brakes apart, having said that, I should be OK with the paint.

This was the initial thread I found on ITR...

Westie said:
Did my calipers this weekend i thort i'd post some pictures of the stages, I followed simon's instructions on the previous page.

All the items i used for the preparation,

CIMG2119.jpg


The calliper lightly keyed with 800 wet/dry and scotch pad,you need to be carefull as there does not seem to be much paint on the calliper,i sanded down to the metal on a couple of places ! spent time masking up with old copy of MCN :)

CIMG2125.jpg


Calliper had 5 coats of heat resistant paint left to dry then heated with hot air gun.

CIMG2127.jpg


Finished article with wheel on.

CIMG2130.jpg


A couple of points to note i took the pads out to make it easy to rub the callipers down and gave them a good clean while they were out. I also decided to leave the callipers on, as the backs were in good condition, so i only ended up lacquering the front and side. It took about 4 hrs from start to finish with quite a good result, in the end, time spent preparing for the final finish is well worth the result.
 
Back
Top