
- Messages
- 232
Right, so I've managed to fit these in my car. No great drama's, you just need to have the tools & parts available.
Tools:
round metalworking file
drill & small cylindrical grinding bit (optional) - if filing is too strenuous....there is quite a bit of material to remove!
socket set
threadlock, non-permanent
Parts:
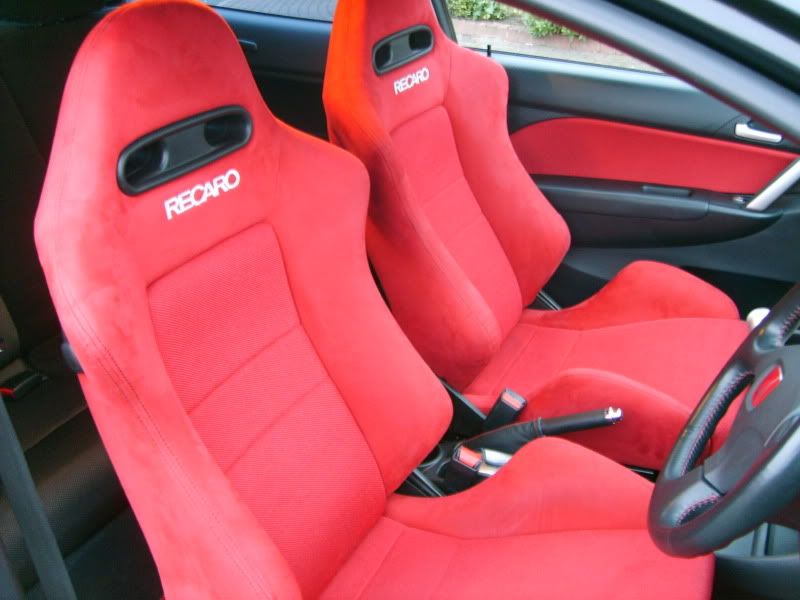
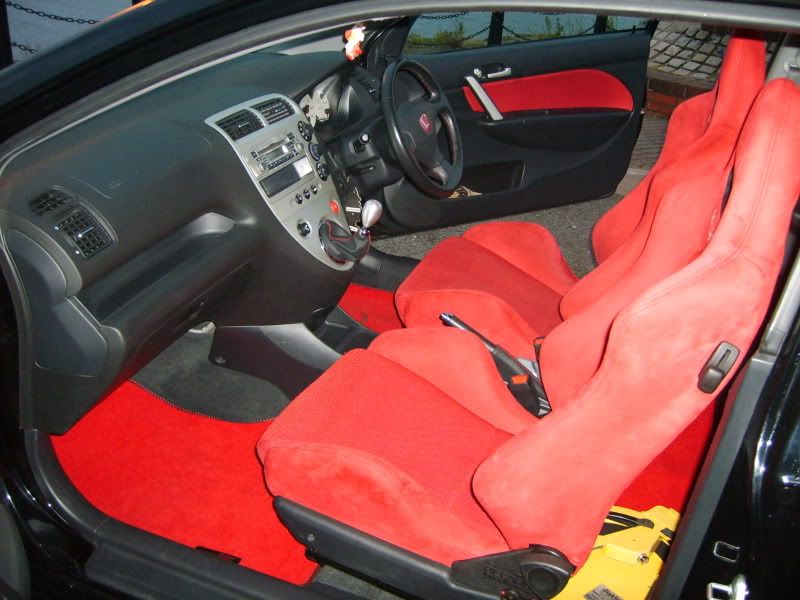
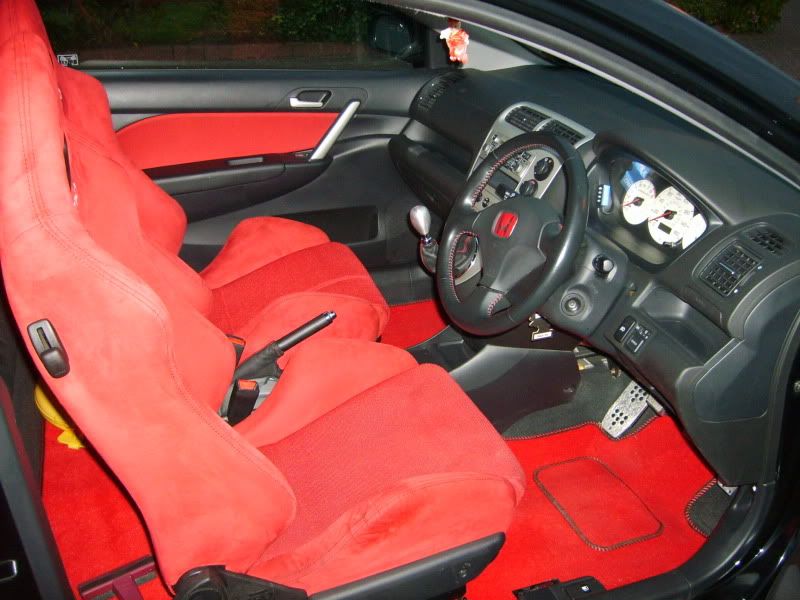
the Recaro seats and runners!
M10 bolts, 60mm long - just need 2 of each
M10 washers, enough to make up a gap of about 25mm - so maybe about 12 each side so at least 30 to be safe you may need a few more if the bolt bottoms out.
As a revision of this, the actual original bolt may have a finer thread, but i found that with a little persuasion, the M10 will fit.
1) Remove the 4 bolts under the drivers seat
2) Detach the seatbelt wiring underneath
3) Remove the seat
4) On the DC5 runners, the 2 rear bolt holes have to be elongated. The vertical hole (near door) is to be filed (or ground) approx 3-4mm downwards (towards the floor).
5) The other rear bolt hole (horizontal) next to centre console is to be elongated backwards approx 5-6mm.
6) Offer up the seat in the fully pushed back postion, with the runners front showing. Insert the two bolts by hand.
7) Move seat forward. Check that the two rear tapped holes in floorpan are visible thru the holes you just enlarged. Try to insert the 2 bolts in those. If there's interference, you may need to manipulate the runner to get a free spin of the bolt. Otherwise remove the seat and file some more!
9) Connect the wiring underneath the seat.
10) Hand tighten the rear bolt near the door.
11) Under the rear runner hole near the centre console, insert your 25m (or so) spacer or however many washers it takes to support the runner above the floorpan. The other way would be to have a nylock nut ready, under the runner, so that when the bolt is screwed to the correct depth, the nut is tightened upwards and so sandwiching the runner frame!
12) Now insert and hand tighten the new 60mm long M10 bolt, have a single washer between the bolt head and runner. Apply some non-permanent threadlock to the bolt before it goes in.
13) Diagonally tighten all of the bolts using the socket and wrench.
14) Check and test that the seat moves correctly, is secure and that you can use the seatbelt.
15) Repeat all of the above for the other side! :lol:
Now enjoy your extremely supportive Recaro SR seats - a world away from the slack CTR standard seats, which are also quite a bit heavier! Oh yeah, height wise, you sit about 2-3inches lower. The headrest height is the same as the OEM CTR seat (facelift). :-D
Tools:
round metalworking file
drill & small cylindrical grinding bit (optional) - if filing is too strenuous....there is quite a bit of material to remove!
socket set
threadlock, non-permanent
Parts:
the Recaro seats and runners!
M10 bolts, 60mm long - just need 2 of each
M10 washers, enough to make up a gap of about 25mm - so maybe about 12 each side so at least 30 to be safe you may need a few more if the bolt bottoms out.
As a revision of this, the actual original bolt may have a finer thread, but i found that with a little persuasion, the M10 will fit.
1) Remove the 4 bolts under the drivers seat
2) Detach the seatbelt wiring underneath
3) Remove the seat
4) On the DC5 runners, the 2 rear bolt holes have to be elongated. The vertical hole (near door) is to be filed (or ground) approx 3-4mm downwards (towards the floor).
5) The other rear bolt hole (horizontal) next to centre console is to be elongated backwards approx 5-6mm.
6) Offer up the seat in the fully pushed back postion, with the runners front showing. Insert the two bolts by hand.
7) Move seat forward. Check that the two rear tapped holes in floorpan are visible thru the holes you just enlarged. Try to insert the 2 bolts in those. If there's interference, you may need to manipulate the runner to get a free spin of the bolt. Otherwise remove the seat and file some more!
9) Connect the wiring underneath the seat.
10) Hand tighten the rear bolt near the door.
11) Under the rear runner hole near the centre console, insert your 25m (or so) spacer or however many washers it takes to support the runner above the floorpan. The other way would be to have a nylock nut ready, under the runner, so that when the bolt is screwed to the correct depth, the nut is tightened upwards and so sandwiching the runner frame!
12) Now insert and hand tighten the new 60mm long M10 bolt, have a single washer between the bolt head and runner. Apply some non-permanent threadlock to the bolt before it goes in.
13) Diagonally tighten all of the bolts using the socket and wrench.
14) Check and test that the seat moves correctly, is secure and that you can use the seatbelt.
15) Repeat all of the above for the other side! :lol:
Now enjoy your extremely supportive Recaro SR seats - a world away from the slack CTR standard seats, which are also quite a bit heavier! Oh yeah, height wise, you sit about 2-3inches lower. The headrest height is the same as the OEM CTR seat (facelift). :-D