
You are using an out of date browser. It may not display this or other websites correctly.
You should upgrade or use an alternative browser.
You should upgrade or use an alternative browser.
The MG-TF K20a V-TEC Project Thread (very pic heavy)
- Thread starter Adam-MGTF
- Start date
yes get a pic up
pic up in it's own thread!
oh... update time!
Update! 15/12/11
Well about time! The past two weeks have been very busy and to the outsider I don't have much to show for it really... but we'll get to that.
First I have a confession to make....
For thoes of you who don't know, MG-Rover had a small cash flow erm.... "crisis" I guess would be the right word, during it's final years. As a result a few costs were cut and some parts made cheaper.
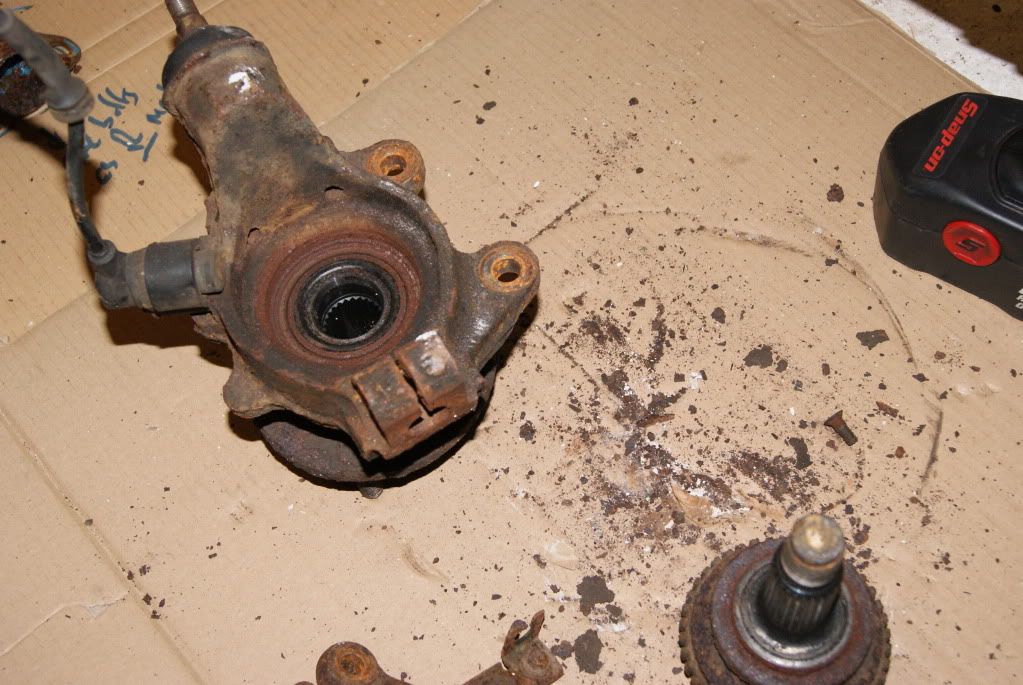
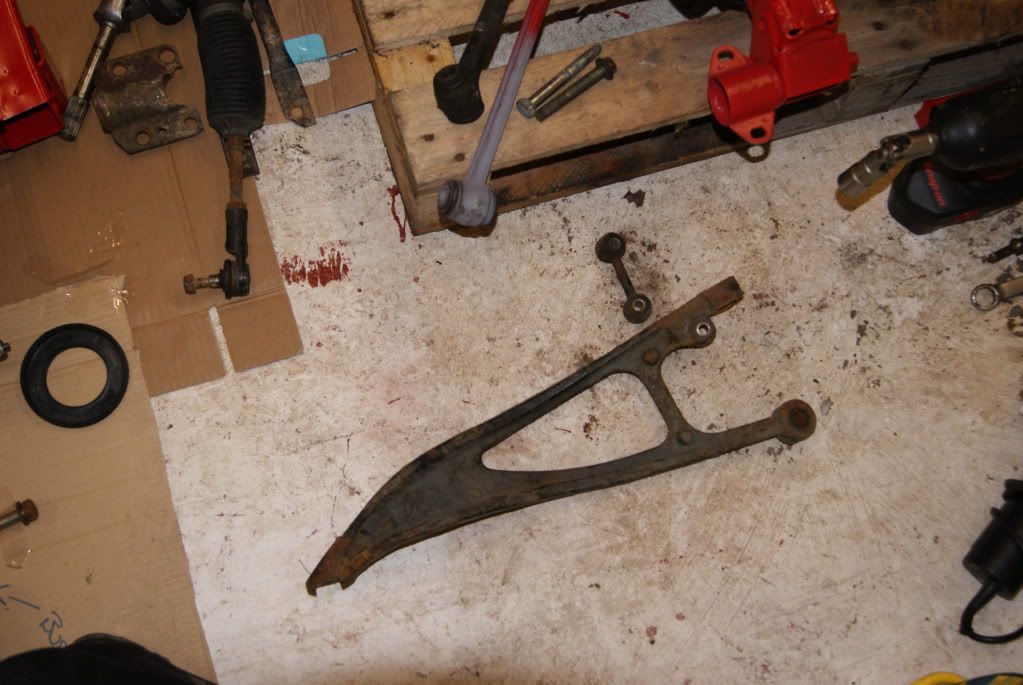
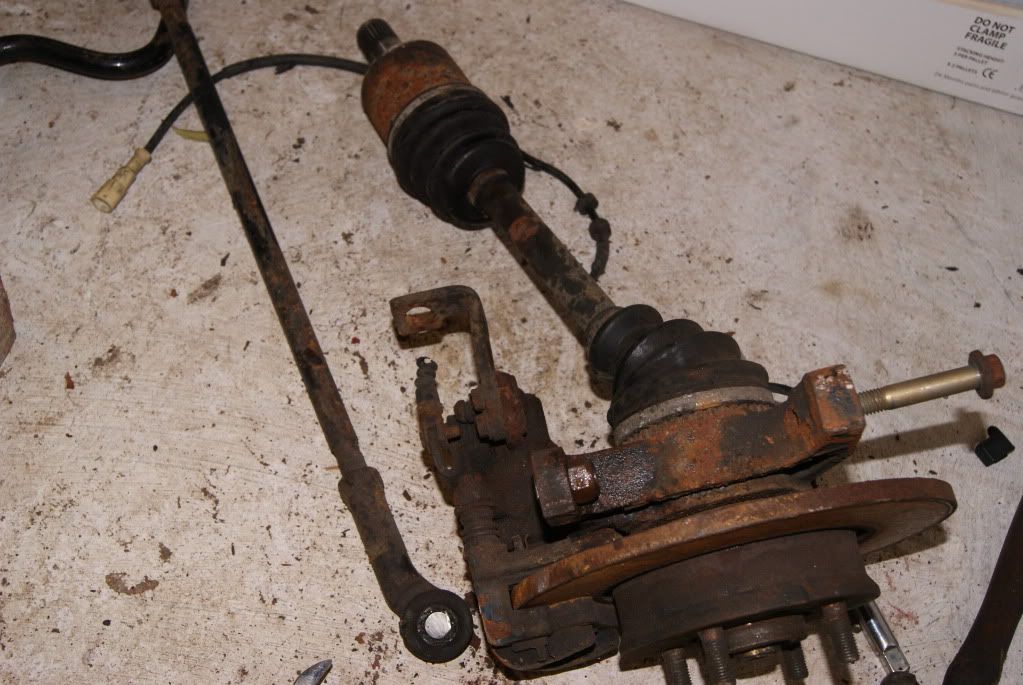
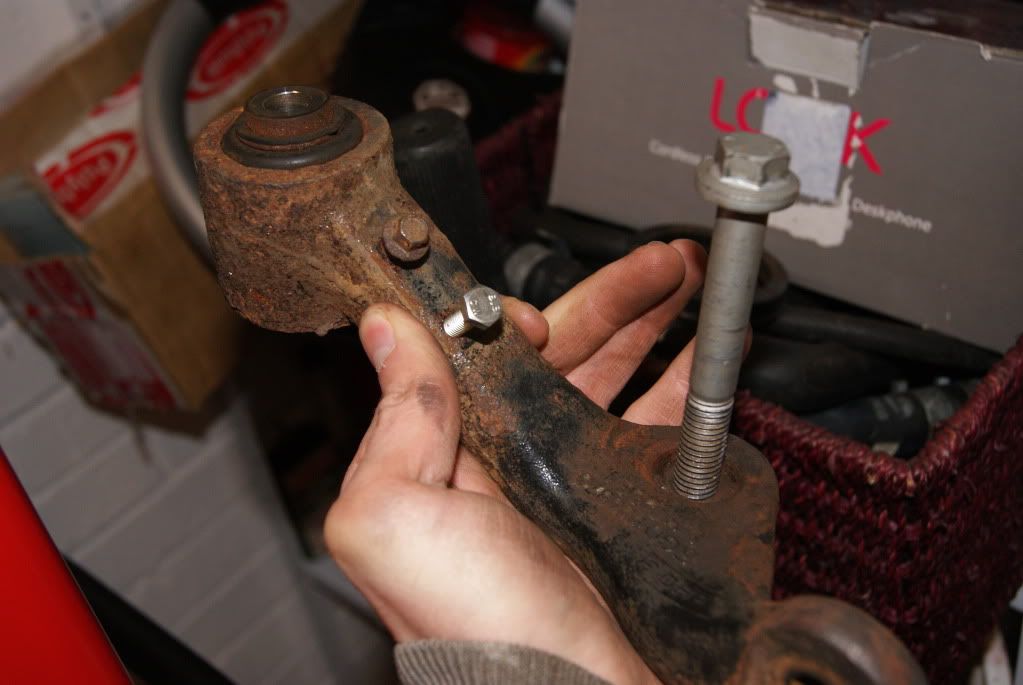
One of thoes parts is this....
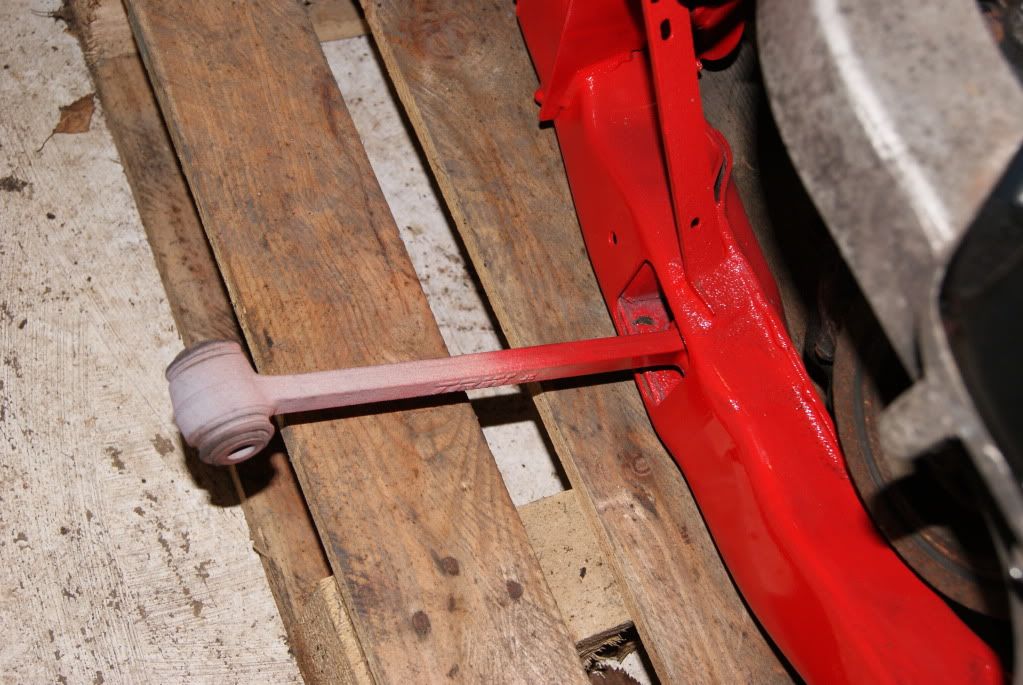
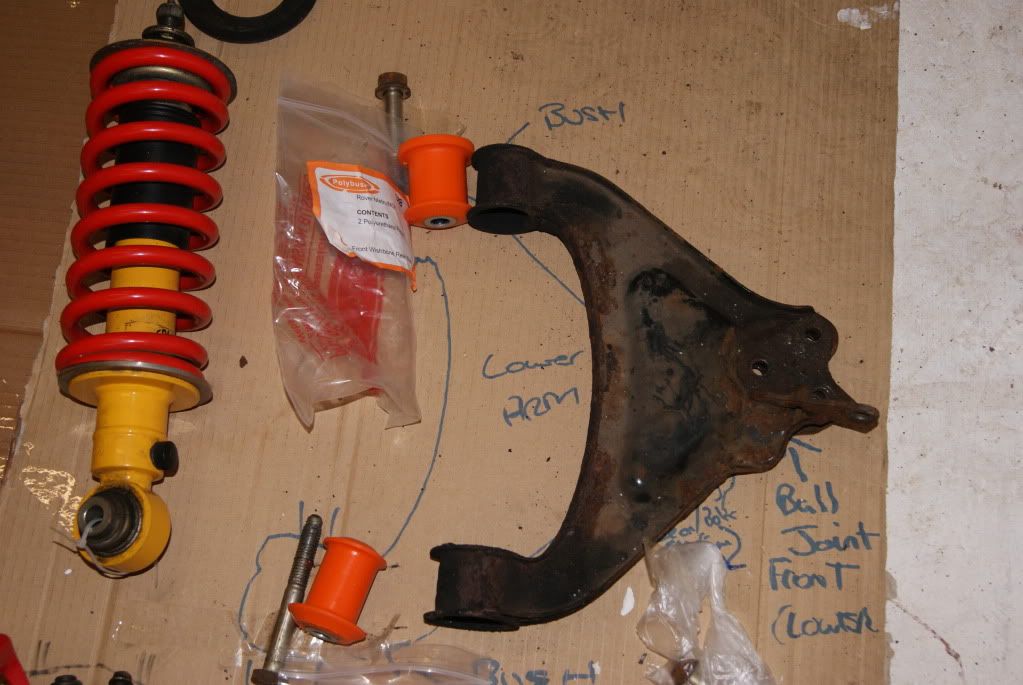
Called a "link assembly, trailing" and it braces the bottom of the hub... you'll notice it's just a solid bar?
well MG also produced an adjustable arm (which adjusts camber I belive) and aids in setting the car up... It was a discontinued part as of some time around 2002 and I feel like i've been looking for a pair for 2002 years!!!!
all my efforts were usless.... brakers, no luck... new old stock? (NOS) not a chance, and if I found them they were hundreds of pounds - sack that!
so.... time for my confession
the arm pictured above is from my donor subframe (which the K20 is now sat on).
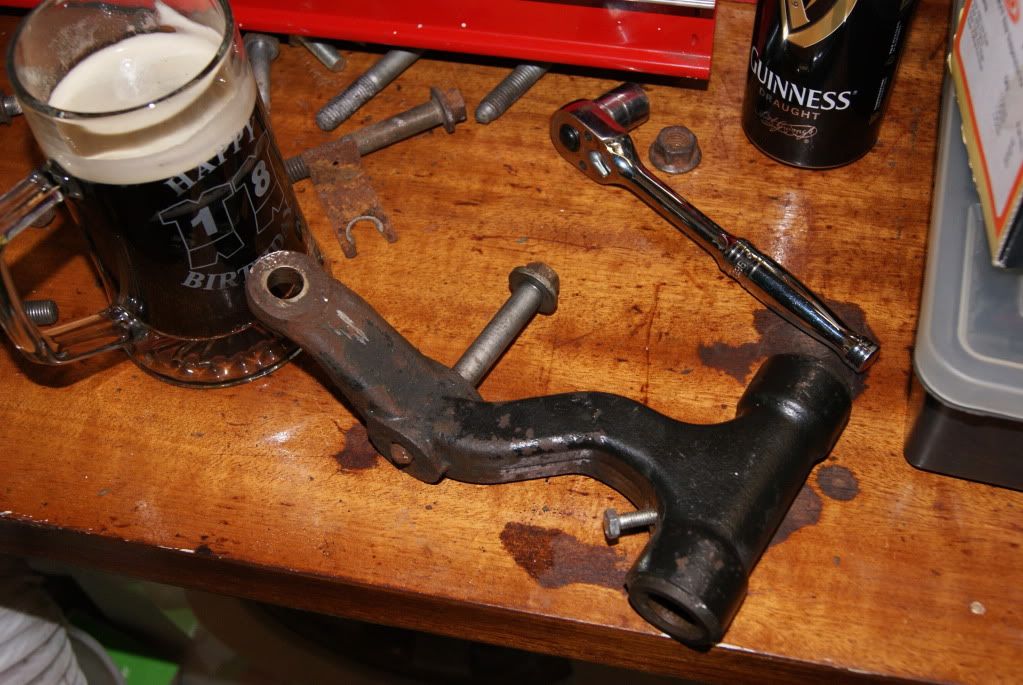
the old subframe that had rubbish mounts was left with woodsport
It lay forgotten in the yard until i brought it home.... (see where this is going?)
and while having a cuppa and looking at it, dreaming absent mindedly about V-TEC Yo!... I noticed this

Ahhh........ yes...... how to sum up my discovery
this is close

but the fail was so epic i think we'll go with this...

anyway here we can see the 2 arms
")
so nil desperandum and all that...
Back with the "progress" thread :slap:
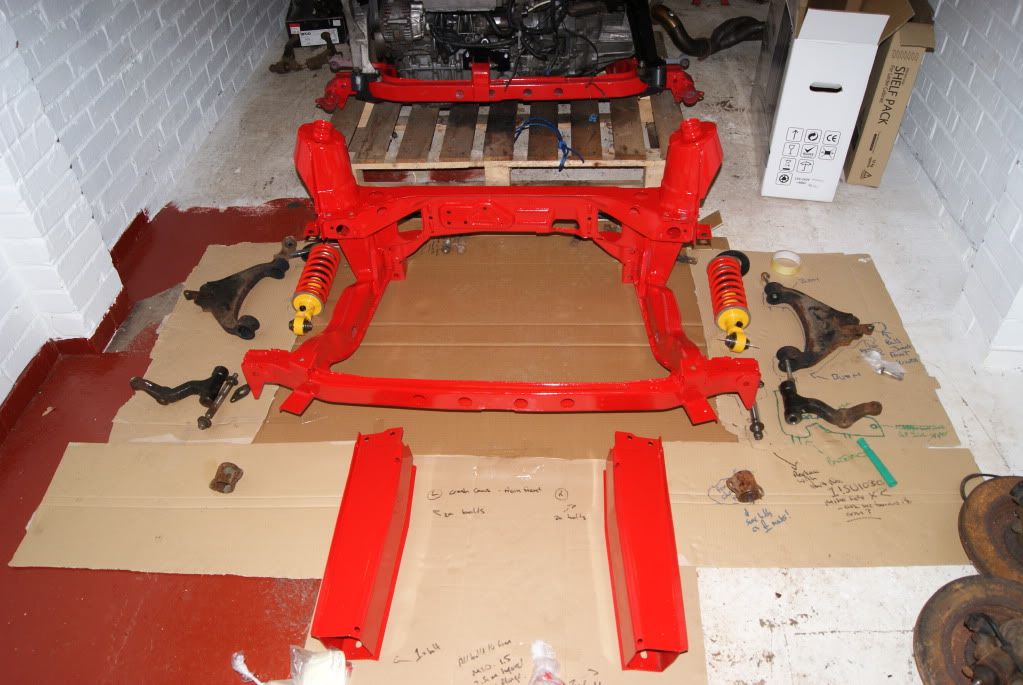
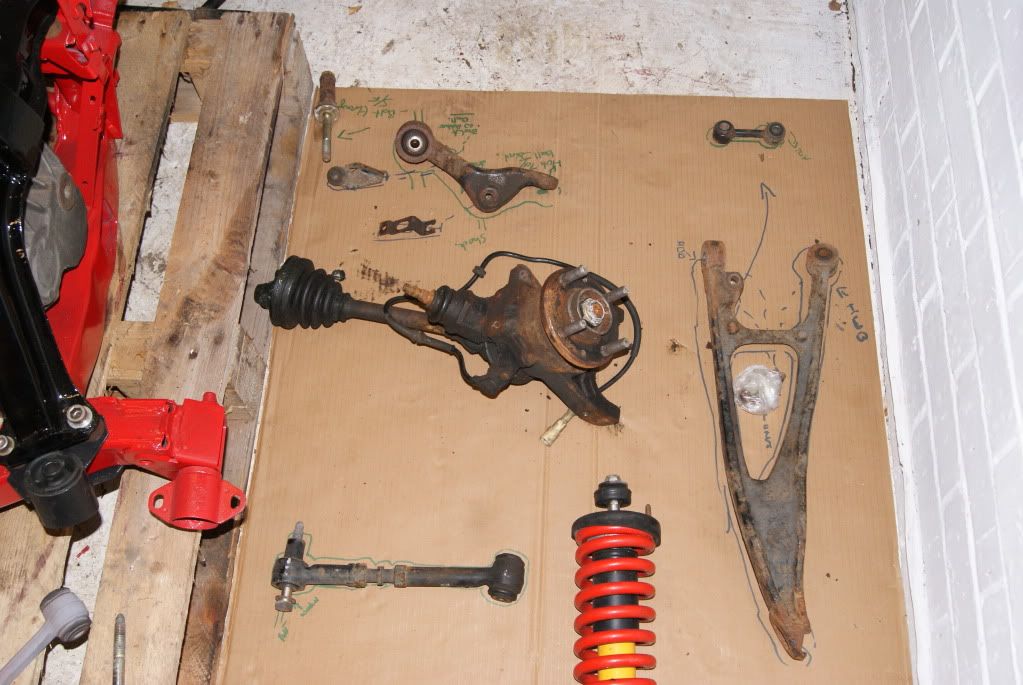
As you may remeber from earlier on the "running gear" of the car is in the following parts:
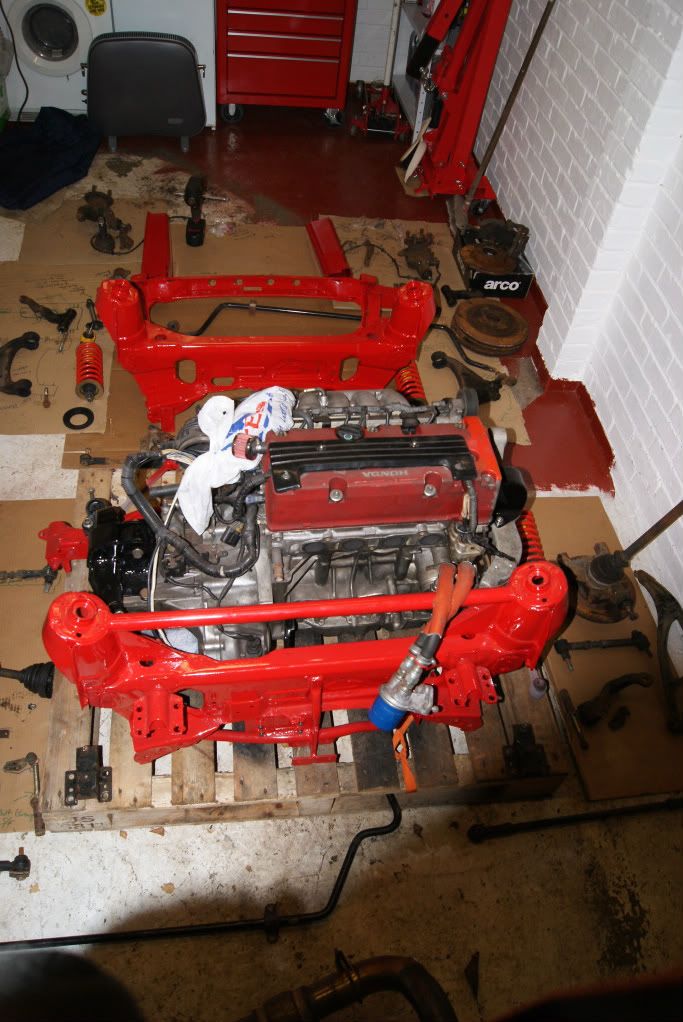
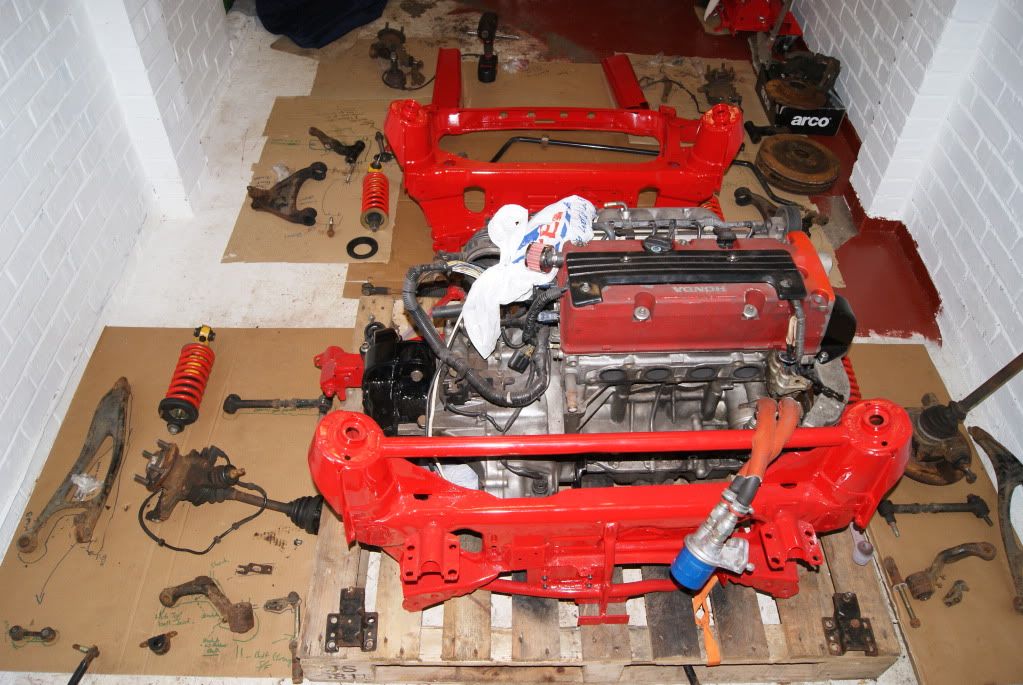
Engine mounted on nice new subframe.
Front subframe and Crash cans blasted and painted.
Front suspention (apart from the hubs and brake disks) in componant parts.
Rear Suspension is one lump - detached from the car in one go and all still attached to the hub.
There were also various parts separate.
So my job was this.
1. Make sure I have EVERY part of the suspension, brakes, hubs and other running gear. Also make sure I hadn't lost (or broke) anything
2. Brake down all the above into componant parts so that they are ready for blasting. Make sure I have a plan to re-build each part
3. Catalouge all the bolts needed to re-build everything and buy new ones where appropriate (90% will be replaced)
4. Make sure I had all the polybushes needed and make a note of what was missing
5. Make a note of any parts still to buy
6. Make a note of areas that should NOT be powder coated
7. Take all the parts for Blasting and powdercoat
I've ticked off items, 1,2,3,4 and 5 so far bar a few issues
There are loads of pictures but most are for my reference and will clutter the thread a bit... so I'll show a key few
If your interested in a certain part let me know, I can upload more.OK! Get ready for the most mental Air-Fix kit you've ever seen!
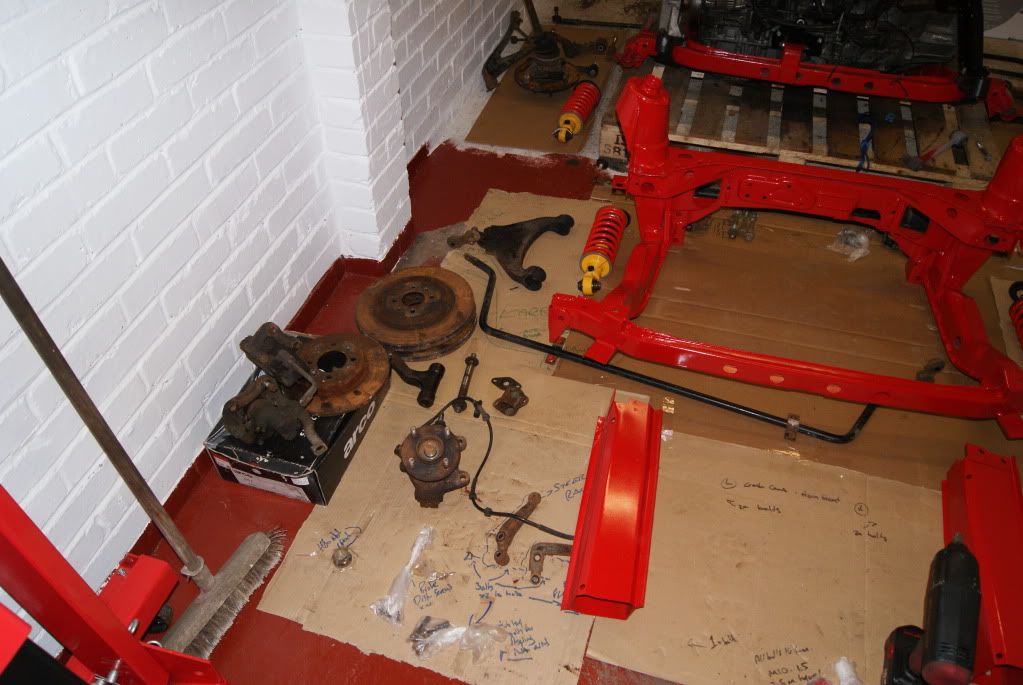
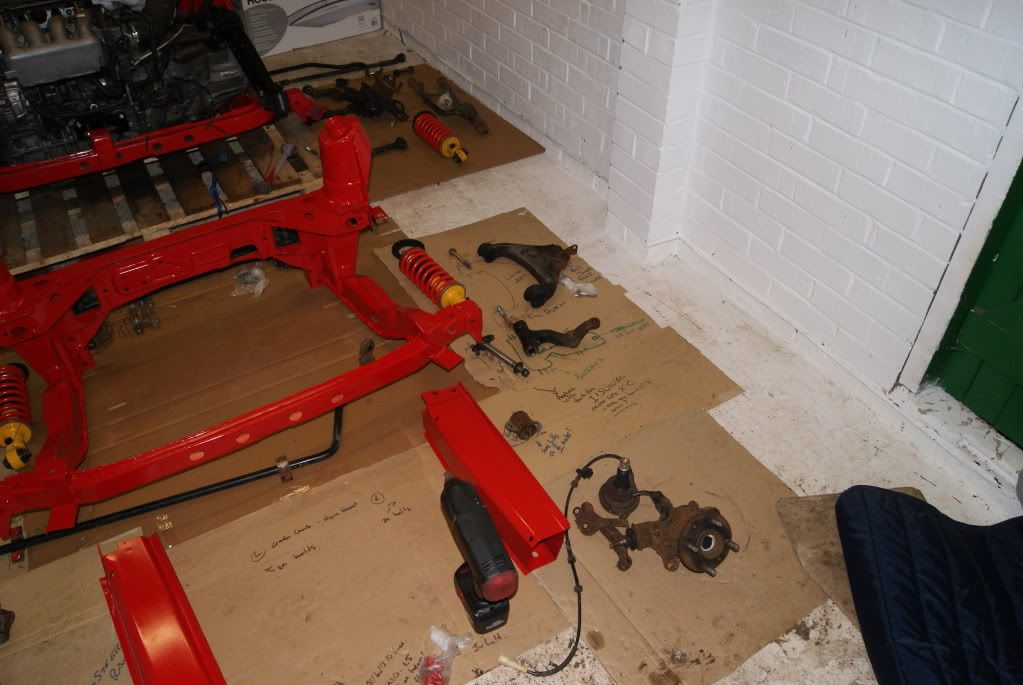
Job 1.... Lay out the parts of front suspension
Thats all but the hubs... which can be seen in the corner of the garage in this pic

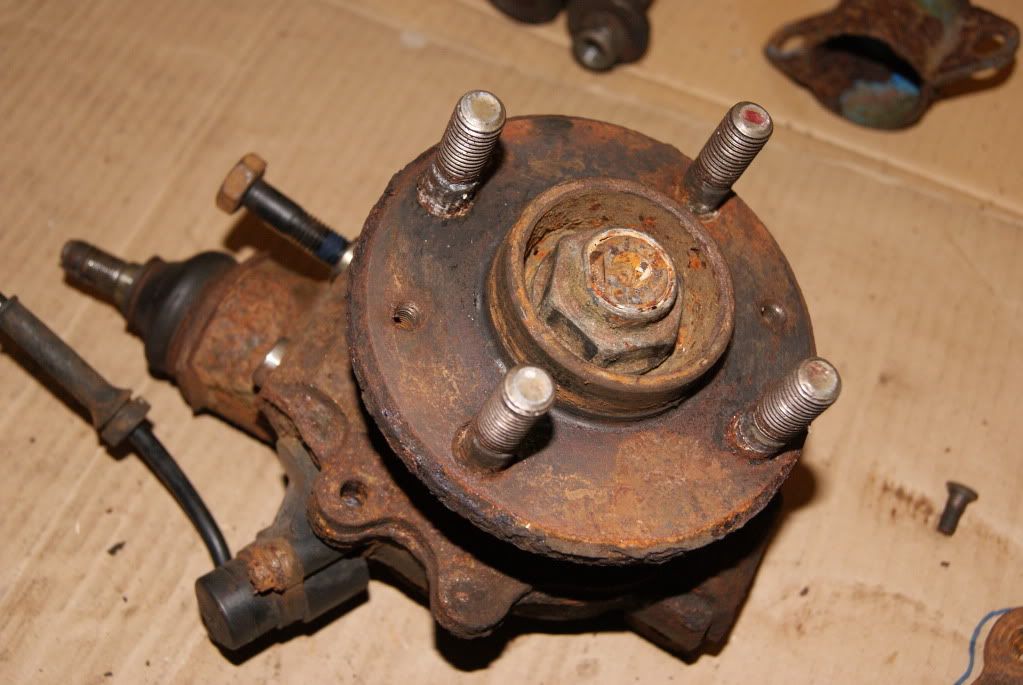
The hubs needed the brake disks removing... I was having problems with this remember? so I bought a impact driver... I LOVE this tool... I call him Steve
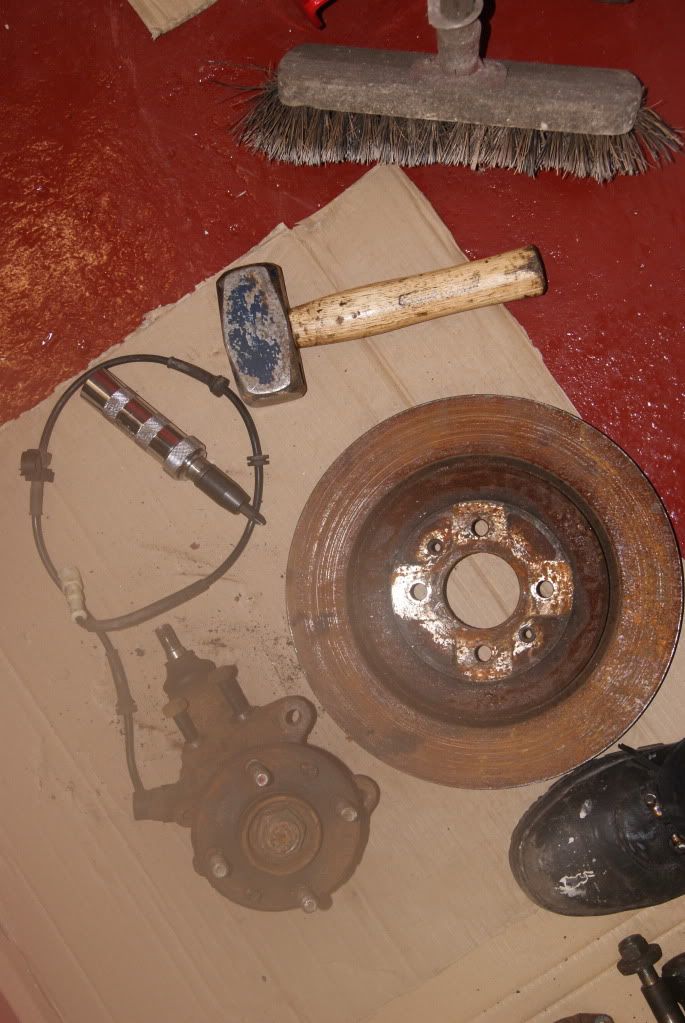
Now I could add the hubs to the Front Subframe Jigsaw.
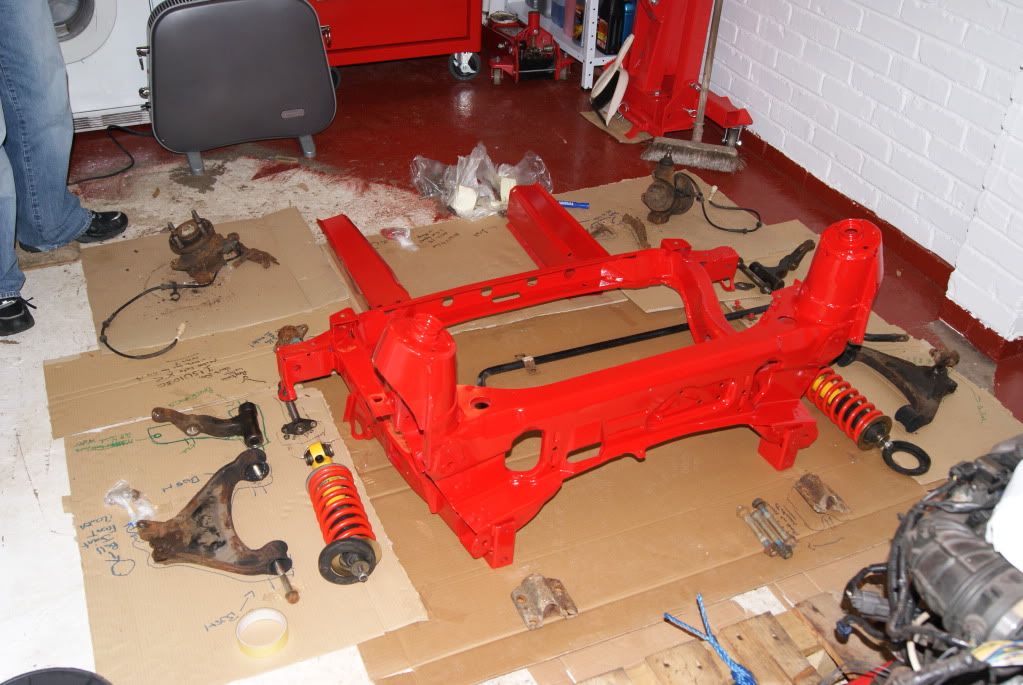
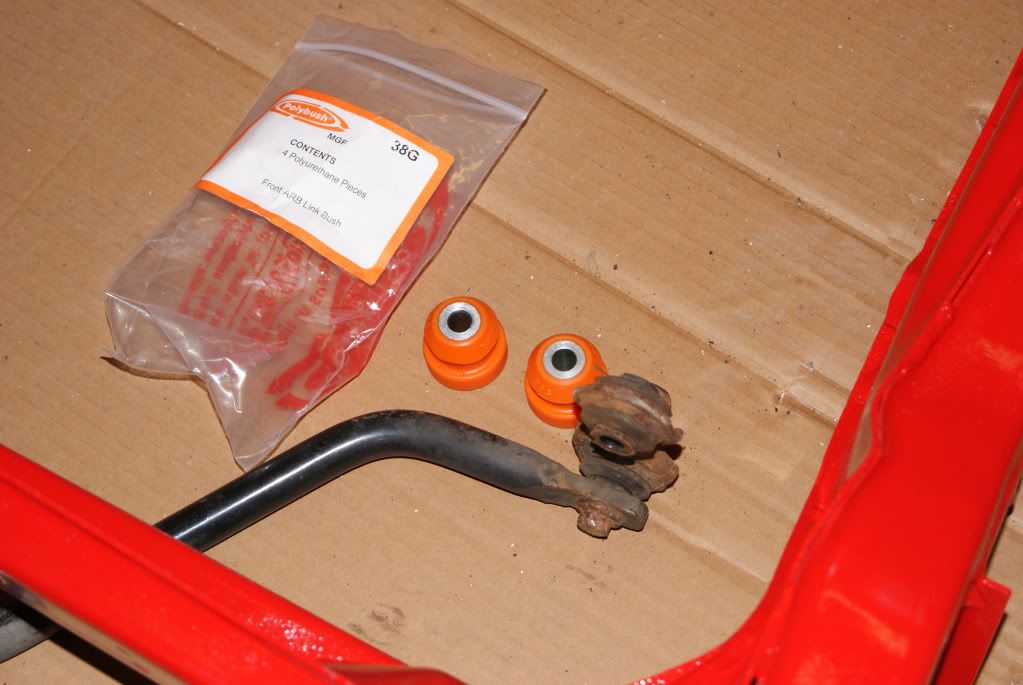
I also lined up the ARB and a few other bits.
All this took me around 5 hours. Why so long? Well I had to mark up all the bolts I had. These were in bags (Which helped) with labels (which should have helped) but the bags were left next to the exit pipe for the tumble drier. So the labels got rather wet (so they didn't help at all really).
Everything had to be re-labeled on the card and in boxes for the fasteners and all sorts... Total arse on... But it should make re-assembly a doddle really (he says!). That was one long night over!
Day 2 begins!
The next evening after work (and 4 hours sleep the night before) I was a bit reluctant to go back out into sub zero temps and crack on...
Thankfully Mr Bob Swan of Swan AVO* Turned up with a little pressie to help me along - as allot more disassembly was required tonight!
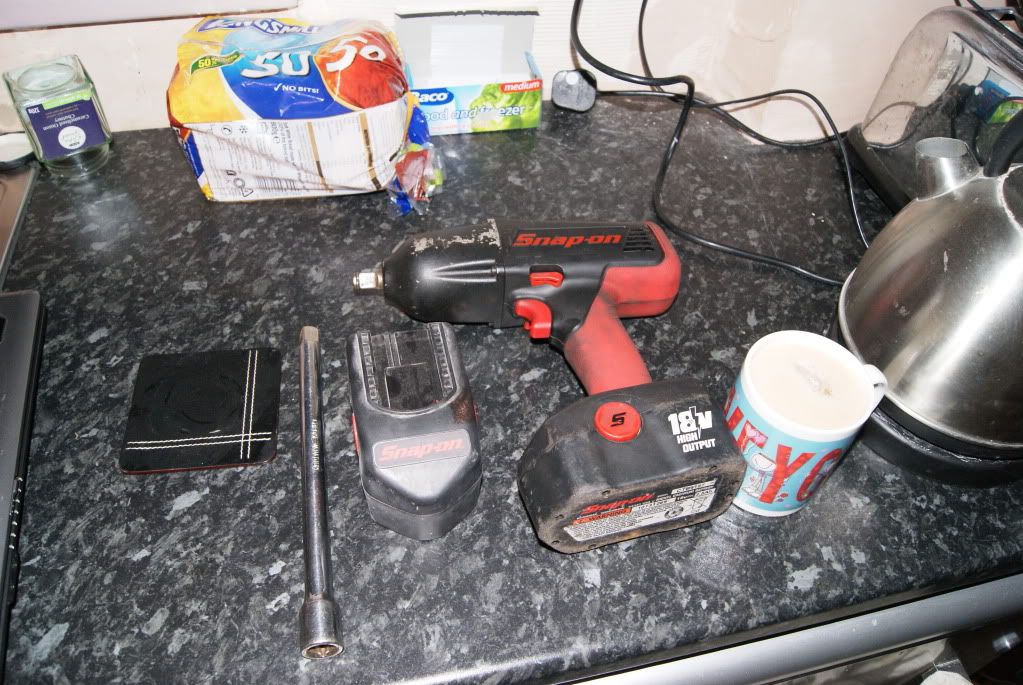
What can I say except... "my precious".... This is an epic tool and as soon as I can scrape together the pennies I am so buying one!
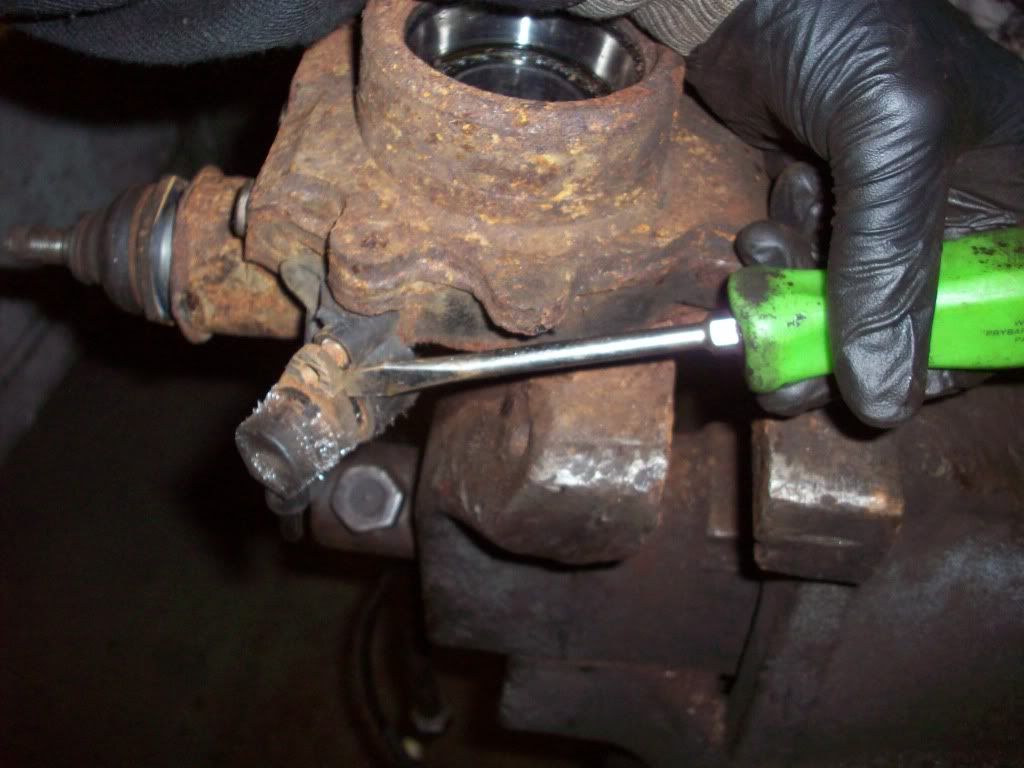
It soon made short work of a hub nut
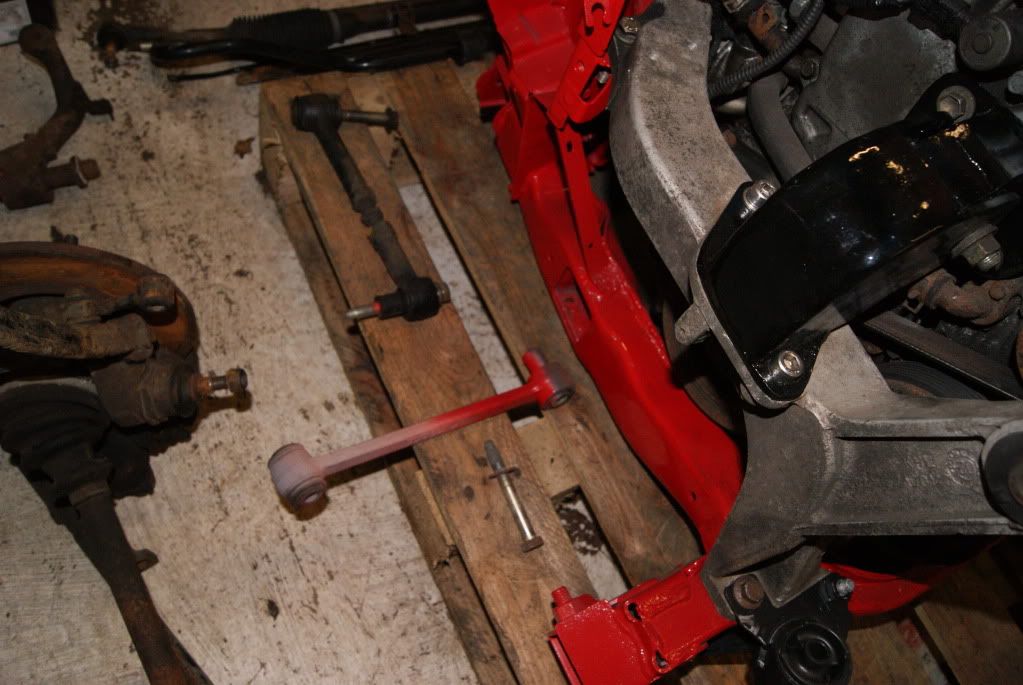
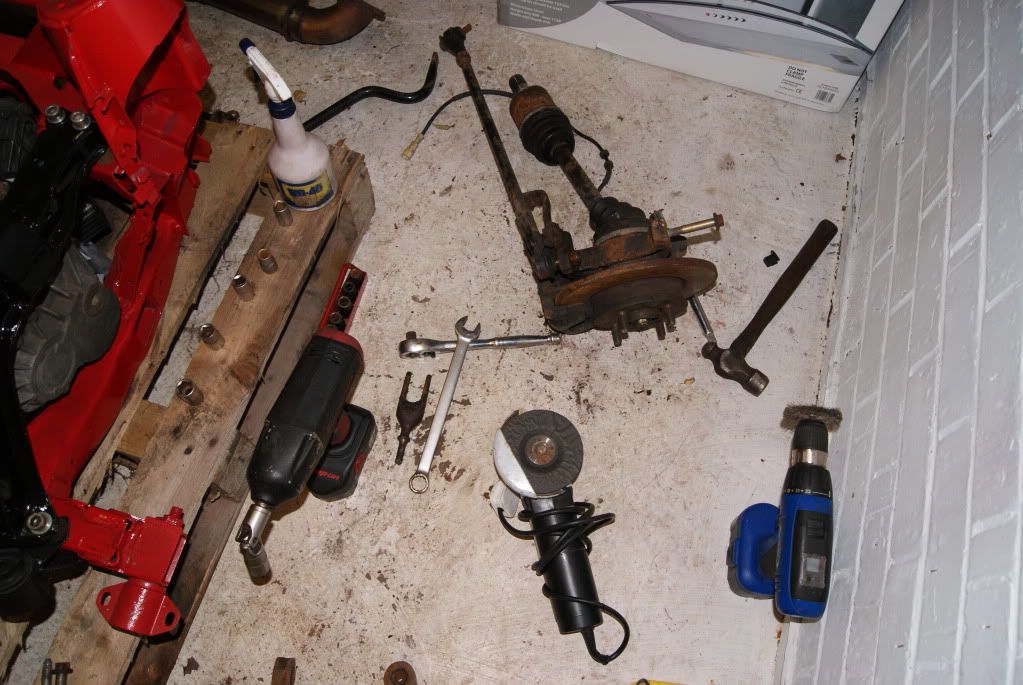
And then I got to work on the rear suspention parts
First the Lower Suspention arm (A.K.A Trailing arm) got the windy gun treatment. Along with the ARB Drop link.
Time for the track rod.
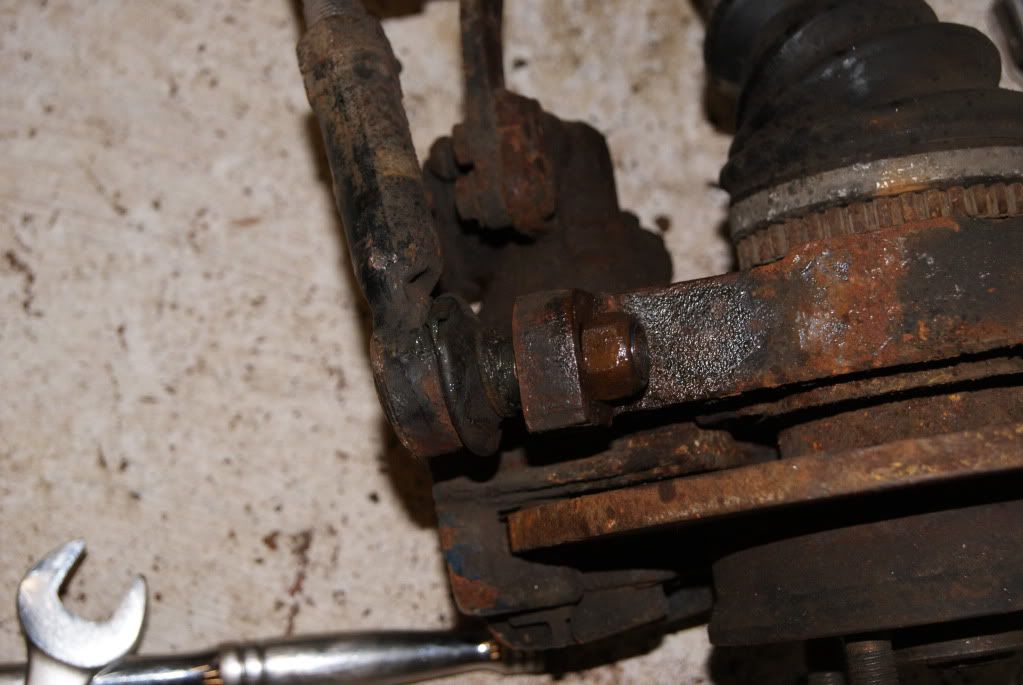
sadly.... This bleeding thing was damn-near the death of me
It would not budge
In the end I used half my tool box
And in the end I won
The TRE is pretty goosed and needs replacing anyway. But it was still a hollow victory as I wanted to save the old end use it to shake the subframe down as they are very expensive (NLA)
but never mind.Off came the Brake Caliper and Disk and we were left with this
Beer time
The rest of the evening was spent on the drivers side hub/suspension assembly. I also removed the brake pipe securing brackets from Top arms and other little bits. Then I concentrated on lying things out and labeling and sorting
all round a good night (or twos) work!!!
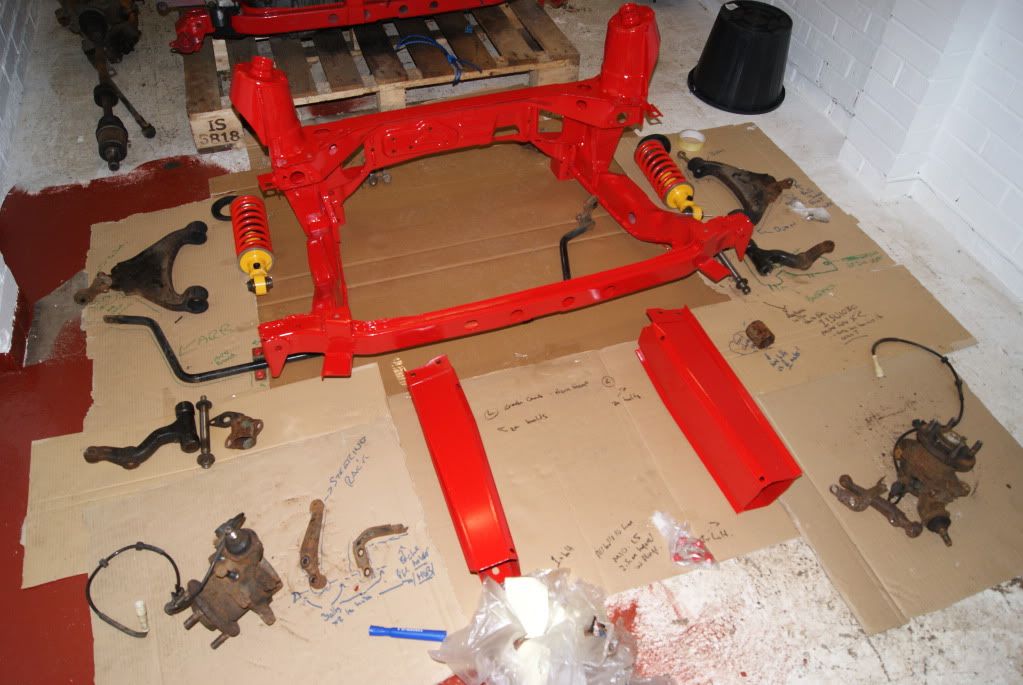
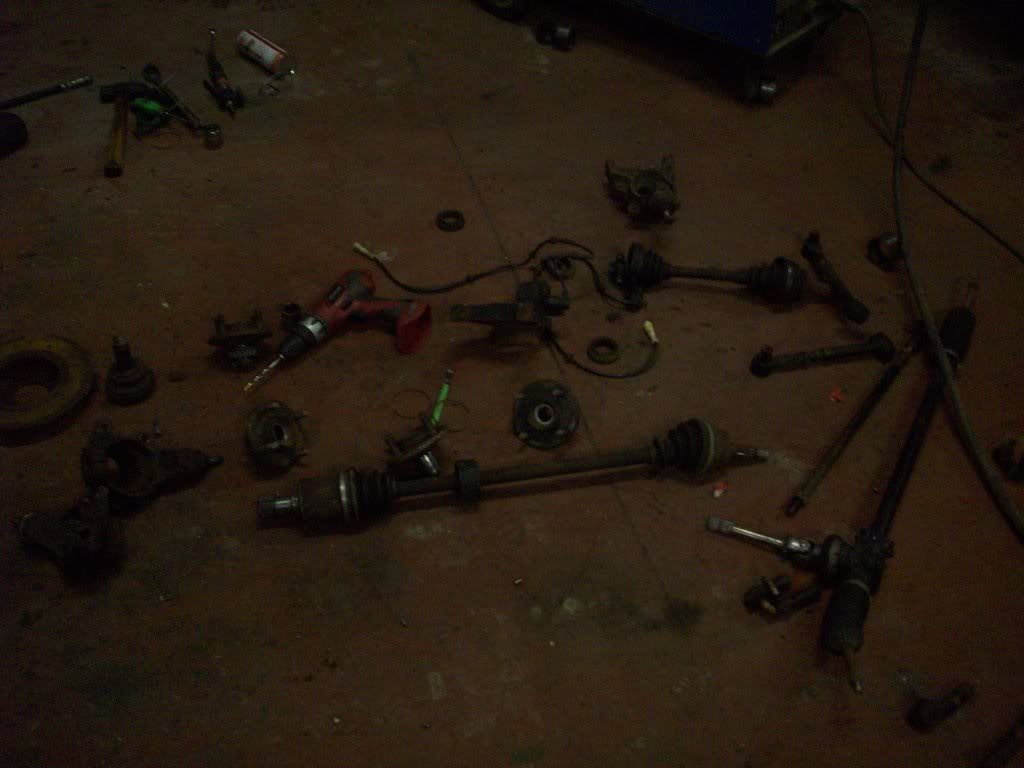
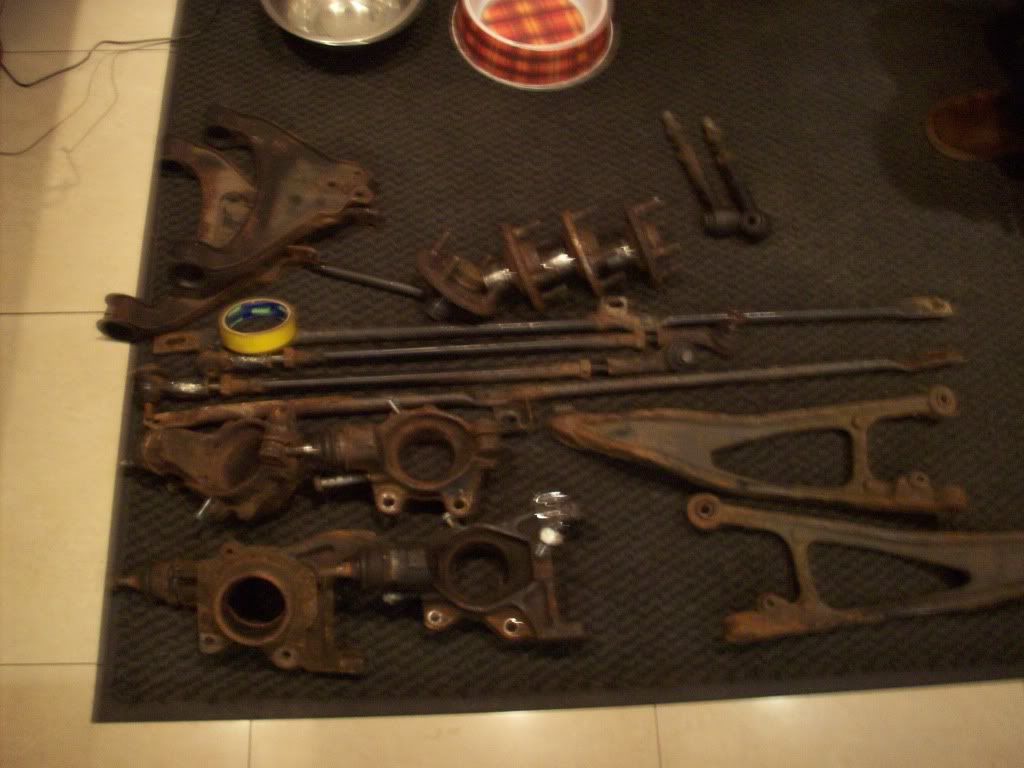
So in case your all wondering (and I bet you are)... If you take every single part, bracket, arm, nut and bolt off a MG-TFs suspention** and lie it all out on card... this is what it looks like!
and a good overhead shot
should pass an afternoon or two bolting that lot together! *yikes*
So whats left to do?
1.Remove the hub-bearings and top ball joints
2.Remove Front Upper arm, Roller bearings
3.Blast parts
3.Powder coat parts
5.Fit Polybushes
6.Bolt back together
Make it work
I'm going to need more coffee.........
*Web Address: http://swanavo.com/index.html FaceBook: http://www.facebook.com/pages/SWAN-avo/192928674123607 Or PM me if you need work done in the **! I'm not affiliated with them in any way. But they help me out of kindness and I would recommend them as a business any day! Their work is second to non and if you want the best and bargin prices you need Swan AVO
**Except for the Hub Top Ball Joints, the Bareings, the drive flanges and 1 brake disk
Update: 16/12/11
Just a Quick update for tonight, more of that "takes ages and seems to produce nothing" type of night.
I laid all my Polybushes out tonight to make sure i had the correct ones in the right places (if anything was wrong i bought them nearly 2 years ago so im stuffed! :lol: ).
etc.....
Then I prepped all the parts for delivery to the blasting company tomorrow (details to follow!)
Mostly this involved checking, checking, double checking and then doing it again to make sure i missed nothing. I'm still a little worried about a few things but I think I'm ok!
Then I needed to plug any Thread holes to save a chew on either masking them or tapping them out after the Powder Coat as been applied
(In my professional opinion as a student nurse - after a working week where every night has been spent in the garage freezing my nuts :err: off, the beer was a medical requirement!) Thats my excuse anyway and im sticking to it!
After that I boxed things up for the move to the blasters!
And for the past hour or 2 I've been sorting every bolt out so I can go to the fasteners tomorrow and have all new ones supplied but no pics of that as it's very boring lol
Tomorrow I'll be burning out the remaining bushes, braking down the last of the hubs, and running round like a headless chicken mostly!
Adam - Out
Just a Quick update for tonight, more of that "takes ages and seems to produce nothing" type of night.
I laid all my Polybushes out tonight to make sure i had the correct ones in the right places (if anything was wrong i bought them nearly 2 years ago so im stuffed! :lol: ).
etc.....
Then I prepped all the parts for delivery to the blasting company tomorrow (details to follow!)
Mostly this involved checking, checking, double checking and then doing it again to make sure i missed nothing. I'm still a little worried about a few things but I think I'm ok!
Then I needed to plug any Thread holes to save a chew on either masking them or tapping them out after the Powder Coat as been applied
(In my professional opinion as a student nurse - after a working week where every night has been spent in the garage freezing my nuts :err: off, the beer was a medical requirement!) Thats my excuse anyway and im sticking to it!
After that I boxed things up for the move to the blasters!
And for the past hour or 2 I've been sorting every bolt out so I can go to the fasteners tomorrow and have all new ones supplied
but no pics of that as it's very boring lolTomorrow I'll be burning out the remaining bushes, braking down the last of the hubs, and running round like a headless chicken mostly!
Adam - Out
B]Update: 4th January 2012[/B]
Happy new year everyone!!!!
Wow I can't belive it's been 3 weeks since my last update. I've been up to all sorts!
The TF-R has been keeping me stupidly busy! So much so I've been remiss in updating the thread sorry guys!
Time to make up for that I think!
We left the saga with me pushing a deadline. The parts needed to be at the blasters/powder coaters and I had spent long into the night prepping parts as best as I could.
The next day dawned bright (and far too) early.
I was up and ready after a few hours sleep and off to my mates work shop (Tailors Transport in Billingham) where I found all sorts of tools for me to play with!
The main job was to brake down the hubs, job 1; the ABS sensor which had rounded bolts on every hub
Job 2 required some specialist equipment: 1. A Welding rig, 2. A Mate who can weld.

The bareings were pushed out by welding along 4 axis and then waiting for the welds to cool a bit, this effectivly "shrank" the bareings into the middle of the hub so we could punch them out.
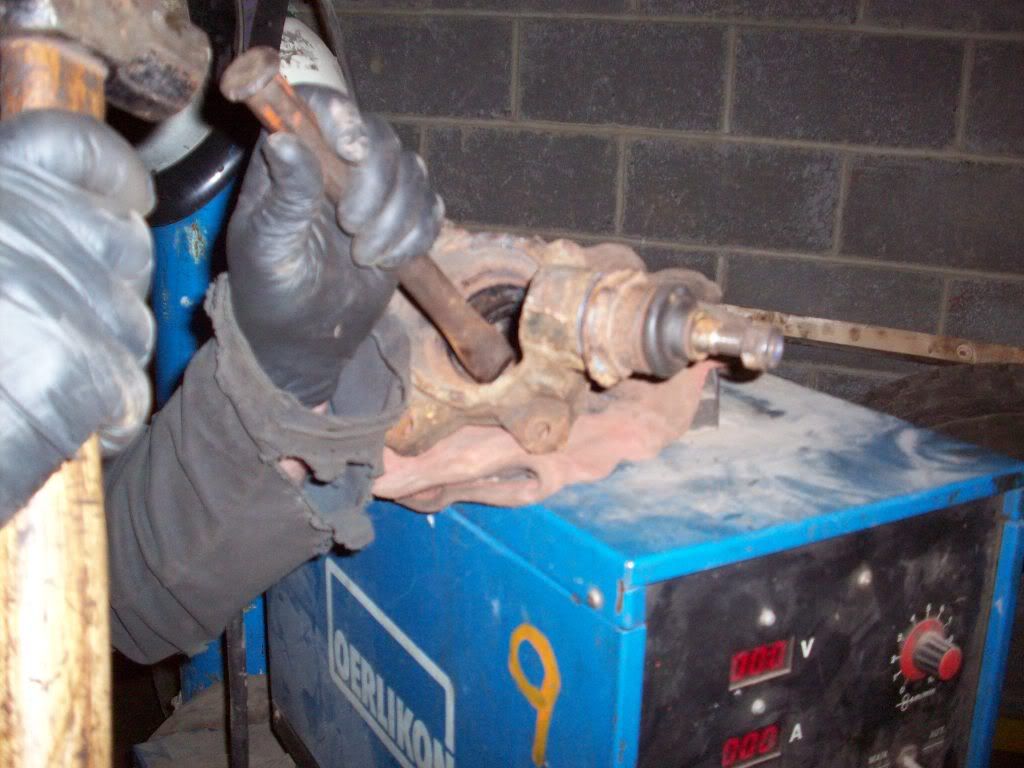
Thanks Mr Lee Olver! told you I'd make you famous.
a few bits in need of some cleaning up!
now, who could do this for me? well...
Time to drop them off a very good and very kind friends! Another of the many friends from MG-Rover.org who have helped me out when I've been in need.
Thanks Mindy!
Her company will be blasting and Powder-coating basically every pice of suspension/running gear on the car. This may cause some issues for me when I fit the new polybushes. But I'm hopeful we will be OK
Sufficer to say Mindy has her work cut out!
See mum, I cover other peoples houses in car parts too!!!
Huge thanks to Lee for his welding skills (we were on a deadline or I was going to have a go at learning how to weld myself never mind) and of course to mindy for taking on such a random job! I can't wait to see the results. Note: Once the parts are back I will post details of how to get in touch with Mindy if you want your parts future rust proofing on your project/restoration. Sadly the Holidays have meant I don't have them back yet (my fault for not getting them to Mindy quicker) but I'm sure it wont be long!
Next Update
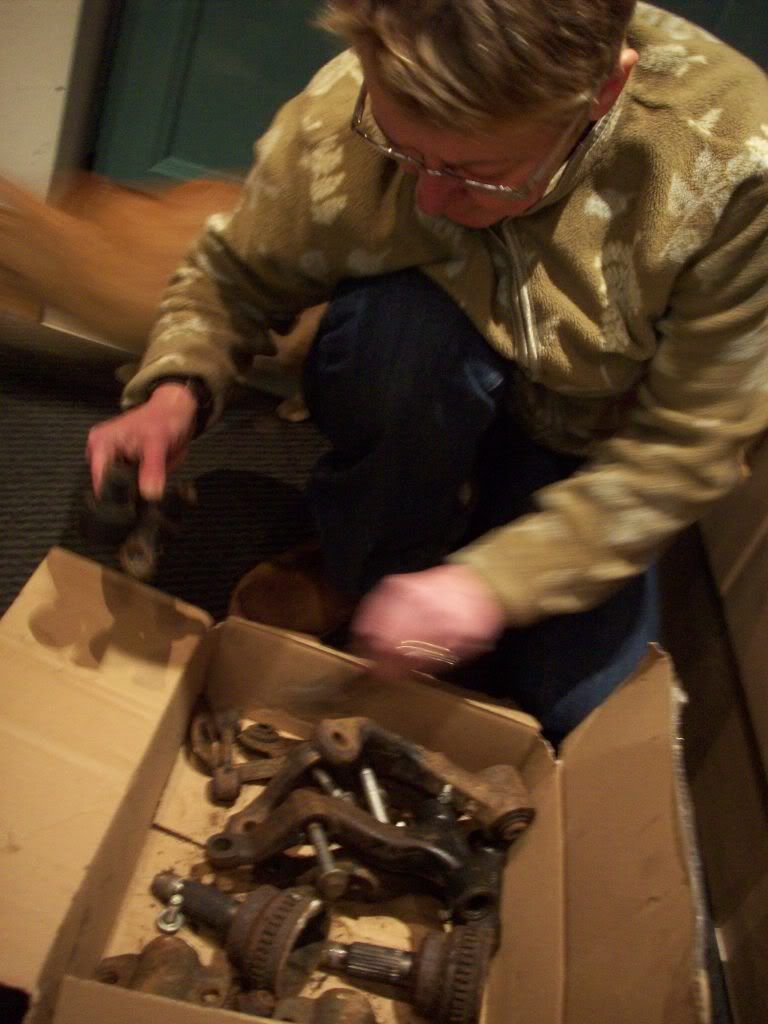
OK, The next week or 2 and over christmas I spent makeing sure I had every TRE, Bush, Polybush, Ball Joint and any other wearable part ready to fit to the parts when they arrive back for the cars Build!
This took some serious detective work. Parts for TFs are easy to come by. CHEAP parts are not. Naturally no expense has been spared where necessary. But some TREs and things are very expensive as old MG/Rover stock and I've made sure I have sourced Good Quality After Market parts for much less money (I think i've saved around £600 and not lost one bit of quality)
Most importantly there wont be a part on the car that wont be better than or as good as new. Only the best will do for my car!!!
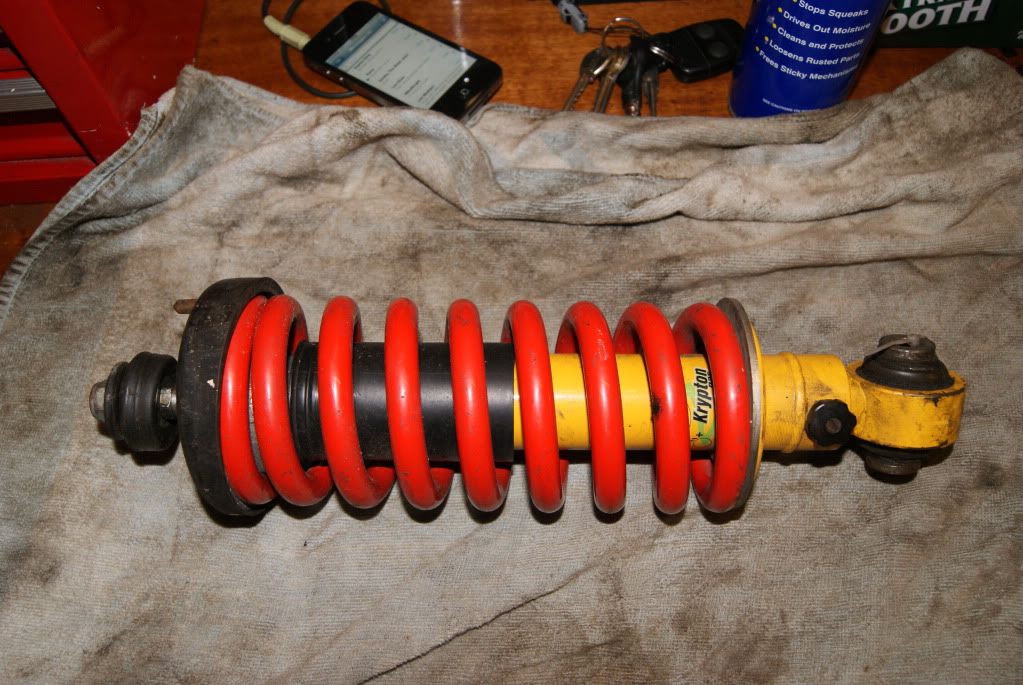
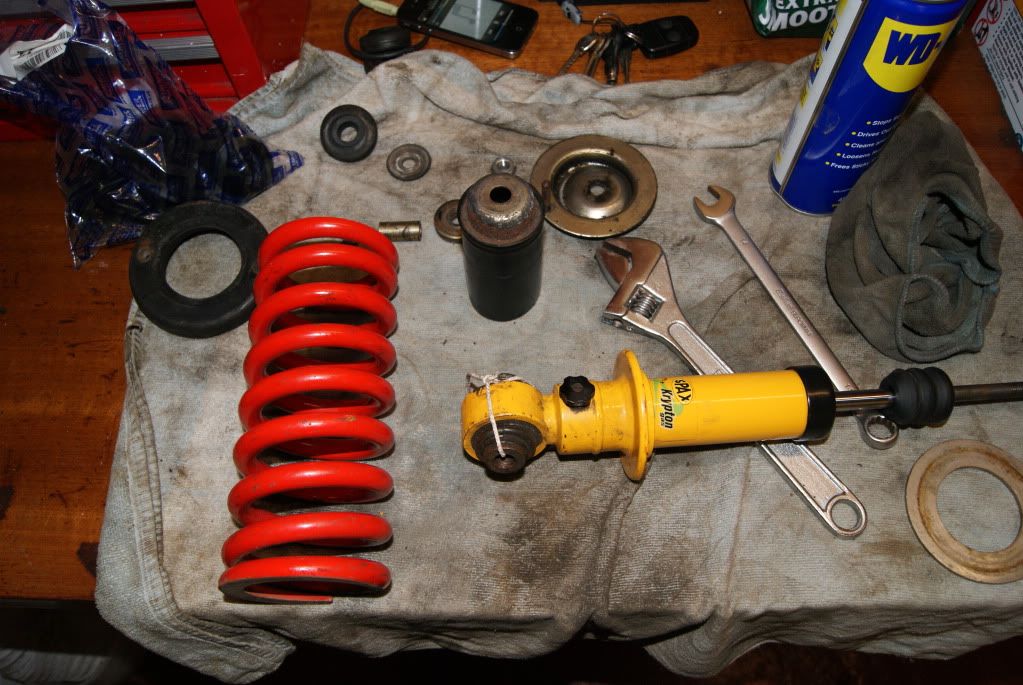
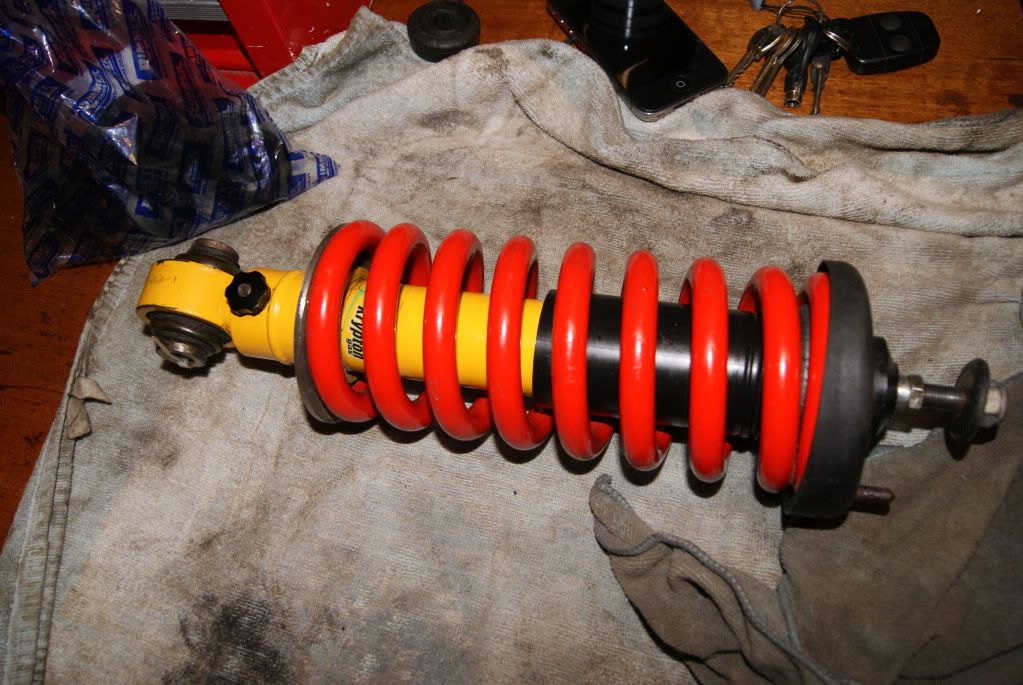
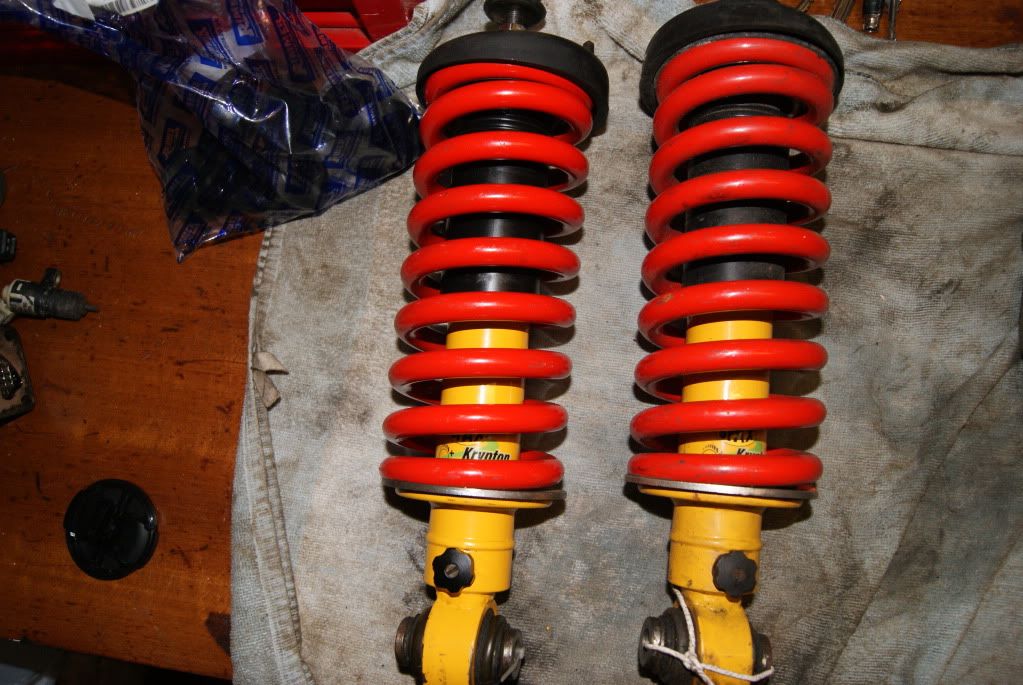
First Job on rebuilding the suspension was to service my Shocks/Springs and add the polybushes
Before:
During:
After:
Before/After:
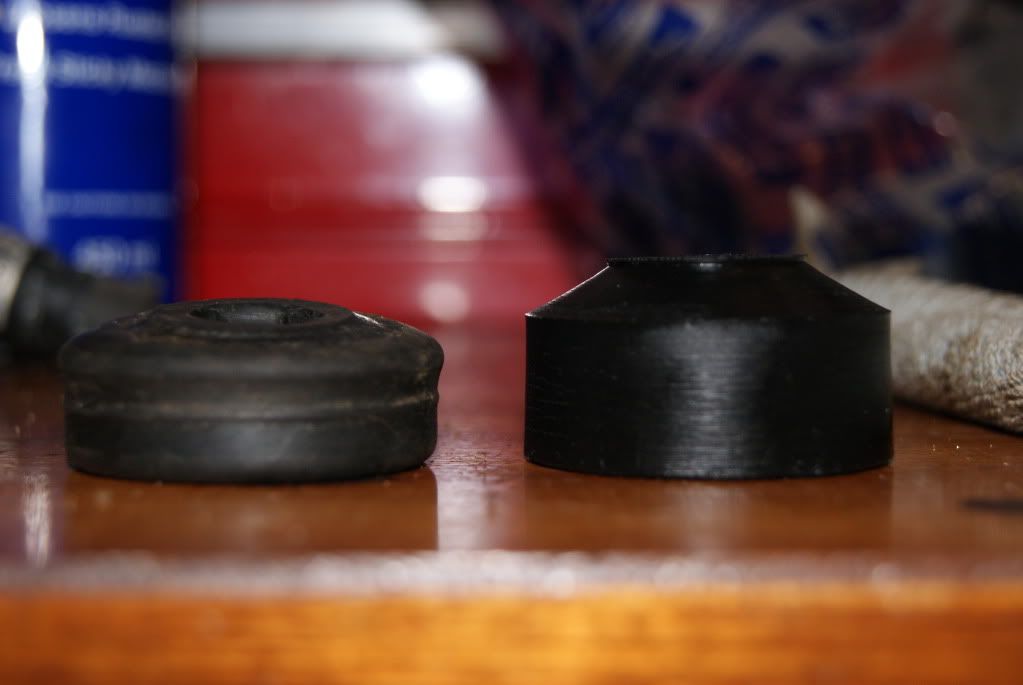
Why we use Polybushes Kids:
And now time for the big headach
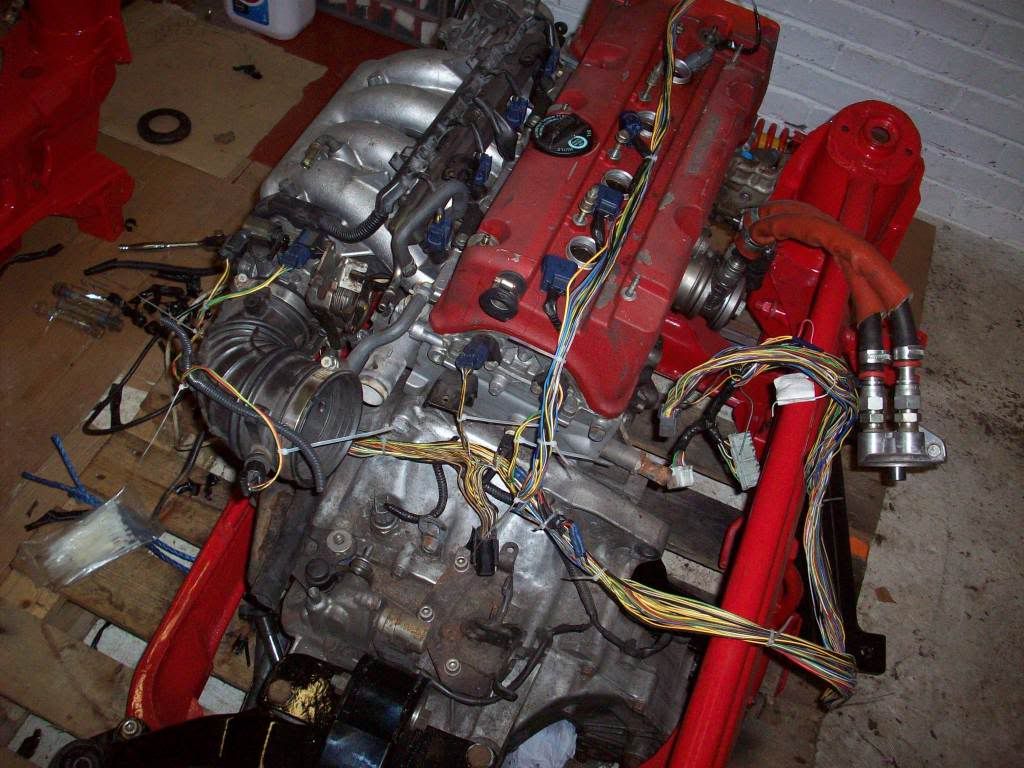
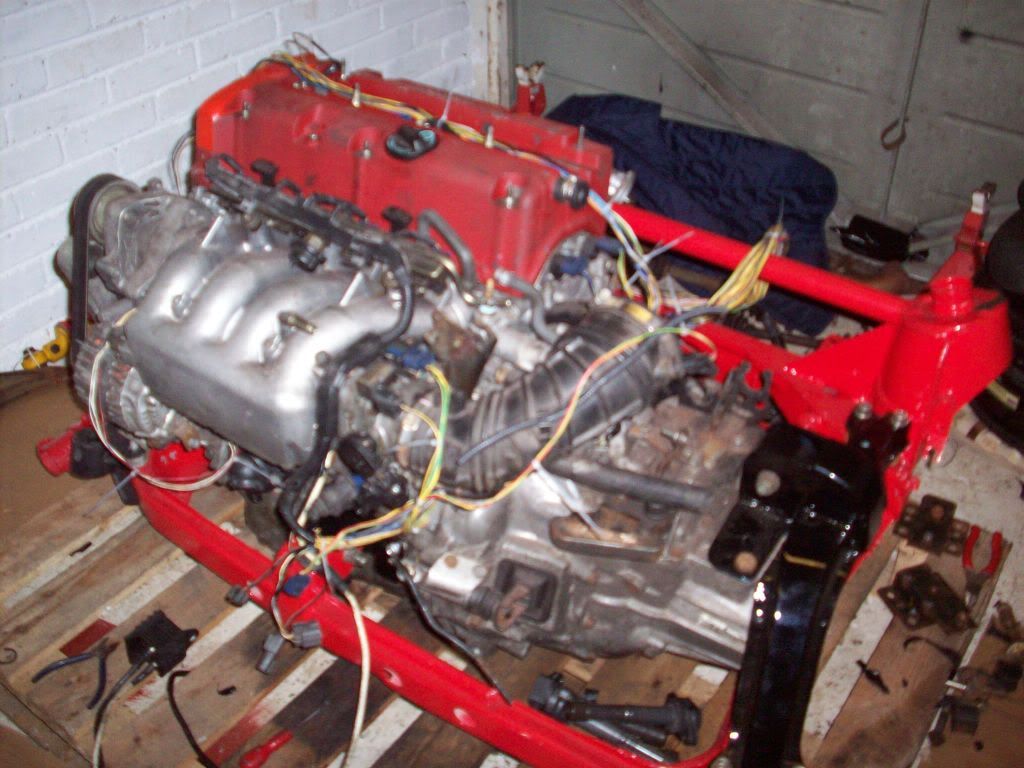
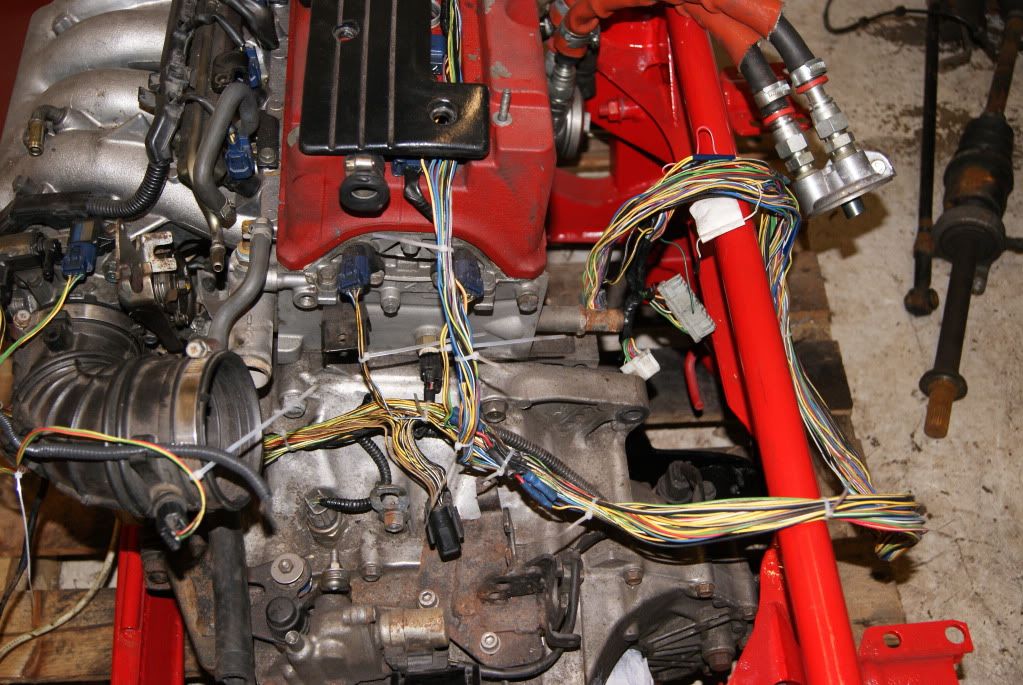
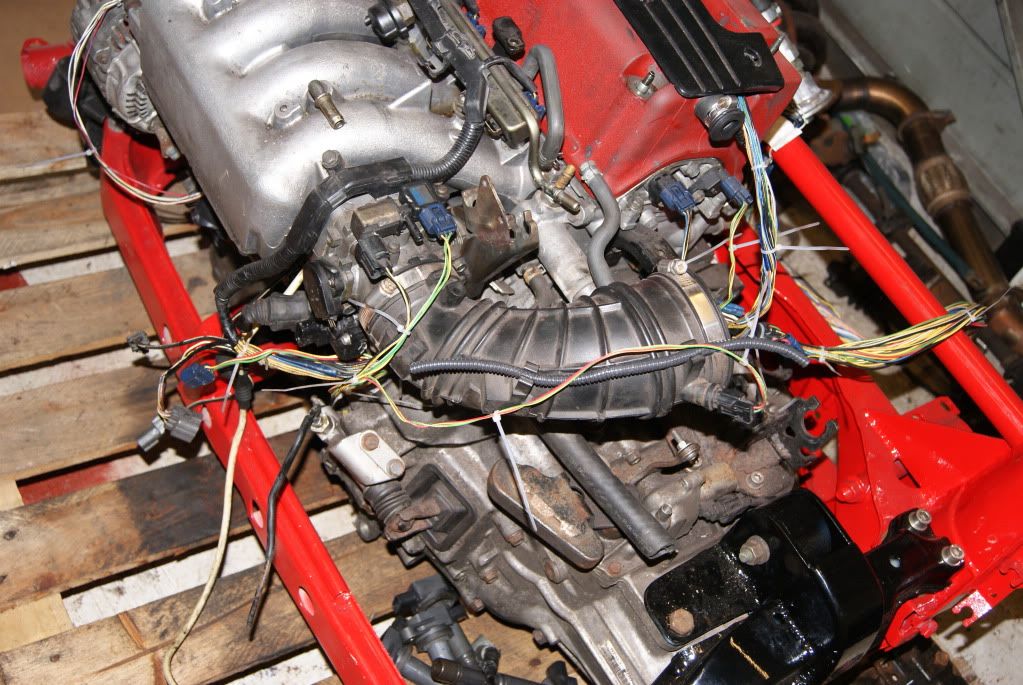
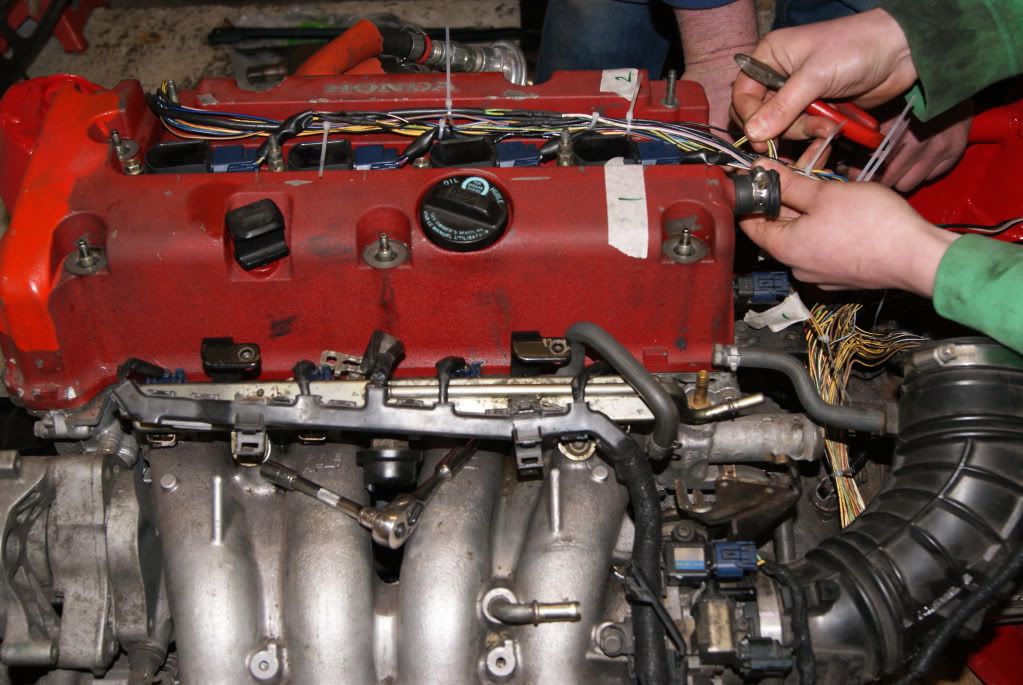
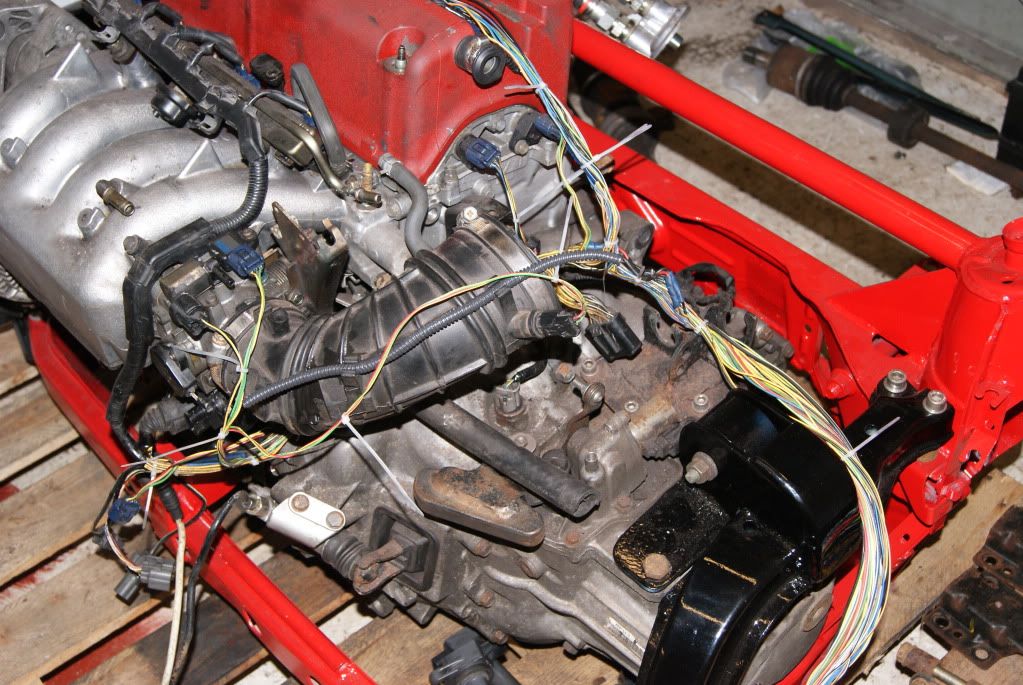
The wireing
This is the one I have been dreading, however after some help from Jonno and Dan Smith. I am convinced I was just being a wuss.
We did find some ticking time bombs though while stripping the loom down (much of it can be binned or re-routed to generally make for a better and tidier install). I will also be doing the Car side of the loom and adding proper conectors so that no wires need to be cut to take the engine out in the future!
Anyway here are the pics:
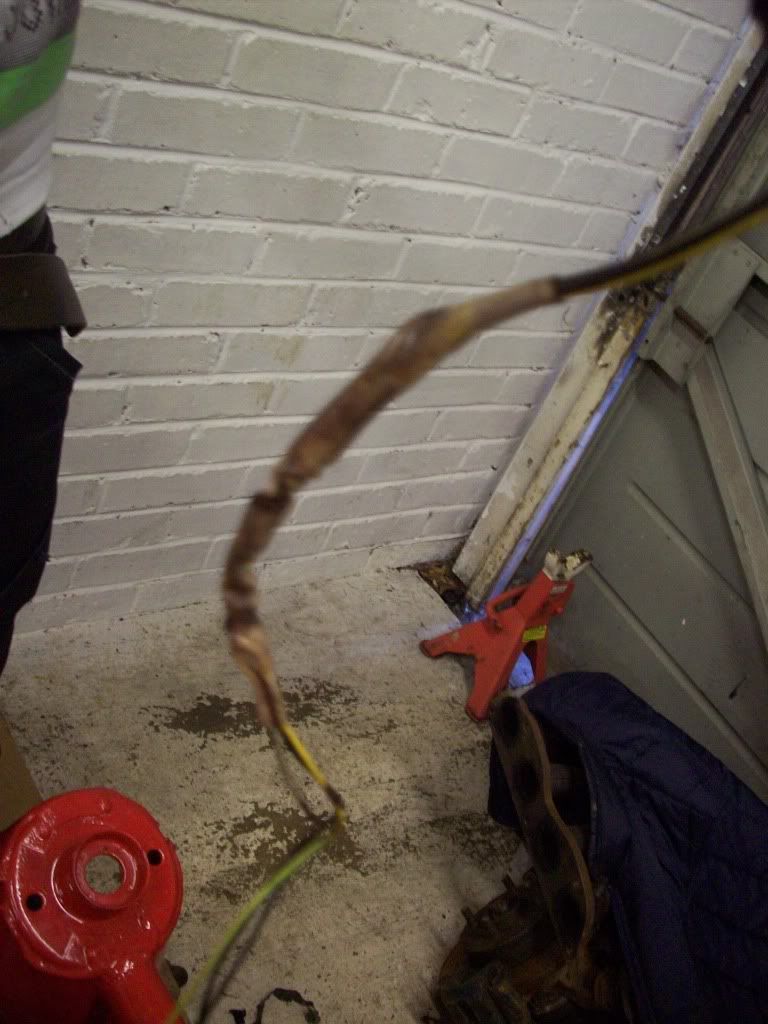
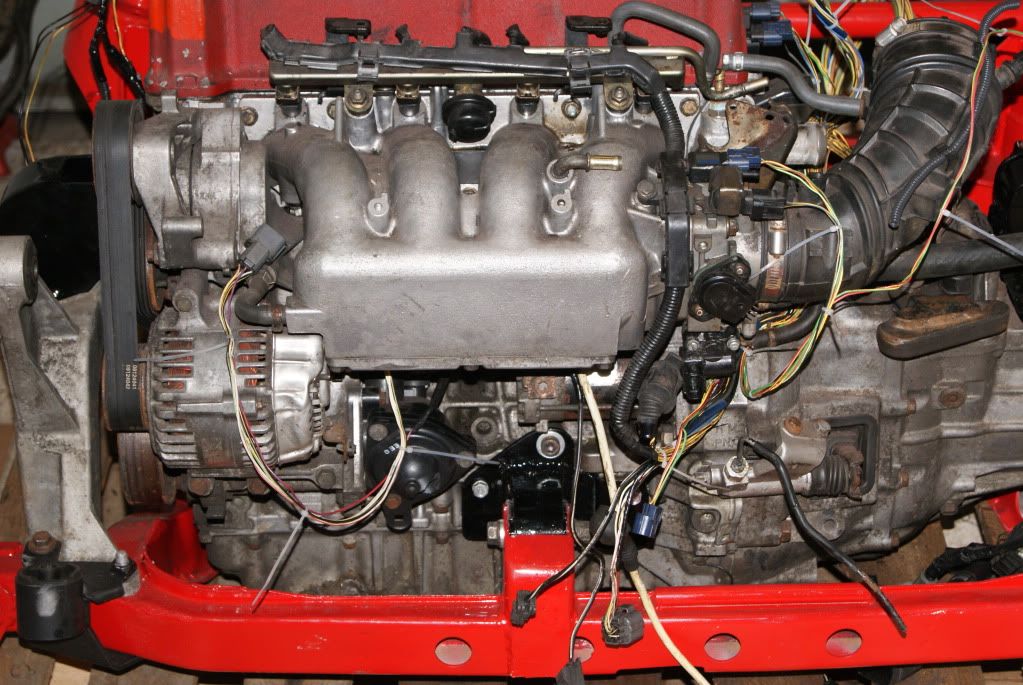
Random Long wire to Coil Pack 1. Is this normal Honda peeps?
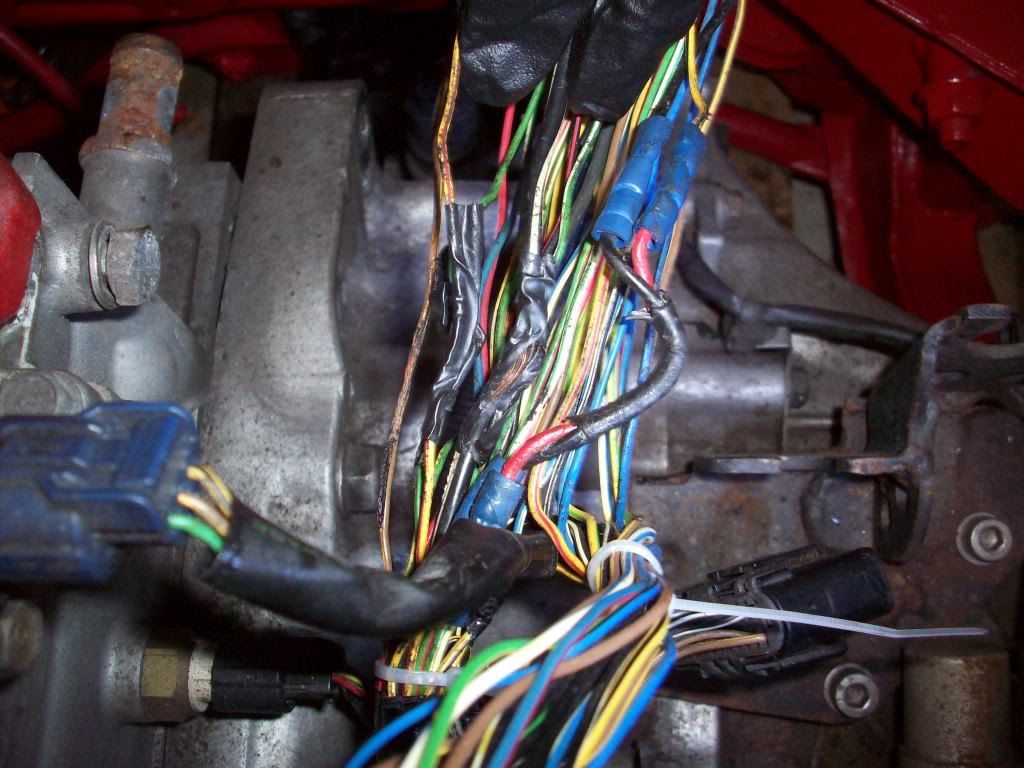
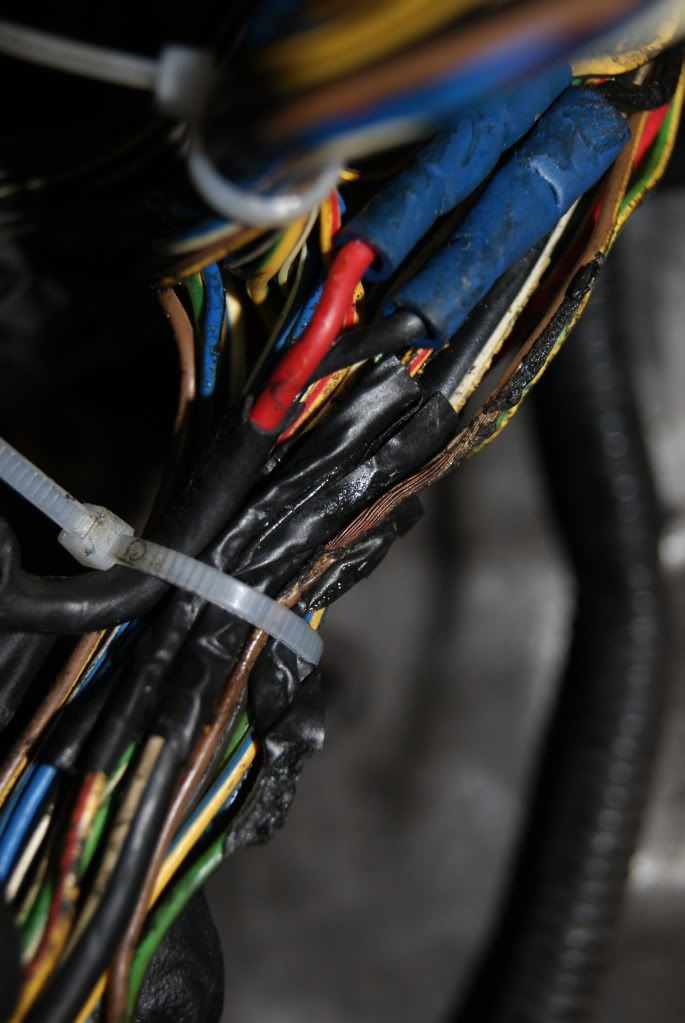
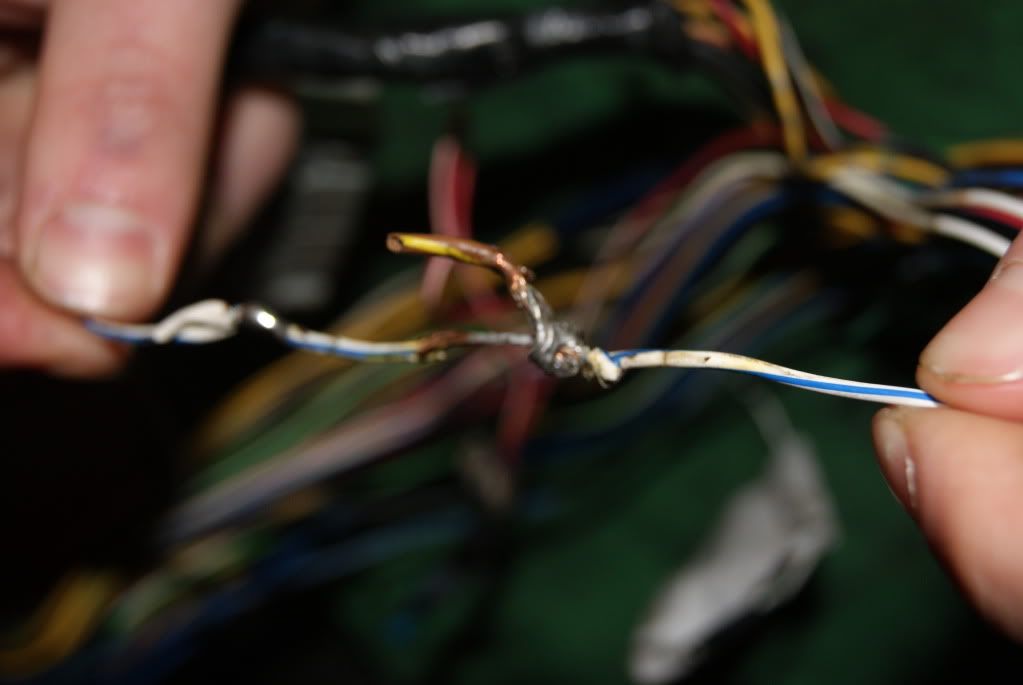
What a nightmare (Notice the burnt through wires!!!!)
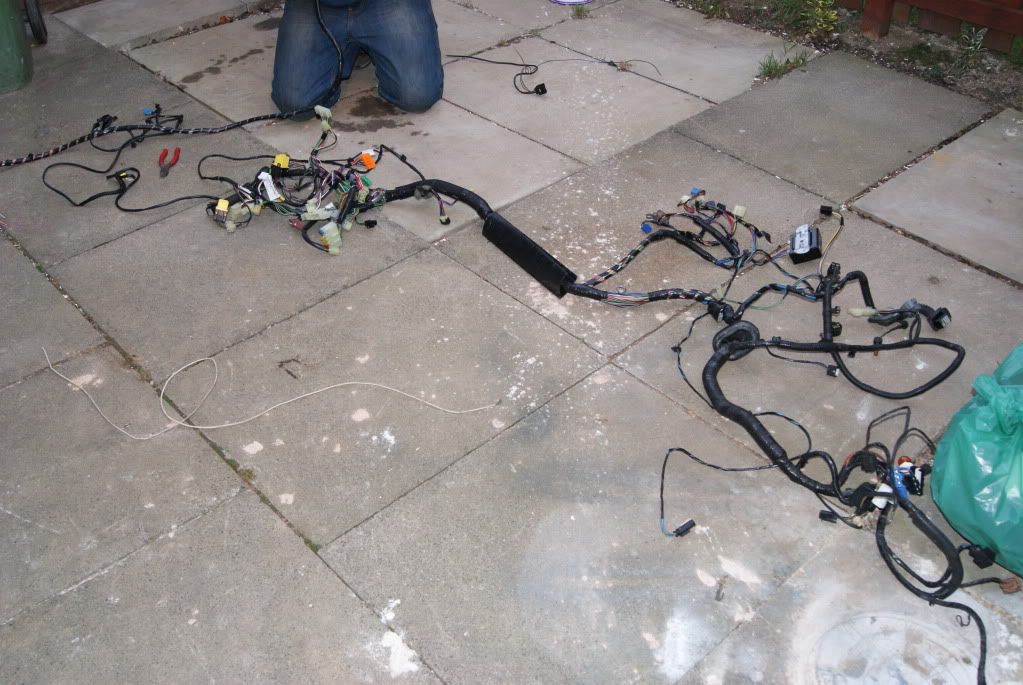
Fully stripped back
Close up of wires that seem to have been on fire!!!!
Some Real Organization takes place:
Other Things I've done but sadly dont have pictures for is to fine tune the Throttle cable (so it actually gives full range of motion).
Get measurements for, and order a clutch line from Hel (to replace the epic bodge I did have).
Also I've looked at the slick shift in the cabin, I think I might know how to fix the long travel on the Vertical Gate. But i need the gearbox in situ to confirm weather this has worked.
Add all that together and I might as well have not bought a "Converted car"
This is bad news for me - because it's been loads of work. But good news for anyone who might want to do this conversion themselves. I've not re-built this car. I will have Built one, more or less from scratch. IF... She works lol
More updates will come very soon people! but right now we are waiting for the parts back from the blasters and err.... payday! lol
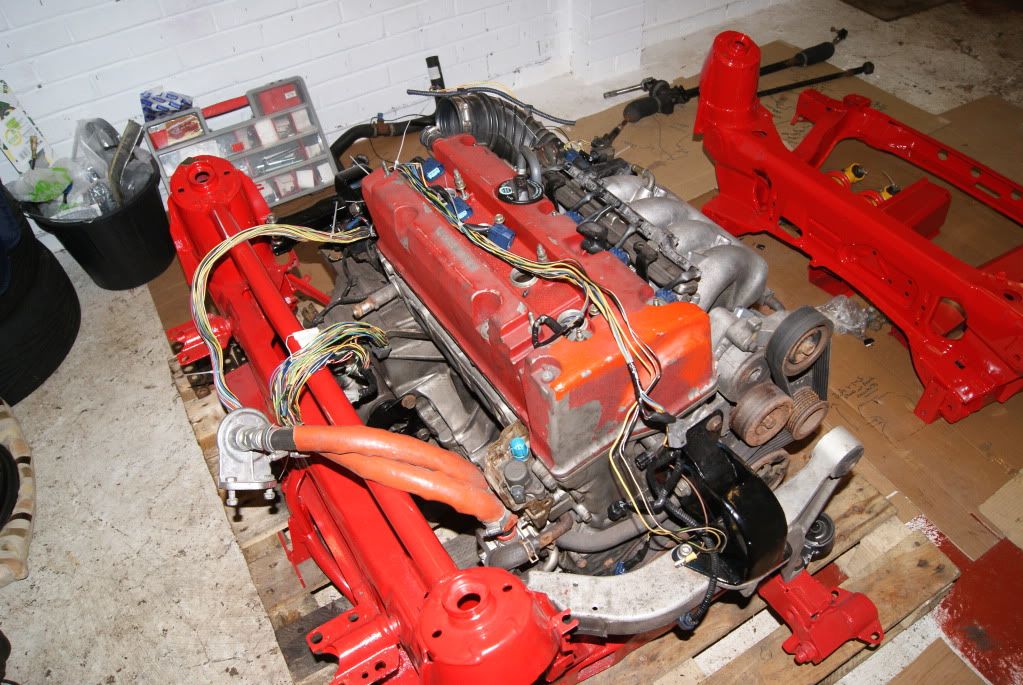
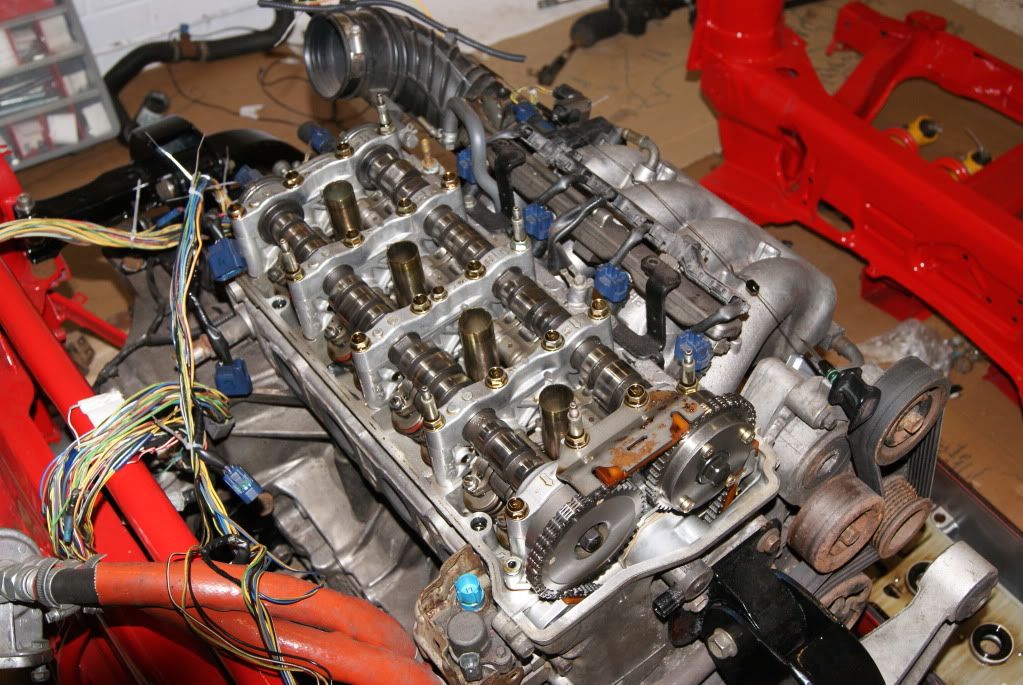
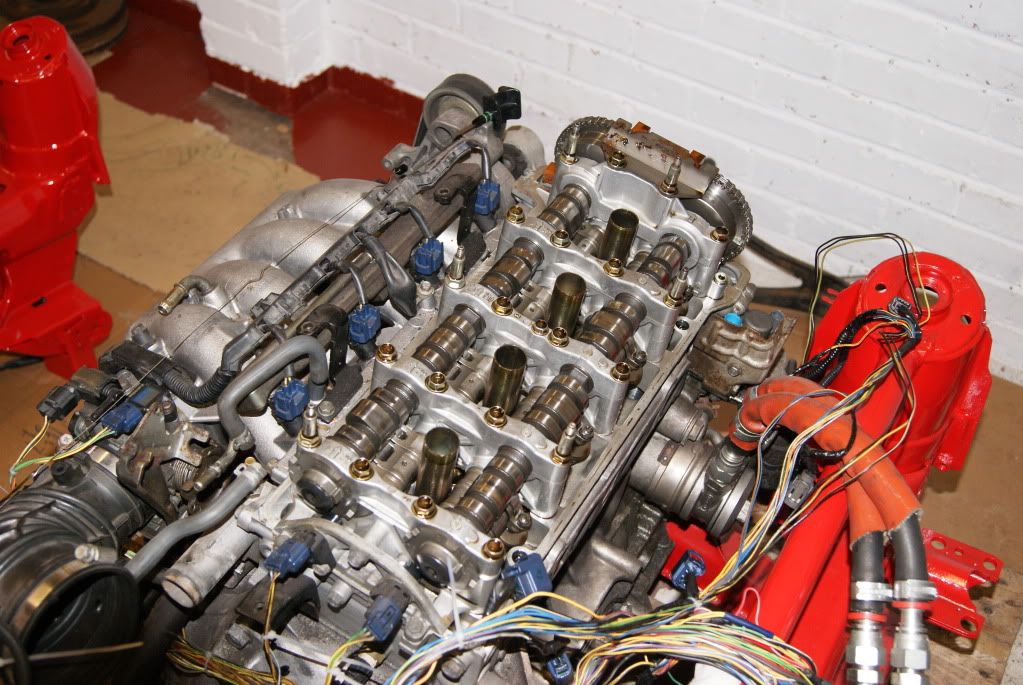
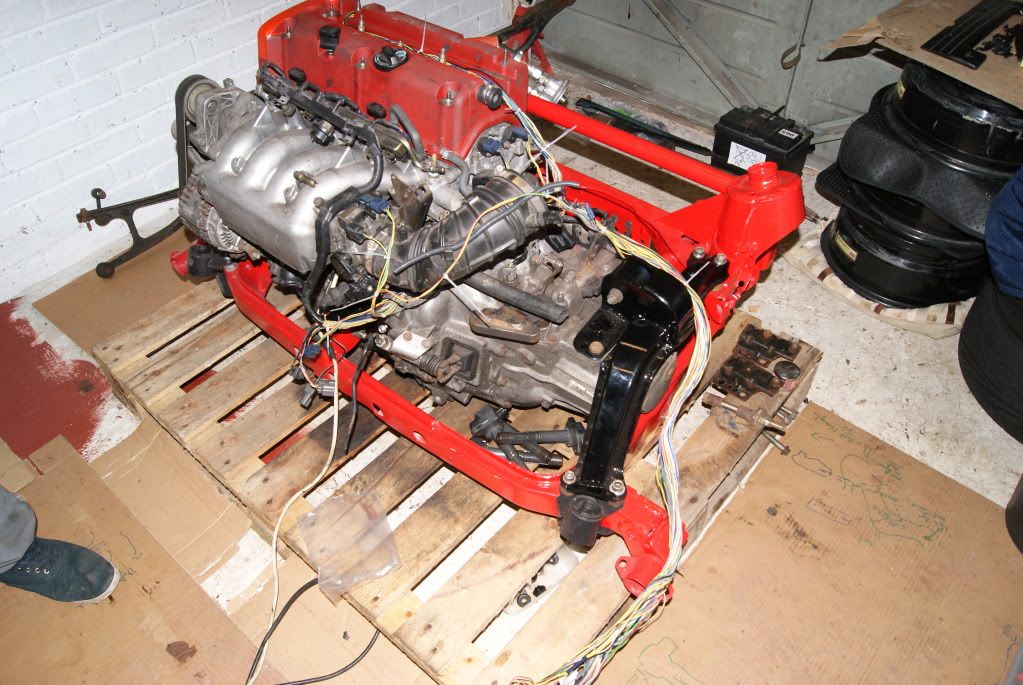
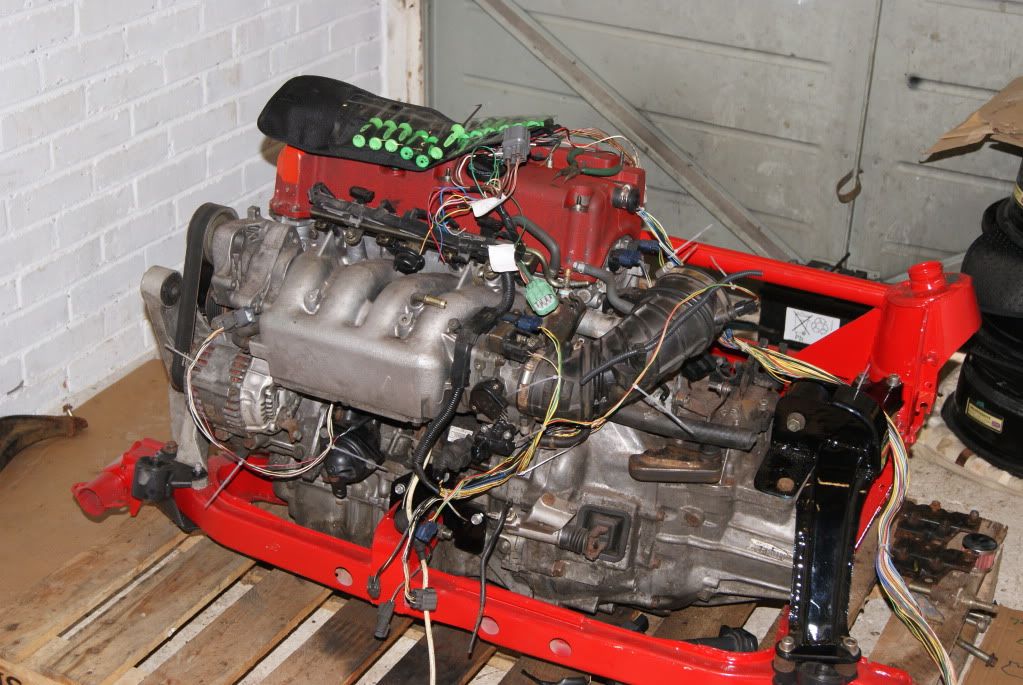
Oh I did however remove the rocker cover to paint it.... Which allowed the taking of some pictures of the business end of a K20A2 engine
In the words of a fellow MG, V-TEC ower "Where iz zee sik V-Tez yO?!"
On that note... see you next time!
Happy new year everyone!!!!
Wow I can't belive it's been 3 weeks since my last update. I've been up to all sorts!
The TF-R has been keeping me stupidly busy! So much so I've been remiss in updating the thread
sorry guys!Time to make up for that I think!
We left the saga with me pushing a deadline. The parts needed to be at the blasters/powder coaters and I had spent long into the night prepping parts as best as I could.
The next day dawned bright (and far too) early.
I was up and ready after a few hours sleep and off to my mates work shop (Tailors Transport in Billingham) where I found all sorts of tools for me to play with!
The main job was to brake down the hubs, job 1; the ABS sensor which had rounded bolts on every hub
Job 2 required some specialist equipment: 1. A Welding rig, 2. A Mate who can weld.
The bareings were pushed out by welding along 4 axis and then waiting for the welds to cool a bit, this effectivly "shrank" the bareings into the middle of the hub so we could punch them out.
Thanks Mr Lee Olver! told you I'd make you famous.
a few bits in need of some cleaning up!
now, who could do this for me? well...
Time to drop them off a very good and very kind friends! Another of the many friends from MG-Rover.org who have helped me out when I've been in need.
Thanks Mindy!
Her company will be blasting and Powder-coating basically every pice of suspension/running gear on the car. This may cause some issues for me when I fit the new polybushes. But I'm hopeful we will be OK
Sufficer to say Mindy has her work cut out!
See mum, I cover other peoples houses in car parts too!!!
Huge thanks to Lee for his welding skills (we were on a deadline or I was going to have a go at learning how to weld myself
never mind) and of course to mindy for taking on such a random job! I can't wait to see the results. Note: Once the parts are back I will post details of how to get in touch with Mindy if you want your parts future rust proofing on your project/restoration. Sadly the Holidays have meant I don't have them back yet (my fault for not getting them to Mindy quicker) but I'm sure it wont be long!Next Update
OK, The next week or 2 and over christmas I spent makeing sure I had every TRE, Bush, Polybush, Ball Joint and any other wearable part ready to fit to the parts when they arrive back for the cars Build!
This took some serious detective work. Parts for TFs are easy to come by. CHEAP parts are not. Naturally no expense has been spared where necessary. But some TREs and things are very expensive as old MG/Rover stock and I've made sure I have sourced Good Quality After Market parts for much less money (I think i've saved around £600 and not lost one bit of quality)
Most importantly there wont be a part on the car that wont be better than or as good as new. Only the best will do for my car!!!
First Job on rebuilding the suspension was to service my Shocks/Springs and add the polybushes
Before:
During:
After:
Before/After:
Why we use Polybushes Kids:
And now time for the big headach
The wireing
This is the one I have been dreading, however after some help from Jonno and Dan Smith. I am convinced I was just being a wuss.
We did find some ticking time bombs though while stripping the loom down (much of it can be binned or re-routed to generally make for a better and tidier install). I will also be doing the Car side of the loom and adding proper conectors so that no wires need to be cut to take the engine out in the future!
Anyway here are the pics:
Random Long wire to Coil Pack 1. Is this normal Honda peeps?
What a nightmare (Notice the burnt through wires!!!!)
Fully stripped back
Close up of wires that seem to have been on fire!!!!
Some Real Organization takes place:
Other Things I've done but sadly dont have pictures for is to fine tune the Throttle cable (so it actually gives full range of motion).
Get measurements for, and order a clutch line from Hel (to replace the epic bodge I did have).
Also I've looked at the slick shift in the cabin, I think I might know how to fix the long travel on the Vertical Gate. But i need the gearbox in situ to confirm weather this has worked.
Add all that together and I might as well have not bought a "Converted car"
This is bad news for me - because it's been loads of work. But good news for anyone who might want to do this conversion themselves. I've not re-built this car. I will have Built one, more or less from scratch. IF... She works
lolMore updates will come very soon people! but right now we are waiting for the parts back from the blasters and err.... payday! lol
Oh I did however remove the rocker cover to paint it.... Which allowed the taking of some pictures of the business end of a K20A2 engine
In the words of a fellow MG, V-TEC ower "Where iz zee sik V-Tez yO?!"
On that note... see you next time!
- Messages
- 6,098
You are a hero Adam. I would have lost patience for this many months ago :lol:
Good work
Good work
Great update
thanks rf55! nice to see your still reading!
More wiring tomorrow lol
You are a hero Adam. I would have lost patience for this many months ago :lol:
Good work
dont sp, you'll make me blush! lol
It's been a labour of love really BUT I do wish i had simply converted my First TF instead of buying this bag of spanners. It wouldn't have been any more work really lol as i've had to re-build the entire car.
On the upside this one has better paintwork and is a nicer colour
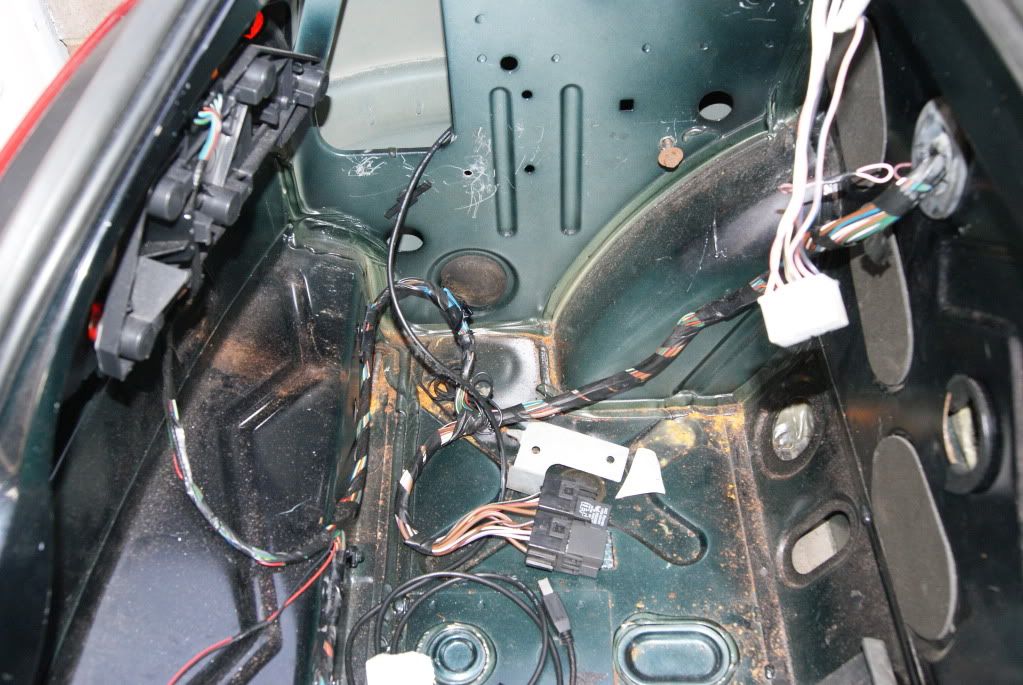
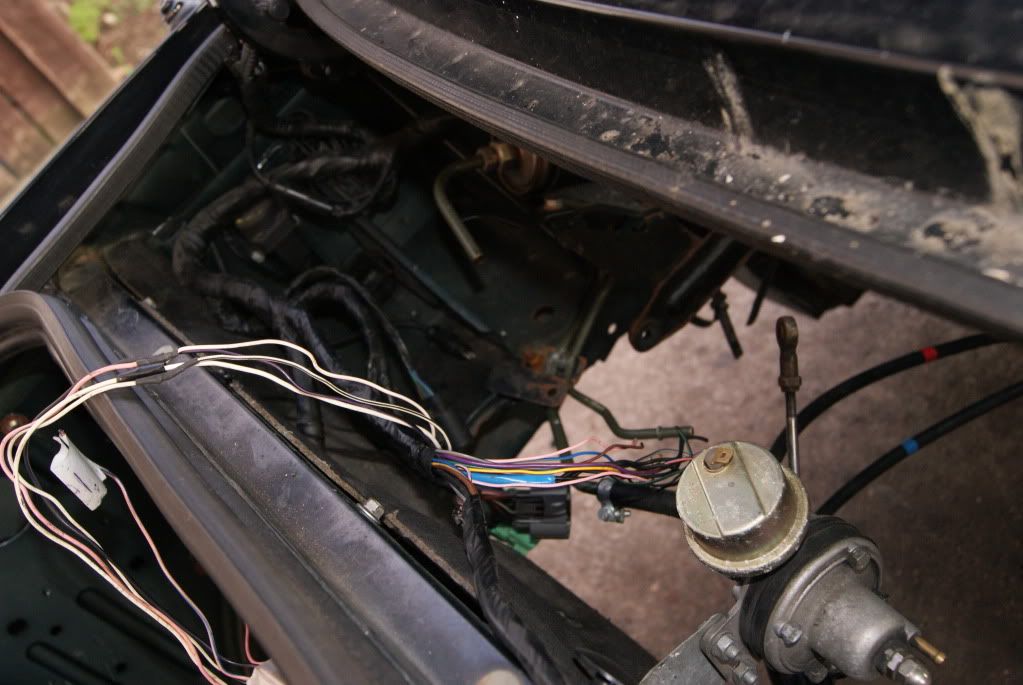
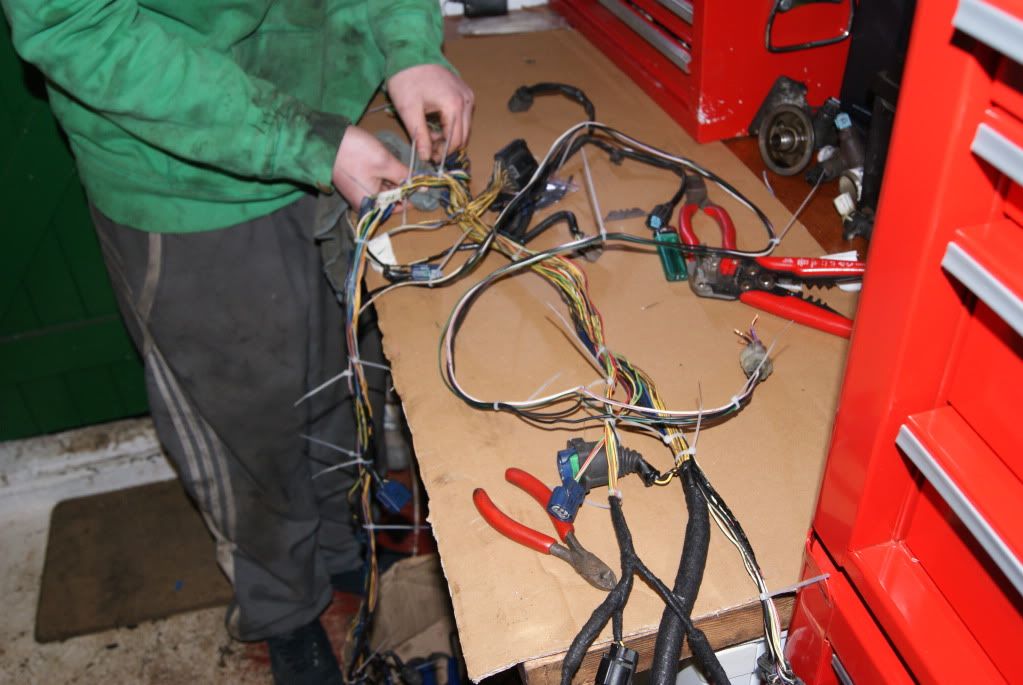
UPDATE 15th January 2012well not allot to report I'm afraidI can't do much until My suspension is home and the bushes are pressed.but the wiring has continuedit's a massive mess still but getting thereshall we see some gash/dangerous and all round fail wiring?
 nicethats just in-explicabledonor loom:
 came in handy!most of this is pointless:
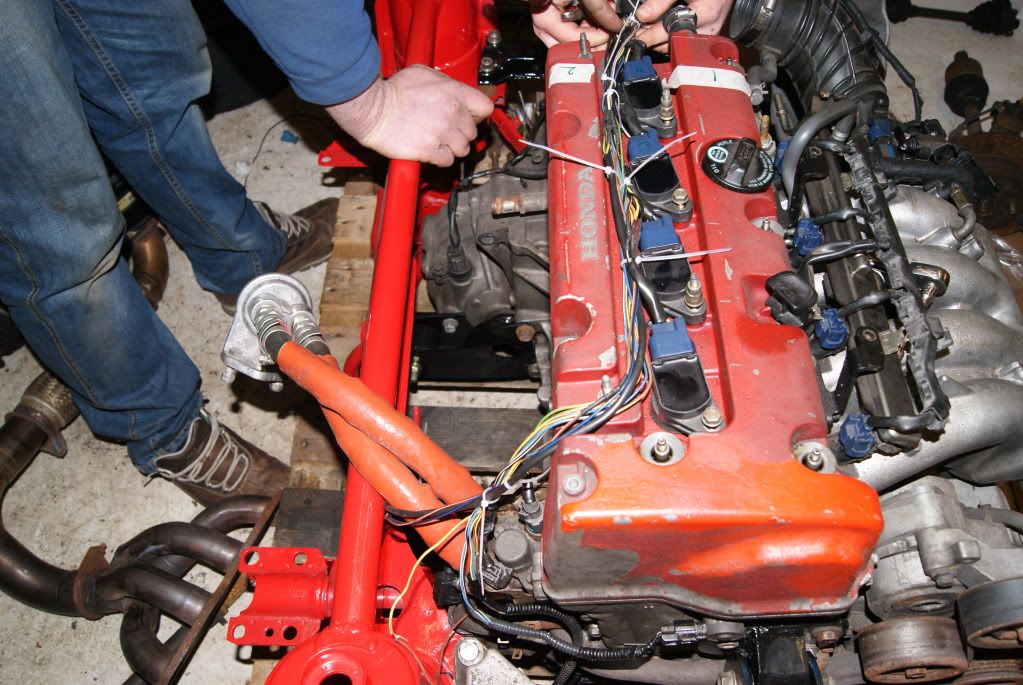
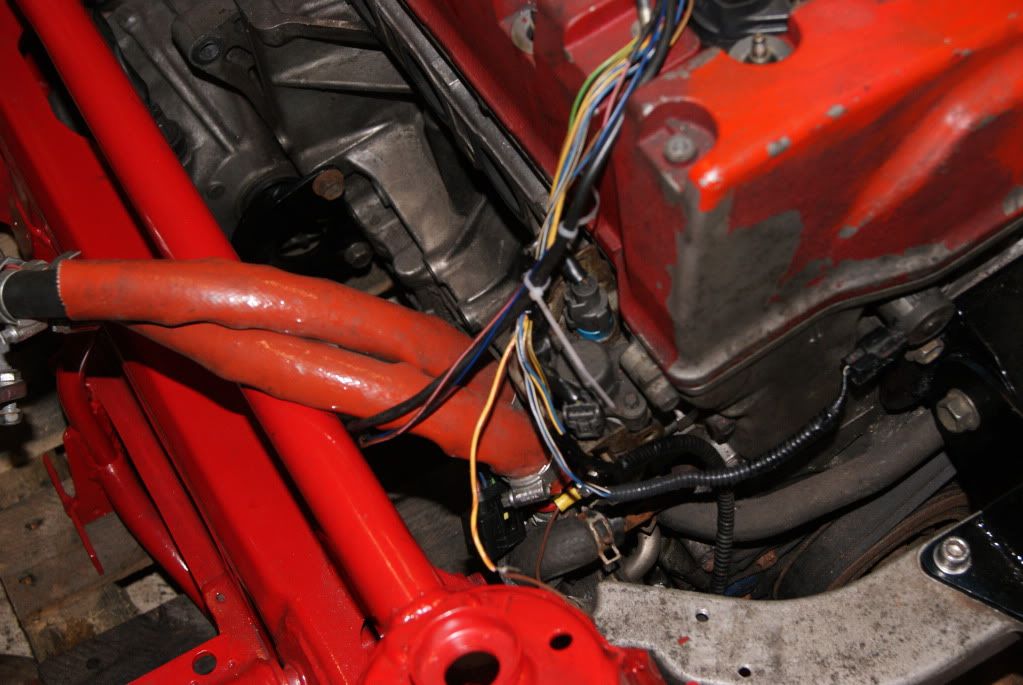
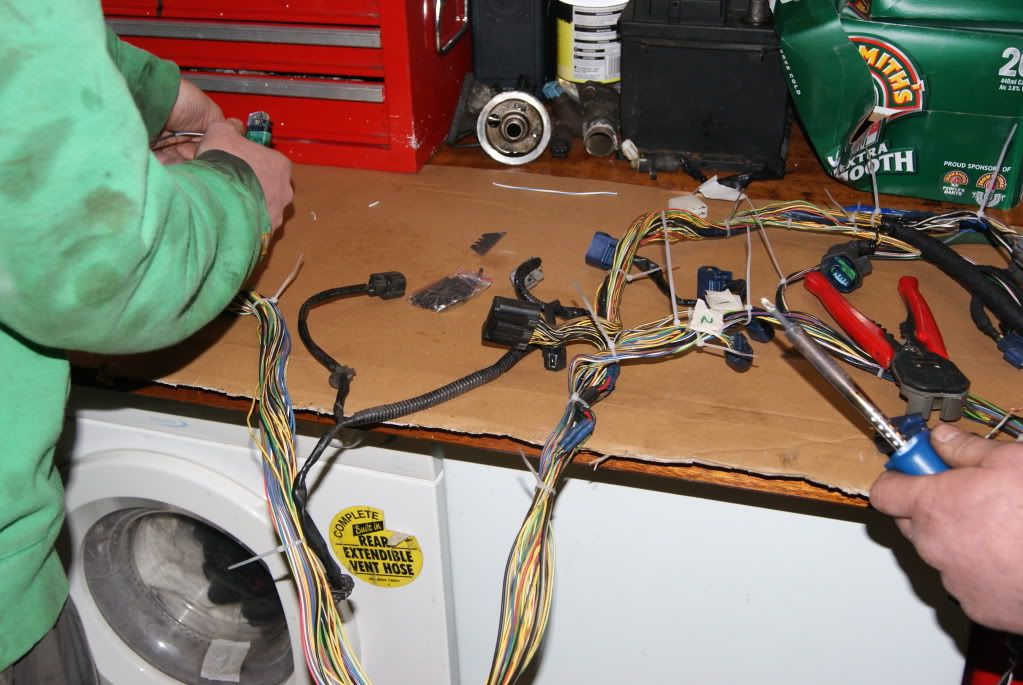
 face palm cityso time to start the long process of tie wrapping the loom, checking, checking some more and then getting rid of all the crap wireingallot of wires were twisted together with tape round them!!!thanks to Dan smiths mental skills we soon sorted out what was what and went mad soldering wires correctly and heat shrinking themwe also ditched a ton of useless wires and replaced some that were generic with ones that were the right colour... didn't "need" to be done, but it made things better Dan is a perfectionist and every time me and Jonna tried cutting a corner he caught us and made us do it the long way round lolthe loom is all the better for it. These are two of the type of friends that everyone needs.Spent time lieing the loom on the engine, bag of tie wraps used!
 Loom on bench for soldering and heat shrink
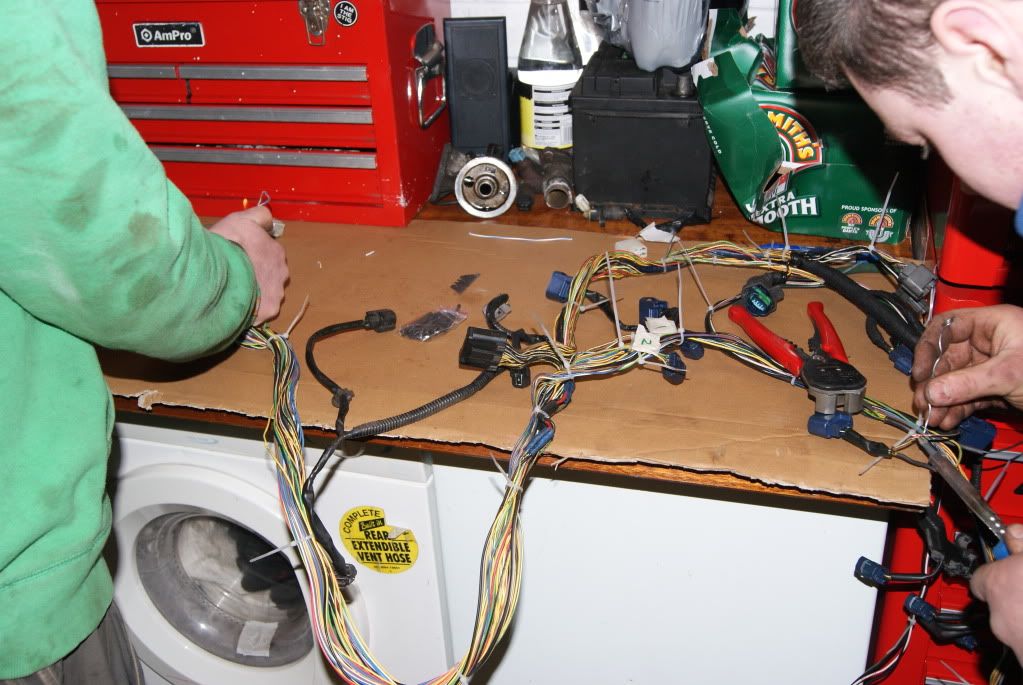 They are great friends but a tad camera shy lol
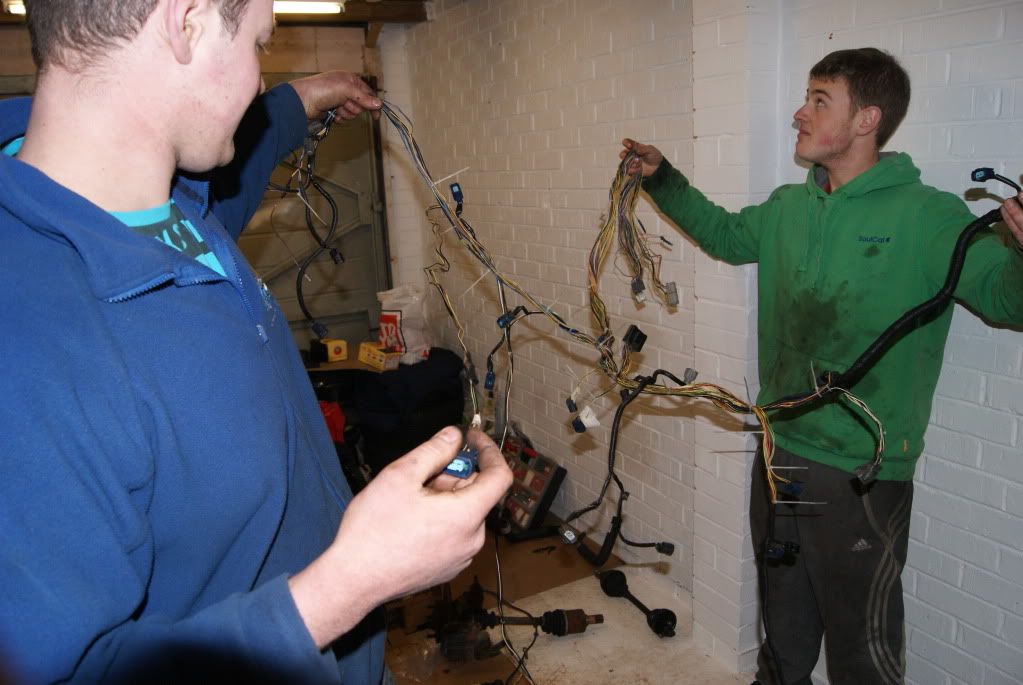 but even Dan and Jonna agreed we needed to show off the complete loom after solder.More wiring still to come guys, we are far from done and of course we have no idea if it will work!!!Total Man hours on Wiring so far: 48
Dan is a perfectionist and every time me and Jonna tried cutting a corner he caught us and made us do it the long way round lolthe loom is all the better for it. These are two of the type of friends that everyone needs.Spent time lieing the loom on the engine, bag of tie wraps used!
Like the green snap on screwdriver,pick set, i have the same :lol:
Good spot! did you get them with the pry bar set??
48 hours! and I do not envy you sorting out that loom.
Good work, keep the updates coming! :smt023
man, you have no idea
it's still not done!!!
the car may be fireing up in less than 14 days!!!! I need a driveshaft and some exhaust manifold studs now and thats it!!!