• Registered users are encouraged to enable MFA/2FA to add an aditional layer of security to their account. More information can be found here: https://www.ncsc.gov.uk/collection/top-tips-for-staying-secure-online/activate-2-step-verification-on-your-email

NYA's DC5**Couple Of Photos, before the update later this week**

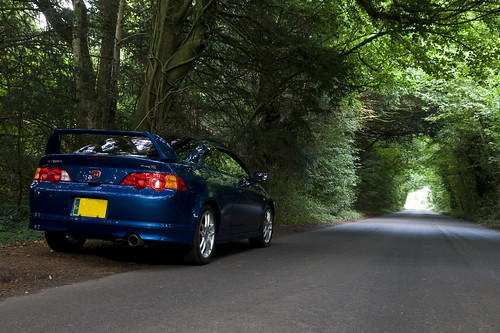
My low splitter was really badly stone chipped when I got the car, so last week I took it and started sanding back the OEM paint. Today I cleaned it off and have now put down the first couple of coats of primer. When sanding I also managed to take a few nasty scuffs and some of the heavier stone chips that had gone through the paint and scarred the plastic. At the moment it's curing in the shed/cupboard downstairs and I'll hit it with the first layer of colour tomorrow. I got a really top notch 3 stage kit from eBay, complete with all the paper, a grey primer, colour coat, and clear and a small bottle of cutting compound to to finish it. I had been looking at the INGS+ replica lips, but Johno at RESpirit sold the last one and won't be getting any back in for quite a while. So here's a pic just to finish, if it comes out good, I'll keep an eye out for aftermarket lips and do a DIY job on one of them.

View attachment 12331

Very good job mate, this is something I don't trust myself of doing. Lol :lol:
 
It's not too hard tbh bud, it's just a case of preparation is everything. I've wet sanded back the first layer of primer and applied my second coat. I'll leave this without sanding so it builds up the coats. Gonna hit it with the first colour coat tomorrow night, I'll wet sand that back with some 1000 grit, then do a second coat which will be done with 1200, and finally the third colour coat will be done with 2000 grit to get it like glass. Then it will be finished with three or four thin coats of clear. Hoping the colour match won't be too bad.
 
It's not too hard tbh bud, it's just a case of preparation is everything. I've wet sanded back the first layer of primer and applied my second coat. I'll leave this without sanding so it builds up the coats. Gonna hit it with the first colour coat tomorrow night, I'll wet sand that back with some 1000 grit, then do a second coat which will be done with 1200, and finally the third colour coat will be done with 2000 grit to get it like glass. Then it will be finished with three or four thin coats of clear. Hoping the colour match won't be too bad.

Nice one mate, I've tried painting some of my stuffs and I've ended up with loads of drip/puddles. Lol.
 
Best thing to do is layer up slowly and thinly. The first layer is almost just a spattering of paint, just enough to hide the primer. Then build up with the following layers. A good trick to getting an even finish is the flick, basically flick the can away at either end of the stroke, this way you don't get too much in one spot, and that stops the drips or runs. Being an old graffiti head helps aswell, means I know my way round a rattle can :lol:
 
Also a quick pic from a couple of nights back.


Ready To Go......... by www.dpjphotography.co.uk, on Flickr


I have a similar pic!

2814206912_5636d63697.jpg
 
Great pic Dan :lol: First, second and third coats of colour on. Will quickly 2000 grit wet sand the third coat but very lightly, then it's finally two or three coats of clear, I'll use the G3 cutting compound to smooth that back and a quick final fourth coat and use some Megs polishing compound to finish. The colour match is extremely good tbh. Quick pic after the first coat of colour. ImageUploadedByTapatalk1372165051.763738.jpg
 
Hadn't even noticed that Ben:lol: cheers bud, I managed to get two clears on this afternoon, should be able to get two more coats out of the can after some wet sanding.
 
Hadn't even noticed that Ben:lol: cheers bud, I managed to get two clears on this afternoon, should be able to get two more coats out of the can after some wet sanding.

look forward to seeing it finished and fitted on the car
 
Kudos for doing it yourself. Spraying bits is one thing i'll leave to the pro's after previous efforts :lol:
 
Cheers Alex, it's not too bad as long as you take your time really. Thin coats are the key to a good final result, build up bit by bit rather than flooding the surface with paint. I've got two coats of clear on now and I'm going to wet sand back the second coat today, then hit it with a final two coats to finish up. The G3 polishing compound should bring out the shine nicely. Then it's a case of fitting my Rhino Lip kit and putting it back on the car. I'm also looking for some decent side winglets to add a bit of aggression to the front. I'm also playing with idea of Canards on the upper part of the bumper for some added downforce. I know they don't make a massive difference but I figure every bit helps and as I want the car a bit more able on the track and fast roads, I figure why not give them a go.
 
It came in the three stage kit I got Joe, it's from a company called Paints4U.com. They use higher pressure cans to get a more even finish and flat angle nozzles to give you a flat line of paint rather than a rounded blob. I used to use this type of nozzle quite a lot when I was into graffiti as you can get a Calligraphy style to any writing you add to pieces
 
Thank you very much Misseur Sims, I was thinking just a huge wang and a set of balls on the roof of the Spaxo, Hatton style :lol:
 
Good to see you having a go at spraying Darren, just be careful not to go through the lacquer when your wet flatting! Are you polishing by hand?
 
Back
Top